
How to Install a Stair Runner: Measuring, Fixing, and Finishing
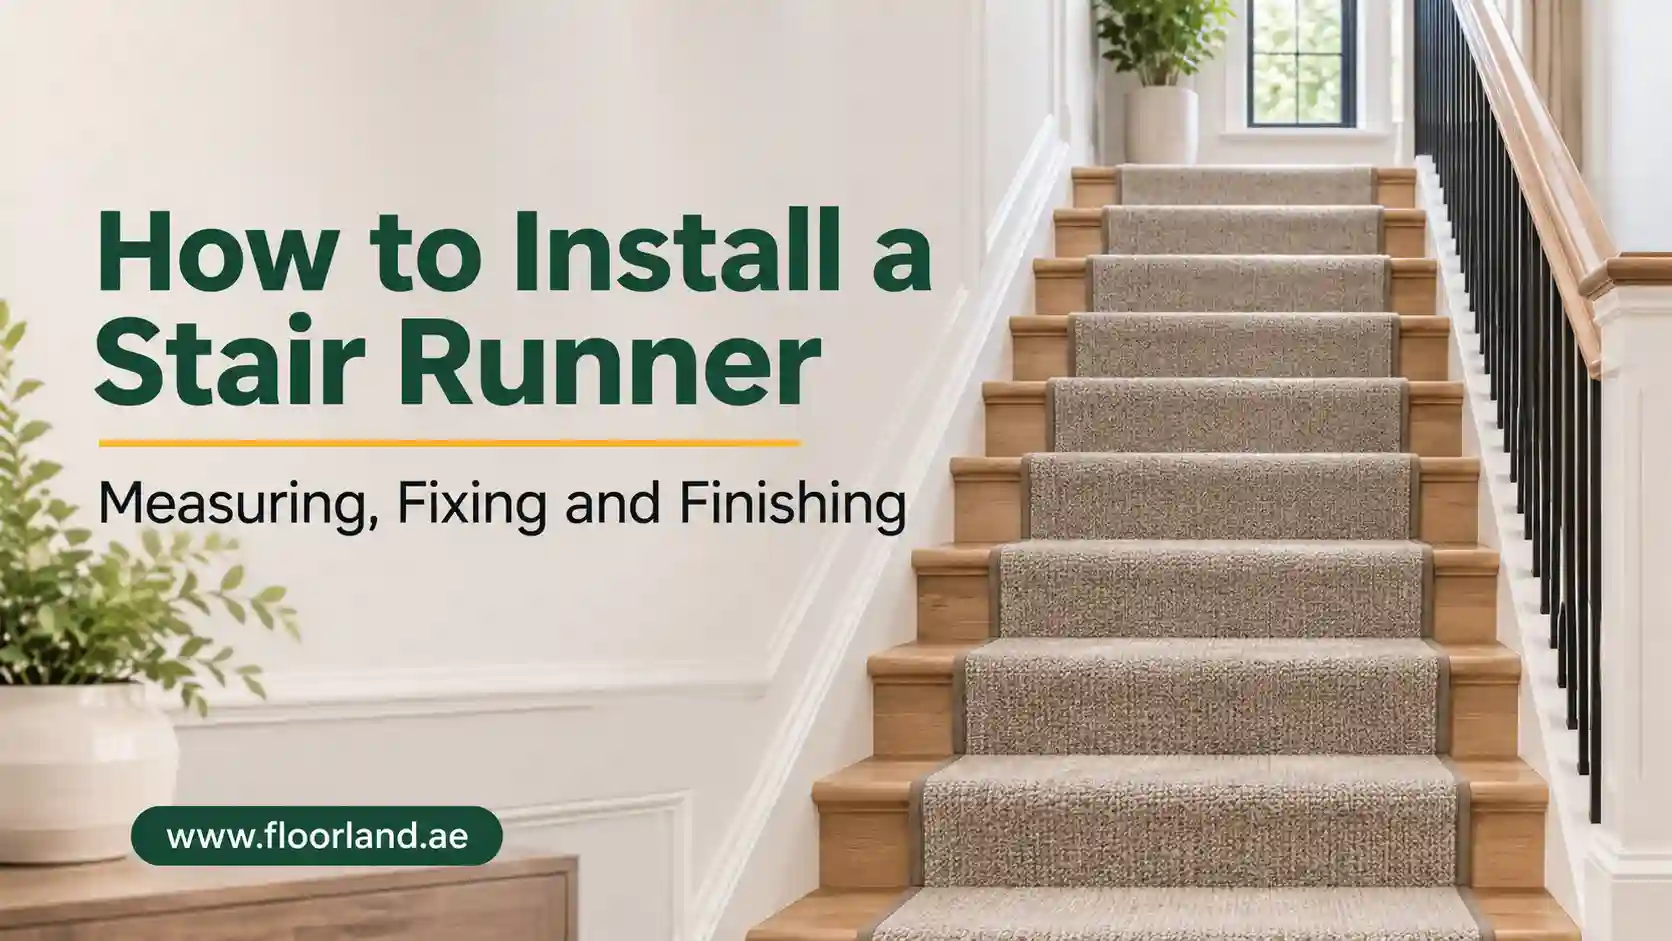
To install a stair runner, measure the staircase, mark a center line on every tread, fix gripper rods or staples and underlay to the steps, then secure the runner from the top of the flight downwards, finishing with a folded edge at the bottom. The fixing style matters. A waterfall runner drops straight over each nosing, while an upholstered runner follows the step profile and tucks beneath the nosing for a tighter, tailored look. A straight timber staircase is a realistic DIY project for a careful homeowner. Winds, curves and stone steps usually need a professional. This guide by Floor Land covers tools, measuring and runner length, both fitting methods, landings and turns, finishing, common mistakes and when to call a fitter.
What You Are Installing – Stair Runner vs Stair Carpet
A stair runner is a narrow length of carpet fixed down the center of the staircase, leaving a strip of the stair surface visible on each side. Full-width stair carpet covers every step from wall to wall, much like wall-to-wall carpet in a room.
Both use the same principles: underlay, firm tension, and secure fixing at every step. A runner adds one extra job: holding a straight line with even borders on every tread. It also differs from individual stair treads, which are separate pads fixed to each step, and from loose hallway rugs. Rugs without a suitable backing and fixing method tend to creep on stairs.
Stage 1:Gather the Tools and Materials
A stair runner needs a small set of specific tools. Having them ready before you start prevents the half-fitted staircase that tempts people into shortcuts.

- Measuring and marking: tape measure, pencil or chalk, a long straight edge
- Cutting: sharp utility or carpet knife with spare blades, and shears for underlay
- Gripper rods: pin length matched to the runner’s thickness, plus a hammer (or screws where the supplier specifies them)
- Staple gun: heavy-duty, with staples suited to the tread material, if you are stapling instead of using grippers
- Double-sided carpet tape: for holding underlay in place
- Stair tool or bolster chisel: for pressing carpet firmly into the crease where tread meets riser
- Underlay: a stair-suitable pad, ideally close to the gripper’s height so the runner sits level
- Protection: eye protection, gloves for handling grippers, knee pads
- Optional extras: stair rods and brackets, a drill with pilot bits, and masonry bits and plugs for stone steps
Stage 2: Choose the Runner and the Fitting Method
Two decisions shape everything that follows: which runner you buy, and how you fit it. Make both before measuring, because the fitting method changes how much runner you need.
2.1 Runner Material, Width and Pile
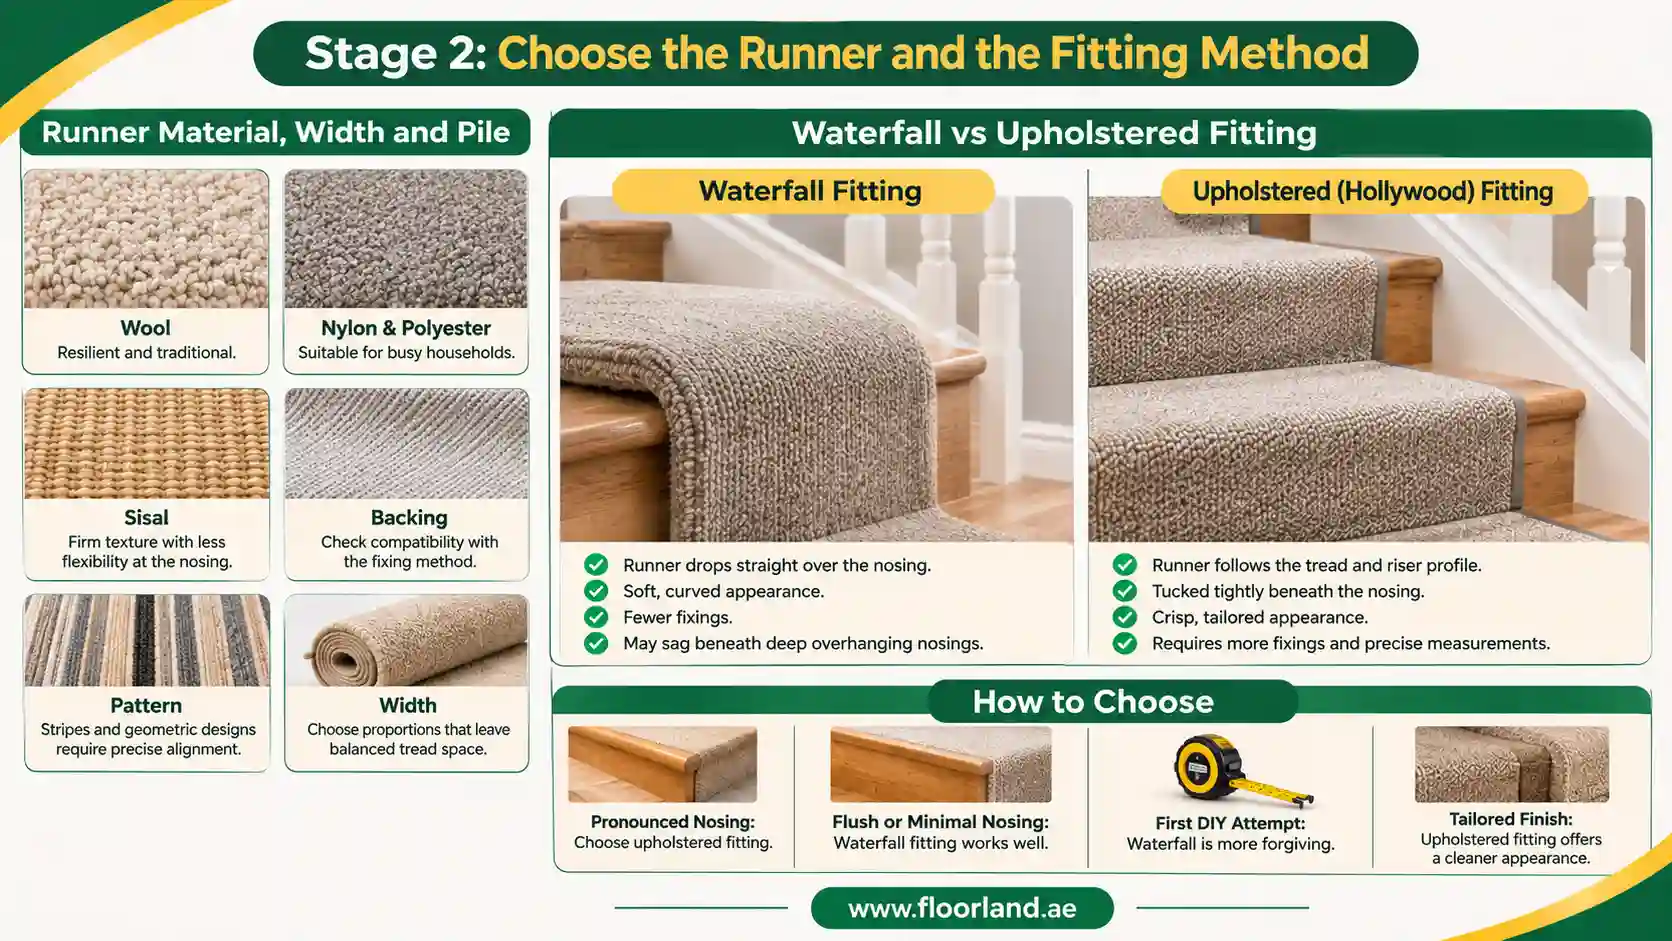
Pick a runner for how it behaves at the nosing, where wear concentrates. Dense, firmly constructed runners hold their shape and wear evenly. Deep, loose, or shaggy piles tend to hide the nosing, are harder to tuck neatly, and show pressure marks sooner.
- Fiber: Wool is resilient and traditional. Nylon and polyester blends are common for busy households. Ready-bound and made-to-measure options arrive with finished edges, so you don’t have to bind them yourself.
- Natural fibers: Sisal has a firm, textured feel but less give at the nosing than cut pile, which makes it less forgiving of measuring errors.
- Backing: Check the manufacturer’s recommended fixing method, because stiff backings behave differently around nosings.
- Pattern: Stripes and geometric designs expose any misalignment. Plain or textured runners hide it.
- Width: This is a design choice, not a standard. One retail guide cites a 27 in (about 685 mm) runner on a 36 in (about 915 mm) staircase, leaving roughly 115 mm of tread on each side. If you plan to fit stair rods, allow for the brackets.
2.2 Waterfall vs Upholstered Fitting
The two fitting methods differ in how the runner meets the nosing.
| Method | Finish | Key Difference |
| Waterfall | Soft curved edge | Fewer fixings; may sag under deep nosings. |
| Upholstered (Hollywood) | Crisp, tailored edge | More fixings, precise measuring and extra material. |
How to Choose
- Pronounced nosing: Choose upholstered, because the runner is supported all the way round.
- Flush or minimal nosing: Waterfall works well.
- First attempt, or a bold pattern: Waterfall is more forgiving.
- Tailored finish and plain runner: Upholstered is the stronger choice.
Stage 3: Measure the Stairs and Calculate the Runner Length
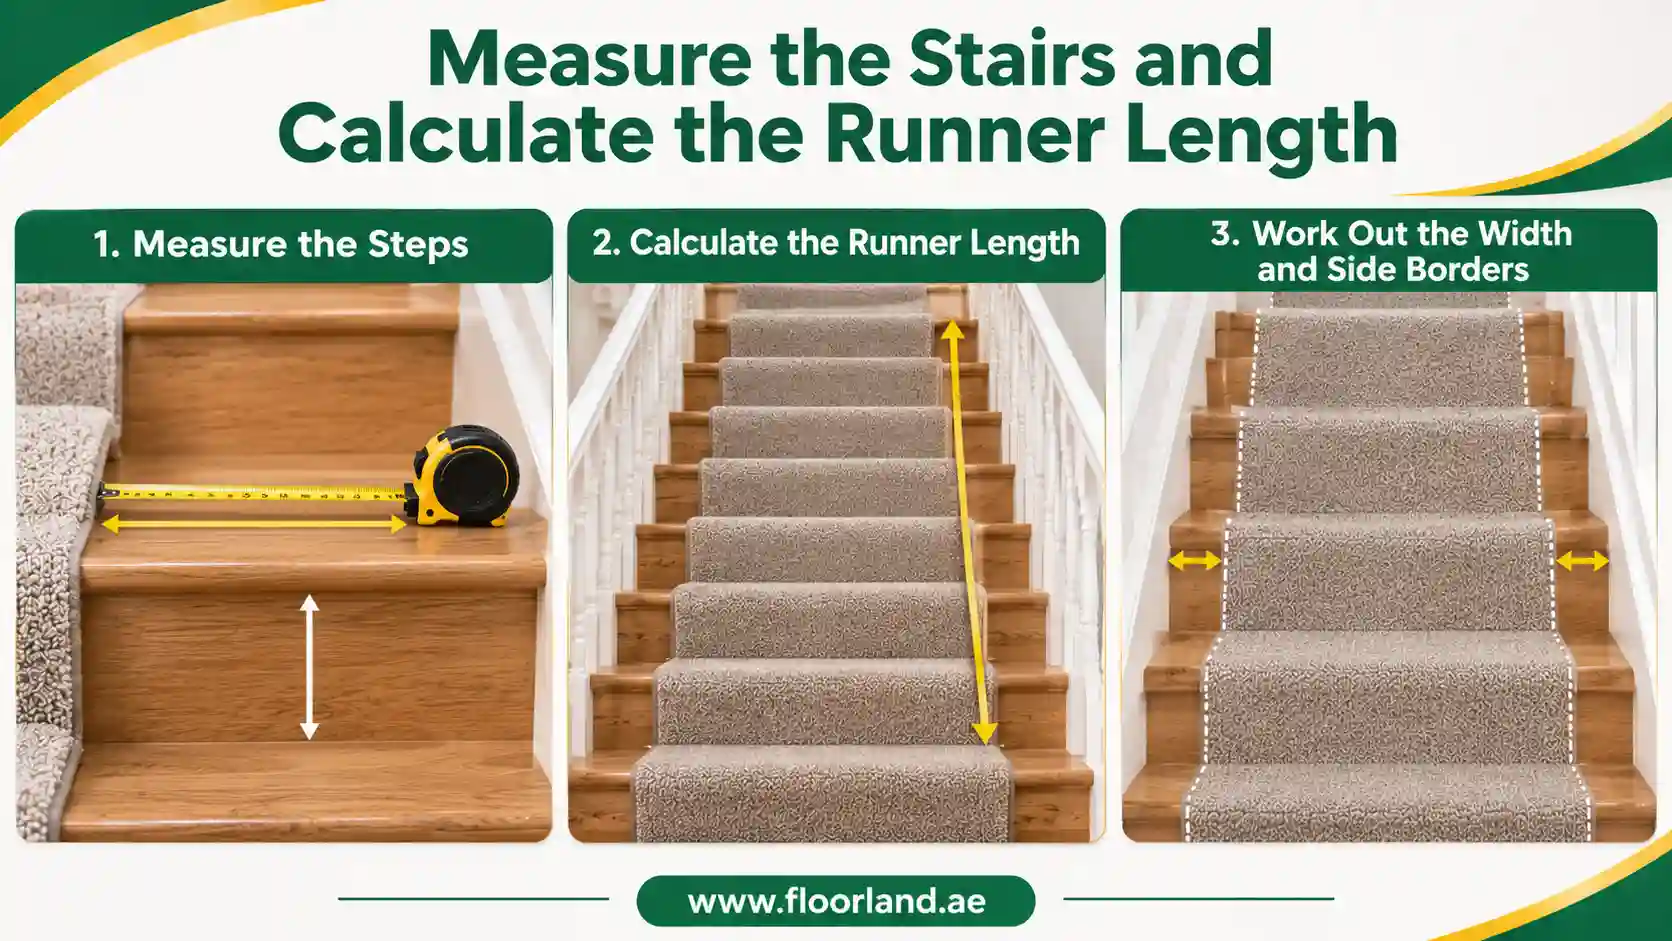
Accurate measuring decides whether the runner fits the first time. This stage has three parts: measuring the steps, calculating the length, and calculating the width and borders.
3.1: Measure the Steps
Take each measurement along the surface the runner will follow.
- Tread depth: From the back of the tread to the outer edge of the nosing.
- Riser height: The vertical distance between treads.
- Stair width: Measure at the top, middle, and bottom. Staircases are rarely perfectly square, and walls bow.
- Counts: Count the treads and risers, and note any landings, turns, or open sides.
3.2: Calculate the Runner Length
For each step, the runner follows one tread plus one riser. The core formula is:
(tread depth × number of treads) + (riser height × number of risers)
Illustrative example (your numbers will differ):
- 14 risers at 185 mm = 2,590 mm
- 13 treads at 280 mm = 3,640 mm
- Total = 6,230 mm
Then add allowances:
- Material to fold under at the top
- A hem at the bottom
- Trimming
- Extra for the pattern repeat, if the runner is patterned.
Published guides vary, from a flat allowance of about 150 mm to roughly 10% extra. Treat those as minimums and confirm with your supplier. Upholstered fitting needs a little more than waterfall, because the runner wraps beneath each nosing, and the amount depends on the nosing profile. If the runner must cross a landing, add its length. If it must be joined, order everything from the same batch so the shade matches.
3.3: Work Out the Width and Side Borders
The visible border on each side (the reveal) is:
(stair width − runner width) ÷ 2
If the staircase is out of square, decide which edge matters most. This is usually the more visible side, such as the open edge beside a balustrade. Keep that border consistent and let the other side absorb the difference.
Stage 4: Prepare the Staircase
Preparation is what separates a flat, lasting runner from one that lumps and loosens. Four jobs come first.
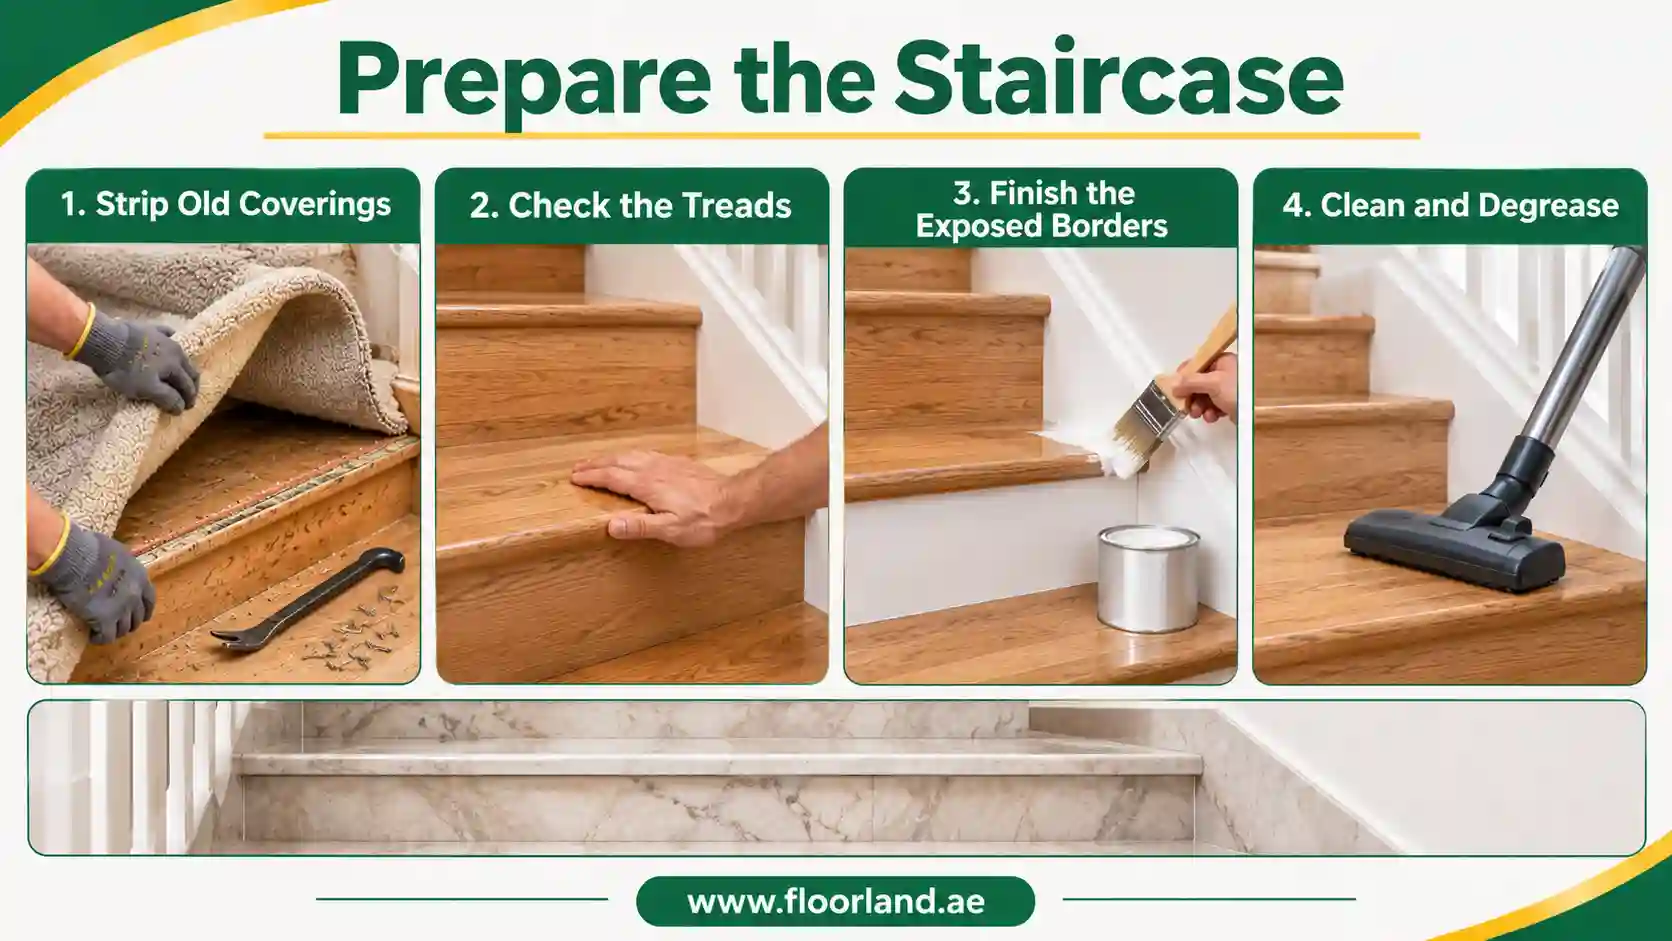
- Strip old coverings. Remove old carpet, underlay, tacks, staples, and old gripper. Pull or flatten any remaining fixings.
- Check the treads. Fix loose boards and squeaks before covering them. Fill holes and sand any raised edges.
- Finish the exposed borders. Paint, stain, or refinish the visible margins now. Doing it later risks marking the runner.
- Clean and degrease. Vacuum thoroughly and let the surface dry fully so tape and adhesives bond.
Stone, tile and concrete steps. Staples and nails need a timber base. Many staircases in the UAE are finished in marble or tile, so this matters here. On masonry steps, installers typically use adhesive-fixed or masonry-fixed gripper, or a carpet adhesive tape, depending on the surface and the runner’s backing. Polished stone needs careful cleaning and degreasing first. Drilling into stone also needs the right bits and care. Unless you are experienced, this is a job for a fitter.
Stage 5: Steps to Install Stair Runner
This is the main fitting process. It assumes a straight timber flight and works from the top down. Follow the steps in order, because each one sets the line for the next.
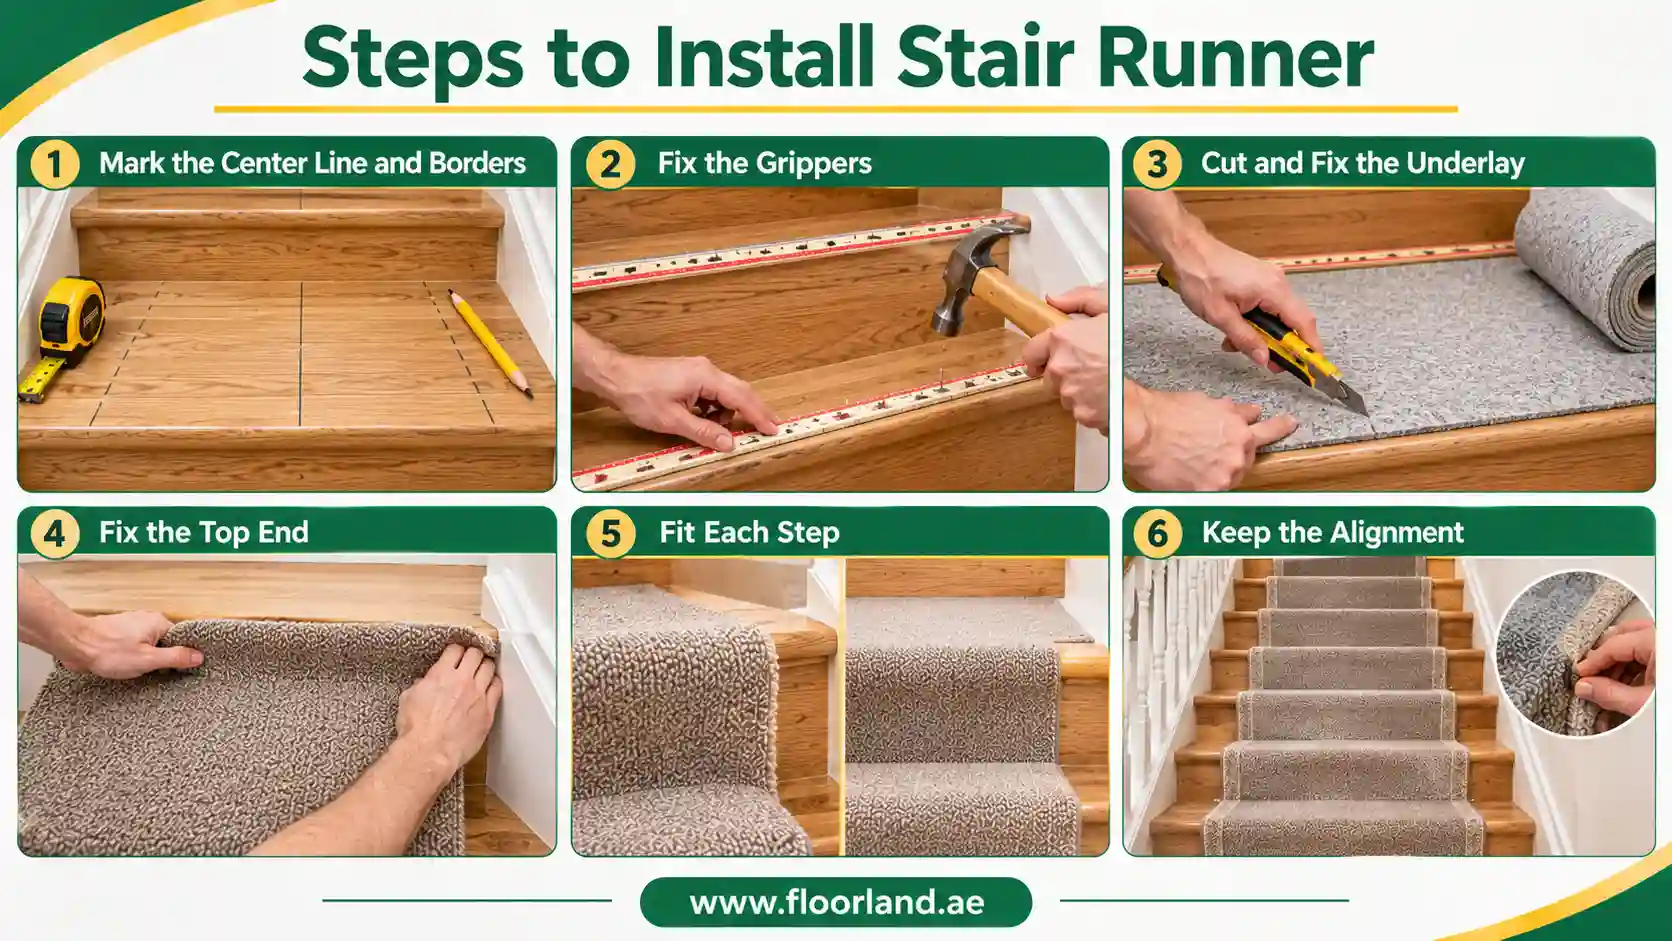
Step 1: Mark the Center Line and Borders
Marking now keeps every tread identical. Measure the width of each tread, halve it, and mark the center near the back of the tread. Mark both runner edges from your border measurement. Carry the lines across with a straight edge, and check the borders on the first, middle, and last steps. Mark the center of the runner where you will fix the top end.
Step 2: Fix the Grippers
Grippers are strips with pins that hold the runner in the crease where each tread meets the riser. On each step, fix one gripper along the back of the tread and one along the base of the riser. Leave a narrow gap between them for the runner to be tucked into, with the pins angled toward the crease. Cut both shorter than the runner so the ends stay hidden. One supplier suggests about 10 cm shorter in total.
If you are stapling instead: On timber, you can staple the runner into each crease, spacing staples roughly 75 mm apart, with one at each outer edge. Staples are faster and cheaper than grippers, but they leave holes and can loosen with wear.
Step 3: Cut and Fix the Underlay
Underlay cushions the runner, reduces noise, and helps protect it at the nosing. Cut one pad per tread, narrower than the runner so its edges stay hidden. Guides range from about 25 mm to 100 mm narrower overall, so follow your runner’s maker. Butt each pad against the grippers without overlapping them, and fix it with double-sided tape.
On nosed stairs, the pad usually runs from the tread gripper over the nosing and down towards the riser gripper below. Staple it beneath the nosing if the supplier advises that. A pad close to the gripper’s height keeps the surface level.
Step 4: Fix the Top End
The top end sets the line for the whole flight, so take your time here. Leave a small allowance at the start, commonly about 25 mm, to fold under the raw edge. Fix it at the top riser, aligning the runner’s center mark with your tread center line. Check that the edges match your border marks before you fix it.
Step 5: Fit Each Step
How you fit each step depends on the method you chose in Stage 3.
- Waterfall: Pull the runner taut over the nosing and down the riser. Press it firmly into the crease with the stair tool so it catches on the grippers (or staple it). Continue across the next tread.
- Upholstered: Draw the runner over the nosing and push it snugly beneath the edge. Fix it there, with fixings near each outer edge. Then pull it down the riser, press it into the crease at the base, and fix it.
Pull firmly but do not overstretch. Overstretching distorts patterns and can drag the runner off its line.
Step 6: Keep the Alignment
Small errors accumulate down a flight. Check against your marks after every step or two, looking at the borders, the pattern, and the runner’s edges. If the runner begins to drift, lift and reset it immediately instead of trying to correct it later.
Stage 6: Finish the Ends and Add Stair Rods
The finishing work gives the staircase its tidy, professional look, and it removes any loose edge that could catch a foot.
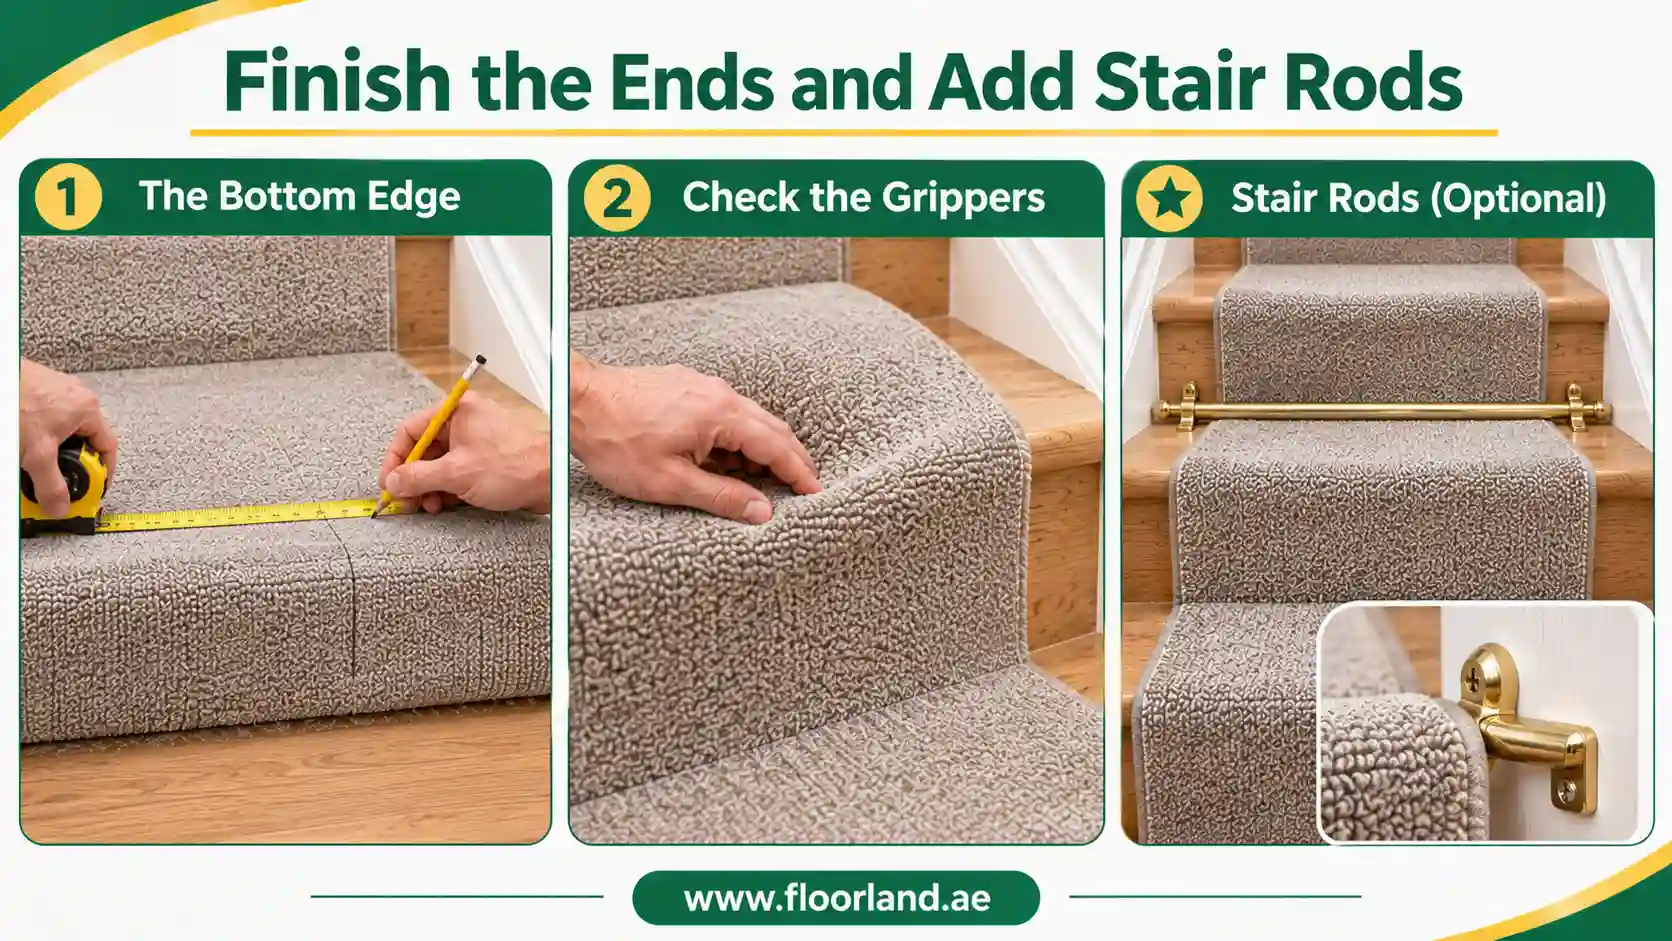
- The bottom edge. Press a crease into the runner at the foot of the last riser. Leave about 50–75 mm beyond it, a range retail guides use, and mark a straight cutting line. Cut, fold the edge under to make a hem, and fix it against the last riser. If a molding or skirting meets the riser, fix the hem so it sits above it.
- Check the grippers. Run a hand along each crease and check that no gripper pins have worked through the pile. Address any that have, following the supplier’s advice.
- Stair rods (optional). The grippers do the holding, and the rods are decorative, though they can mask small irregularities. Fit the brackets at each runner edge in the crease, drilling pilot holes sized to the screws. On stone, use masonry fixings.
Landings, Turns and Unusual Staircases
Everything above applies to a straight flight. Once the staircase turns, narrows or opens up, the measuring and fixing change. This section explains why each layout is harder.
Landings
A landing is a flat stretch of floor. You can carry the runner across it in one piece by adding its length to your measurement, or end one flight at the landing edge and start the next with a separate piece. A cut or joined runner needs aligned patterns, matched shades, and secure fixing at the join. Landings with a turn are where DIY jobs most often go wrong.
Winders, Curved and Spiral Stairs
Winder treads taper toward the inside of the turn, so a parallel-sided runner cannot follow them without being cut, folded or joined. Fitters shape the runner to each tapering step, and patterns need careful planning across the turn. Many suppliers recommend a professional fitter for these layouts, and so do I.
Open Sides and Open Risers
On an open side, the runner’s edge is exposed, so edge finish and border consistency matter more. Secure the open edge well so it cannot lift. On open-riser staircases, there is no riser to wrap or drop down. Individual treads, or a fitter’s solution, are usually the answer.
Common Stair Runner Installation Mistakes and How to Fix Them
Most runner problems trace back to measuring, tension, or fixing. These are the ones that come up most often.
- Uneven borders. Marking every tread prevents the runner from drifting. Check against the marks as you go.
- Rippling. This usually comes from slack tension or from carpet that was not fully pressed into the crease. Reset the step and re-tuck.
- Visible underlay. The pad was cut too wide. Cut it narrower than the runner.
- Pins showing through the pile. The gripper pin length does not suit the runner’s thickness. Choose the right grade and correct any pins.
- Sagging over the nosing. Waterfall fitting on a deep nosing without enough support lets the runner hang loose. Switch to upholstered or add proper underlay.
- Creeping or lifting edges. The outer edges were not fixed. Fix them at every step.
- Pattern jumping between steps. Cut at a consistent point in the repeat so the pattern sits identically on each tread.
- Cutting too short. Add allowances for folds, hems and pattern repeat.
Safety and Maintenance
A fitted runner needs safe working conditions during installation and light care afterward.
Safety while fitting
- Wear eye protection when stapling and gloves when handling grippers, whose pins are sharp.
- Keep tools off the steps.
- Work in good light.
- Do not use a partly fitted staircase, and keep children and pets away from it.
- Check that no loose end or lifted edge can catch a foot.
- Exposed borders can help people see where each step ends, especially in dim light. Consider contrast between the runner and the stair surface.
Maintenance
- Vacuum regularly and treat spills promptly, following the manufacturer’s cleaning guidance.
- Check edges and fixings from time to time.
- Some fitters leave a little spare length so you can shift the runner later to even out nosing wear. Ask your fitter whether your fitting allows this.
DIY or the Professional Stair Runner Installation
You can fit a stair runner yourself if the staircase is a straight flight with timber treads and you are comfortable measuring and cutting carefully. Retail guides rate the job as intermediate and quote a few hours for a straight flight. That assumes preparation is done, and nothing goes wrong, so a first-timer should allow longer.
Reasonable for a confident DIYer
- A single straight flight
- Timber treads and risers
- A plain or simply striped runner with bound edges
- Basic tools and patience for slow, accurate cutting
Better left to a fitter
- Winders, curved or spiral stairs
- Landings where the runner turns or must be joined
- Marble, tile, granite or concrete steps
- Large patterns that must match across a join
- Expensive or custom-bound runners, where a miscut is costly
If any of the second list applies, a carpet installation service that fits stairs regularly is usually cheaper than replacing a ruined runner.
Final Word
A stair runner looks simple, yet the result depends on decisions made before the first staple: the fitting method, the measurements and the condition of the steps beneath. Get those right and a straight timber staircase is a manageable weekend job. Get them wrong and small errors repeat on every tread. If your staircase turns, tapers or is made of stone, a fitter will save you time and material. Whichever route you choose, measure twice, mark every tread and keep the borders even from the top step to the bottom.
I wrote it to avoid a second recap of the stages, since the overview near the top already does that. It also contains no new links or location mentions, so the internal-link and UAE counts from the quality check are unchanged.
Frequently Asked Questions
Can I install a stair runner myself?
Yes, if the flight is straight, the treads are timber, and you have basic tools. Winders, curves, landing turns, and stone steps need a professional.
How much extra carpet do I need for a stair runner?
Calculate (tread depth × treads) + (riser height × risers). Then add allowances for the top fold, the bottom hem, trimming, and pattern repeat. Published guides range from about 150 mm to roughly 10%, so confirm with your supplier. Upholstered fitting needs slightly more than waterfall.
Should I use padding under a stair runner?
Yes. Underlay cushions the runner, reduces noise, and helps protect it at the nosing. Cut it narrower than the runner so it stays hidden, and choose one close to the gripper’s height.
What is the best way to secure a stair runner?
On timber, gripper rods give a neat, hidden fixing. Staples are quicker but leave holes. On stone, adhesive or masonry-fixed gripper is typical. Stair rods are decorative and do not hold the runner in place.
Can a stair runner be installed on curved stairs?
Yes, but it needs a professional. The runner must be cut and shaped to follow the tapering treads, and the pattern needs careful planning.
Can I install a stair runner over existing carpet?
It is not advisable. Old carpet compresses unevenly and prevents grippers from fixing properly. Remove it, along with tacks and staples, first.
How long does it take to install a stair runner?
Retail guides quote about two to four hours for a straight flight. Larger, curved or more complex staircases take longer and can extend to a day or two.
Can you install a stair runner on marble or tiled stairs?
Yes. Staples and nails will not work, so installers use adhesive-fixed or masonry-fixed grippers, or carpet tape, depending on the surface. Clean and degrease the stone first, and ask a fitter if you are unsure.