
How to Get Pet Odor Out of Carpet? What Actually Works

To remove pet odor from carpet, you have to remove what causes the smell instead of covering it. Find every affected spot, saturate it with an enzyme cleaner, let the enzymes work for several hours, then extract the moisture and dry the carpet fully. Sprays and scented powders fade within a day because urine, skin oils, and dander sink past the face fibers into the backing and padding, where a surface product never reaches.
In this blog post by Floor Land, you will learn how to find old spots, how much moisture to use, how long each treatment should sit, and how to dry carpet so the smell stays gone. So, let’s start learning.
Methods to Treat Different Pet Odors
| Odor Problem | Best Approach | Suitable For | Important Note |
| Fresh urine, still damp | Blot, rinse with cool water, extract, then apply an enzyme cleaner | Accidents found within a few hours | Blot with pressure. Scrubbing drives urine into the backing. |
| Dried urine, days to weeks old | Rewet the spot, saturate with enzyme cleaner, cover it, let it dwell 8 to 12 hours | Spots you can smell or see but that have dried | Treat an area wider than the stain, because urine spreads underneath. |
| Deep-set urine in padding | Sub-surface flushing and extraction, padding replacement, subfloor sealing | Repeat accidents in one spot, smell that spikes in humid weather | Surface cleaning rarely fixes this on its own. |
| General dog smell from oils and dander | Slow, thorough vacuuming, a dry or low-moisture deodorizing treatment, regular grooming | A whole-room smell with no single wet spot | Baking soda helps here. It does not solve urine. |
| Cat urine odor | Enzyme cleaner with a long dwell time, a clean water rinse, and a repeat treatment if needed | Litter box misses and spray marking | Skip anything ammonia-based. It smells like urine to a cat. |
| Vomit, feces, or food residue | Lift the solids first, clean the residue, then treat with enzymes | Occasional accidents and sick days | Removing solids first keeps you from grinding them into the pile. |
What to Do Before You Clean
Five minutes of preparation can save you from spreading the problem.
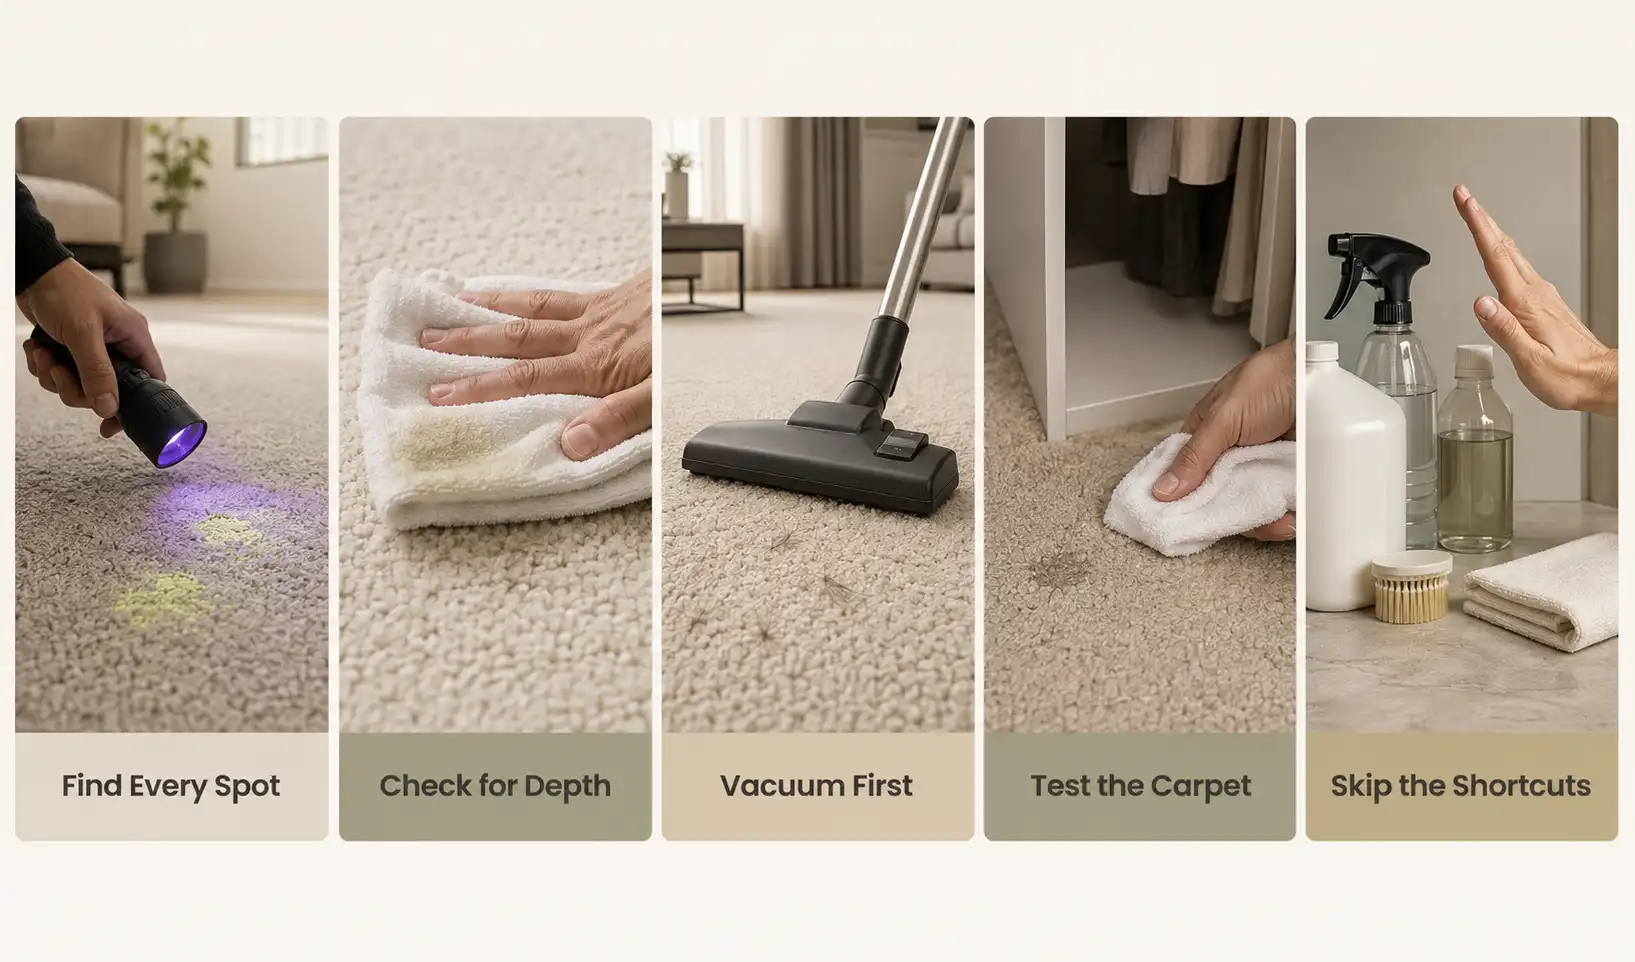
- Find every spot. Odor almost never comes from the one stain you can see. Turn off the lights and pass a UV black light slowly over the wall-to-wall carpet. Dried urine glows a dull yellow-green. Mark each spot with painter’s tape or a coin so you can find it once the lights are on.
- Check for depth. Press a folded white towel into the spot with your heel. Yellow transfer means residue is still active near the surface. A spot that smells strong but transfers nothing has likely settled into the backing or padding.
- Vacuum first, slowly. Dry soil and hair come out far easier before you add moisture. Use several slow passes in different directions rather than fast ones.
- Test the carpet. Apply your cleaner to a hidden area, such as inside a closet, and blot with a white cloth after a few minutes. If color transfers, stop and call a professional. Wool and some natural fiber carpets, like sisal carpets, react badly to alkaline and oxidizing products.
- Skip the shortcut of layering products. If you already sprayed something on the spot, rinse the area with cool water and extract before applying an enzyme cleaner. Leftover detergents and disinfectants can deactivate the enzymes before they start working.
How to Remove Pet Odor From Carpet?
This is the core method for pet odor. It works for both fresh and dried accidents, with timing adjustments noted below.
What you need
- An enzyme-based pet odor cleaner sold for carpet
- Clean white towels or a stack of paper towels
- A spray bottle of cool water
- A wet vacuum or carpet extractor if you have one
- Plastic sheeting or a plastic bag
- A fan and a dehumidifier if you own one
The Process
Pet odor is difficult to remove because the liquid does not always stay on the surface. It can soak through the carpet fibers, backing, and sometimes the underlay beneath it. Simply spraying a deodorizer over the stain may make the smell less noticeable for a while, but it does not remove the residue causing the odor.
For best results, remove as much moisture as possible, dilute the remaining residue, use an enzyme cleaner that can reach the contaminated area, and then extract and dry the carpet properly.
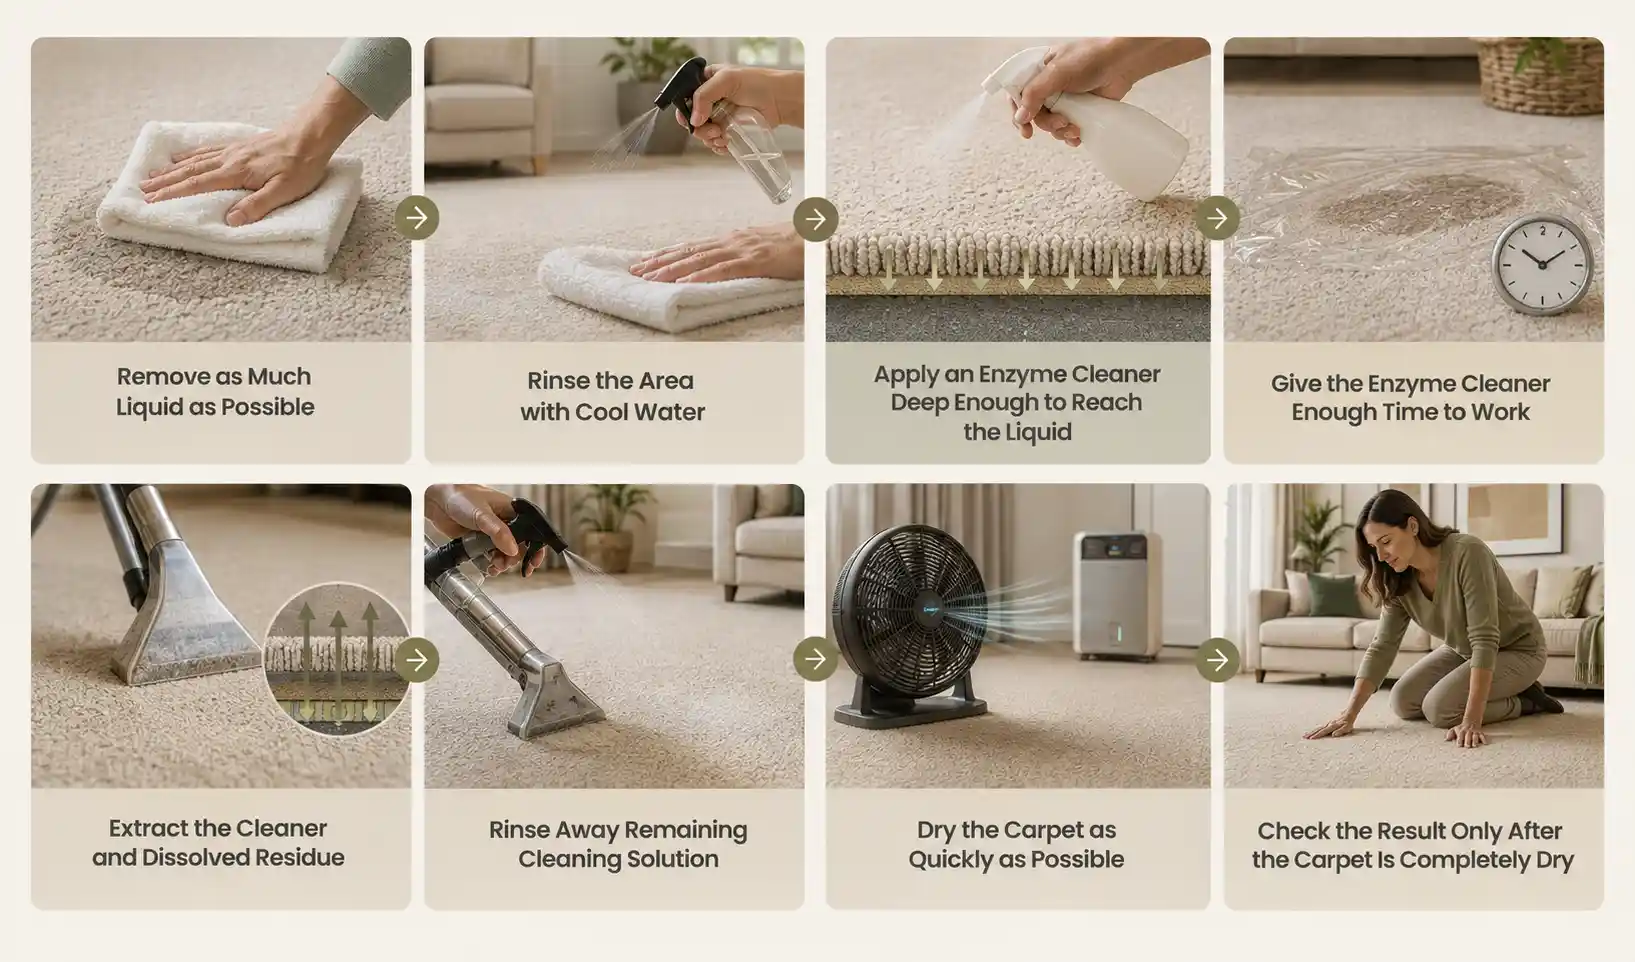
1. Remove as Much Liquid as Possible
Start by removing the liquid before applying any cleaning product. The more liquid you remove at this stage, the less residue the cleaner has to deal with later.
For a fresh accident, place several layers of clean, absorbent towels directly over the wet area. Press down firmly or stand on the towels for around 30 seconds. Replace the soaked towels with dry ones and repeat until the towels are picking up very little moisture.
Do not scrub the carpet. Rubbing can push liquid farther into the pile and spread the contaminated area beyond the original spot.
If you are dealing with a dried stain, the first step is slightly different. Lightly mist the area with cool water and let it sit briefly to soften the dried residue. Then blot firmly with clean towels. You are not trying to soak the carpet again; the goal is simply to loosen surface deposits so they can be absorbed.
2. Rinse the Area with Cool Water
Once you have removed as much liquid as possible, rinse the affected area with a small amount of cool or lukewarm water.
Lightly mist the carpet rather than pouring a large quantity of water over it. Then press clean towels into the area or use a wet vacuum to extract the moisture. Repeat this process two or three times if necessary.
This step helps dilute concentrated liquid residue, particularly the salts left behind as urine or vomit dries. Removing some of this residue before applying the enzyme cleaner gives the cleaner better access to what remains in the carpet.
Avoid hot water. Excessive heat can affect some carpet fibers, dyes, and stain residues, and it can make certain protein-based stains more difficult to remove.
3. Apply an Enzyme Cleaner Deep Enough to Reach the Liquid
This is one of the most important steps in the entire process. Pet odor is not always located where you can see the yellow or discolored mark. The liquid can travel down between the fibers and into the carpet backing or underlay. If the cleaner only reaches the surface, the deeper residue can continue producing an odor.
Choose an enzyme-based carpet cleaner specifically intended for pet urine or organic stains. Apply it generously enough to reach approximately the same depth as the original contamination.
Don’t just spray a fine mist over the visible mark. For a heavily contaminated area, the product needs enough moisture to penetrate the carpet rather than remain on the tips of the fibers.
Treat an area slightly larger than the visible stain. Extending the treatment approximately 3 to 4 inches beyond the visible edges helps account for liquid that may have spread underneath the carpet surface.
The exact amount depends on the product and the size and depth of the contamination, so follow the manufacturer’s application instructions. On a larger or heavily saturated area, you may need considerably more product than you would for a small surface spot.
4. Give the Enzyme Cleaner Enough Time to Work
Do not immediately blot up the enzyme cleaner after applying it. Enzyme products need contact time to break down the organic compounds responsible for the odor.
Keeping the treatment area sufficiently moist can be particularly important for older stains. If the cleaner dries too quickly, it may not have enough time to work throughout the contaminated material.
For a light surface accident, the product may need only 15 to 30 minutes. Older or heavier contamination may require several hours or an overnight treatment. The correct dwell time depends on the specific cleaner, so always follow the product label rather than assuming every enzyme cleaner works for the same length of time.
If the instructions allow it, you can loosely cover the treated area with a sheet of plastic to slow evaporation. Do not seal the area indefinitely or create unnecessary moisture underneath the carpet.
5. Extract the Cleaner and Dissolved Residue
After the recommended dwell time, remove the plastic if you used it and begin extracting the moisture. For a small area, place clean, dry towels over the carpet and press down firmly. Standing on the towels can help force moisture upward from deeper in the pile. Continue replacing the towels until they are no longer becoming heavily damp.
A wet vacuum or carpet extractor makes this step easier, especially when the pet liquid has penetrated deeper into the carpet. Make slow passes over the treated area so the machine has enough time to pull out moisture and dissolved residue.
Extraction isn’t just about making the carpet feel dry. You are also trying to remove the residue and cleaning solution loosened during treatment.
6. Rinse Away Remaining Cleaning Solution
After extraction, give the area a final light rinse with clean, cool water. Mist the carpet lightly, then extract or blot it again. You do not need to flood the area. The aim is to remove excess cleaning product and any remaining dissolved residue without introducing unnecessary moisture.
This step is particularly useful when the cleaner leaves a noticeable residue. If too much product remains in the carpet, the fibers can develop a sticky surface that attracts dust and soil. That can leave you with a dark or dirty-looking patch after the carpet has been walked on repeatedly.
Again, use the product’s instructions as your guide. Some cleaners may specifically recommend a rinse, while others may not.
7. Dry the Carpet as Quickly as Possible
Proper drying is just as important as cleaning. A carpet that remains damp for too long can develop a musty smell, which can make it difficult to tell whether the original odor has actually been removed.
Place a fan at floor level so air moves directly across the treated area. Keep the room ventilated where possible by opening windows or doors. In humid conditions, running a dehumidifier can help remove moisture from the surrounding air.
Avoid judging the result while the carpet is still damp. A wet carpet can smell different from a completely dry carpet, and moisture can temporarily mask or alter the original odor.
Ideally, the treated area should be completely dry within roughly 6 to 12 hours, although drying time will vary depending on the carpet, humidity, ventilation, and amount of water used.
8. Check the Result Only After the Carpet Is Completely Dry
Once the carpet has dried completely, check the area carefully. Look at the carpet from different angles to see whether any discoloration remains. More importantly, smell the area after it has fully dried. If the odor has disappeared, the treatment has likely worked.
If the smell is still noticeable, do not immediately cover it with air freshener or carpet deodorizer. A remaining odor usually means that some contamination is still present or that the cleaner did not reach the full depth of the affected area.
Older stains may require a second enzyme treatment. This is particularly common when pet liquid has reached the carpet backing or underlay.
Repeat the cleaning process according to the enzyme cleaner’s instructions, paying particular attention to the depth and size of the contaminated area.
What If the Pet Odor Has Reached the Carpet Underlay?
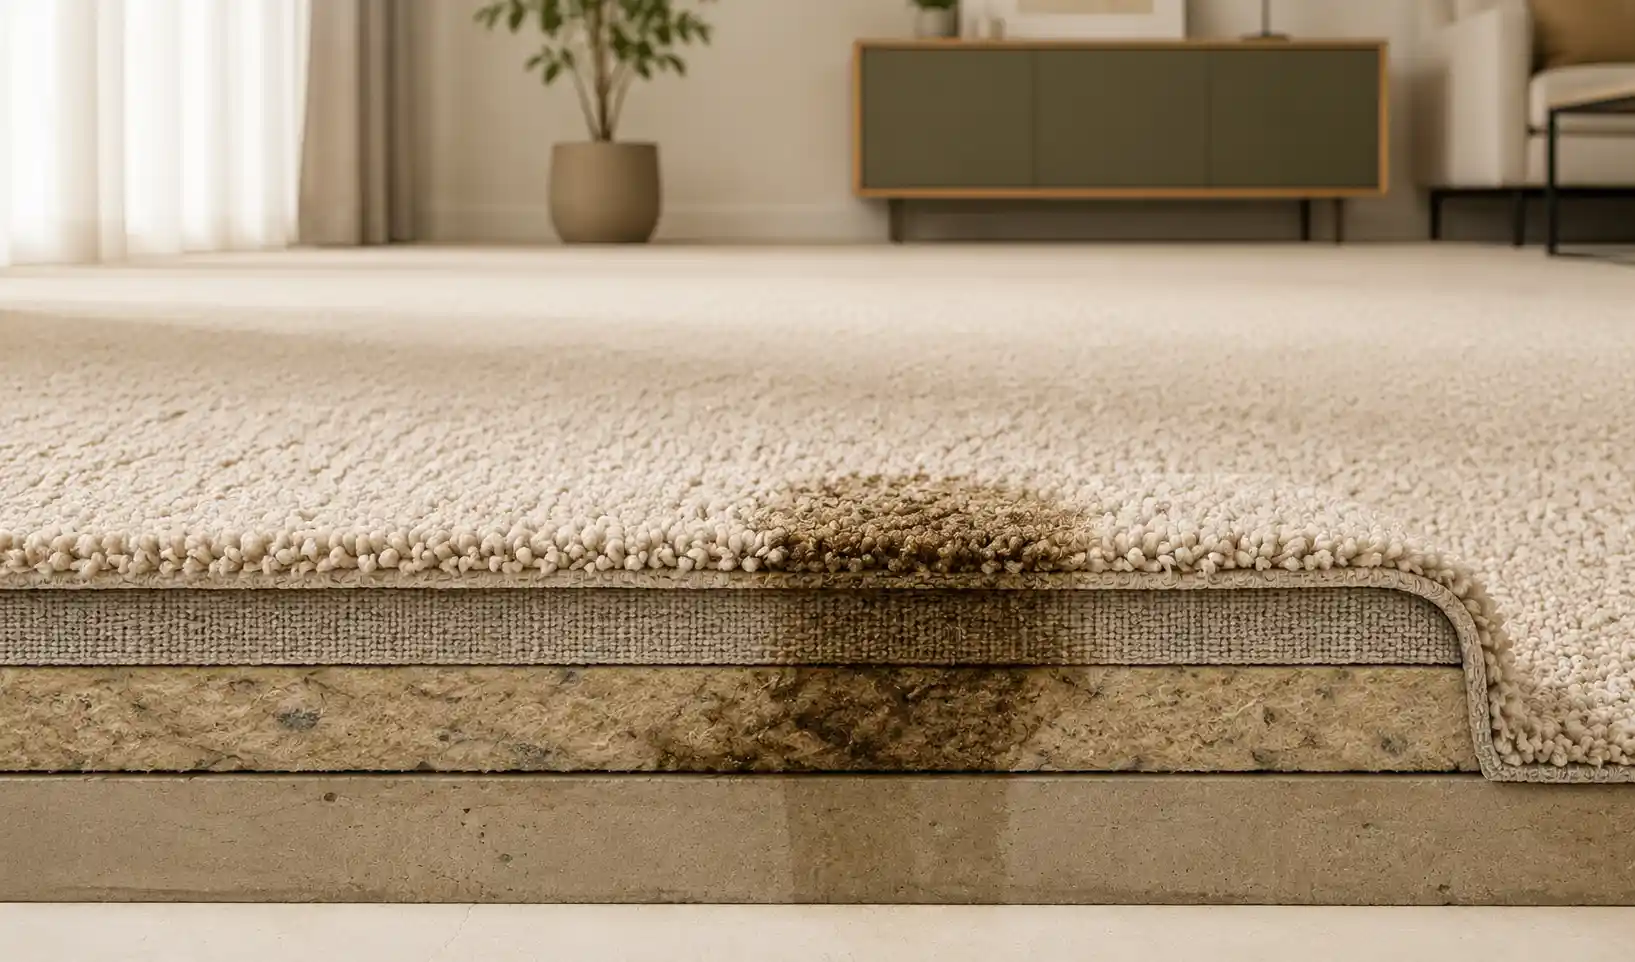
If you have treated the carpet several times and the odor keeps returning, the problem may be underneath the carpet rather than in the visible fibers.
Urine, vomit, or feces can pass through the carpet backing and reach the underlay or even the floor underneath. In these situations, cleaning only the carpet surface may not permanently solve the odor.
If it is practical and safe, lift the carpet carefully and inspect the underlay and floor beneath the affected area. If the underlay is heavily contaminated, replacement may be more effective than repeatedly treating the carpet surface.
For large areas, repeated accidents, or liquid that has soaked deeply into the carpet system, professional carpet cleaning may be the more practical option because professional extraction equipment can remove considerably more moisture and residue than surface blotting alone.
How to Handle a Fresh Accident?
Speed is the whole advantage here. Liquid that never dries never forms concentrated salts, and it stays close to the surface for the first hour or two.
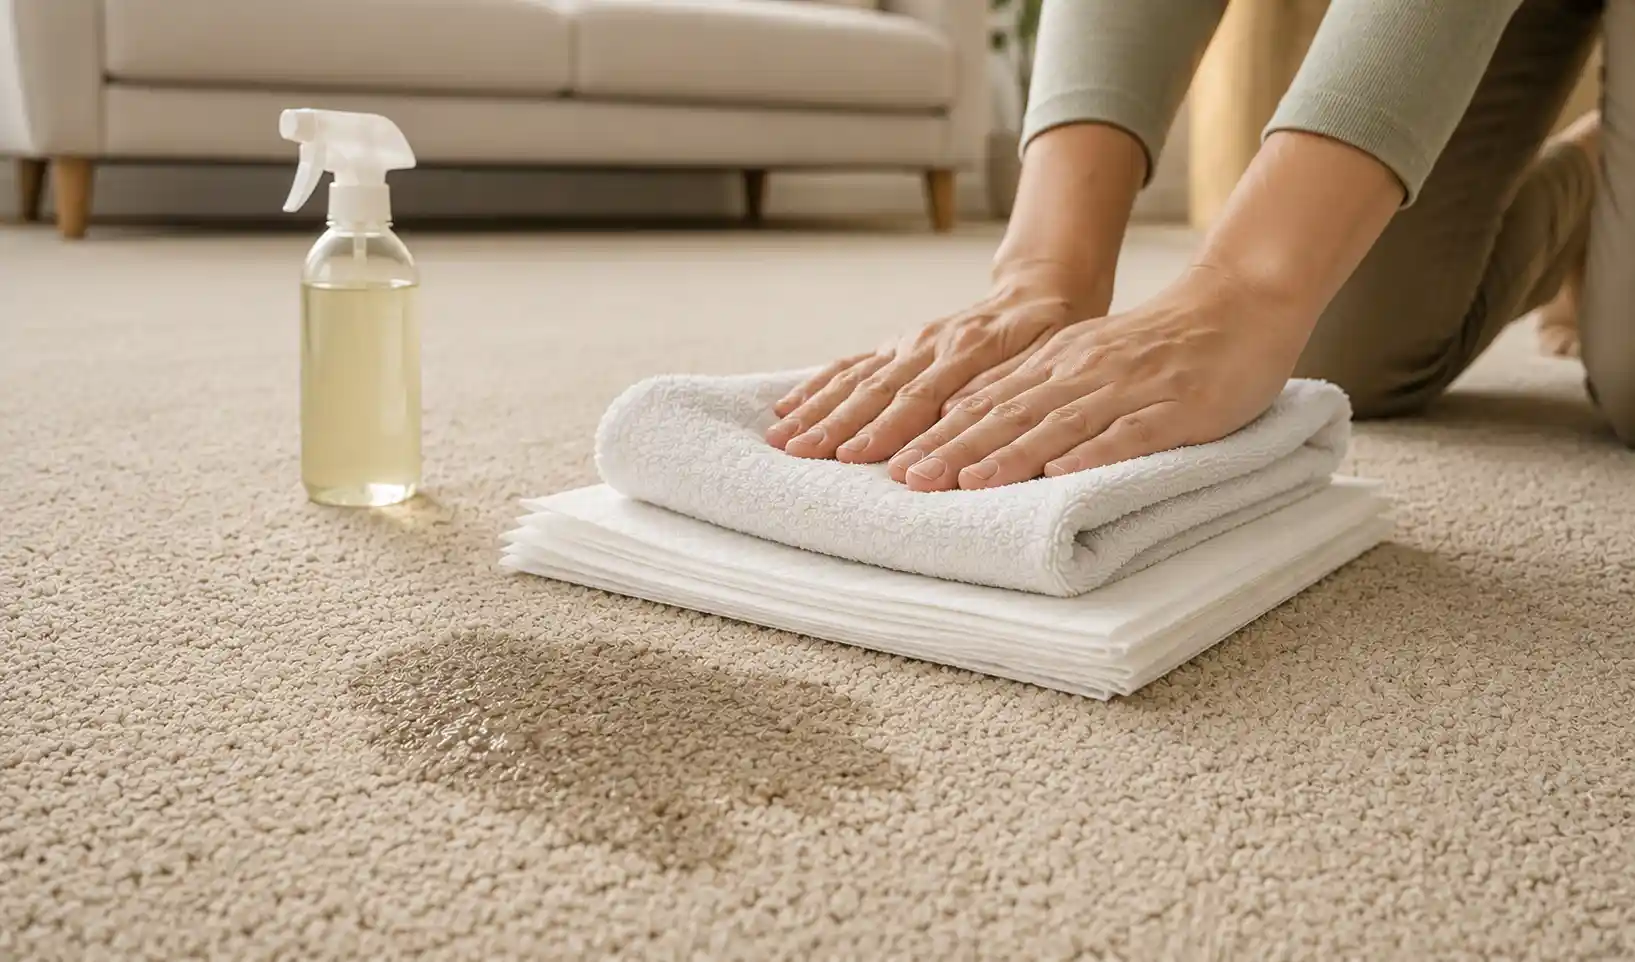
Cover the wet area with a thick stack of paper towels, then a folded bath towel on top. Stand on it for about a minute so pressure pulls the liquid upward. Replace the towels and repeat until you are getting almost nothing out. Mist with cool water, blot again, and finish with an enzyme cleaner using a short dwell time.
Two things to avoid: don’t rub the spot, and don’t use a household disinfectant spray as your first move. Rubbing spreads stains sideways and forces them into the backing. Disinfectants can leave residue that interferes with the enzyme treatment you actually need.
How to Get Old Pet Odor Out of Carpet
Old spots are a different job because the residue has crystallized and bonded to the fibers and backing. The method above still applies, with three changes.
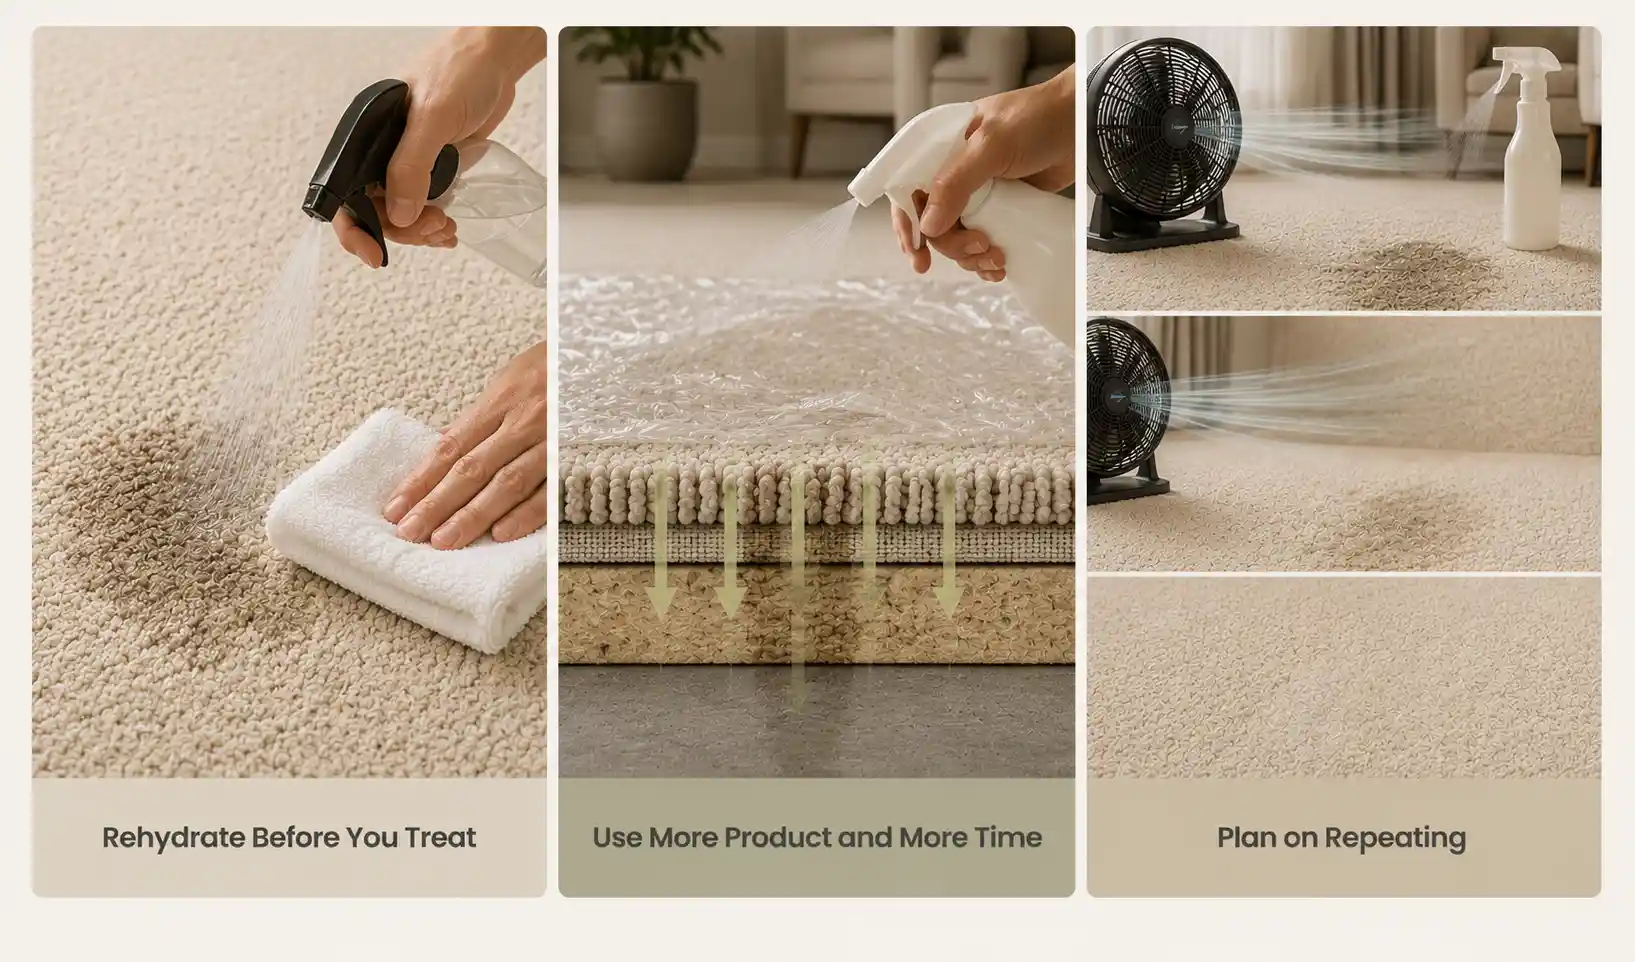
- First, rehydrate before you treat. Mist the spot with cool water, wait ten minutes, and blot. Dry crystals resist enzyme activity, and a little water gets them back into solution.
- Second, use more product and more time. A dried spot needs enough enzyme cleaner to reach the full depth of the original accident, and a dwell of 8 to 12 hours under plastic. Short treatments on old urine are the most common reason people conclude enzyme cleaners don’t work.
- Third, plan on repeating. Two or three cycles over a few days often clear an old spot that one cycle only improves. Between cycles, let the carpet dry completely so you can judge progress honestly.
If the smell keeps returning after several rounds, the residue has moved beyond what surface treatment can reach. At that point, the padding is holding it, and no amount of topical cleaner will fix it.
Home Remedies for Removing Pet Odor: What Helps and What Does Not
Household ingredients have a real place in this job, as long as you know what each one does.
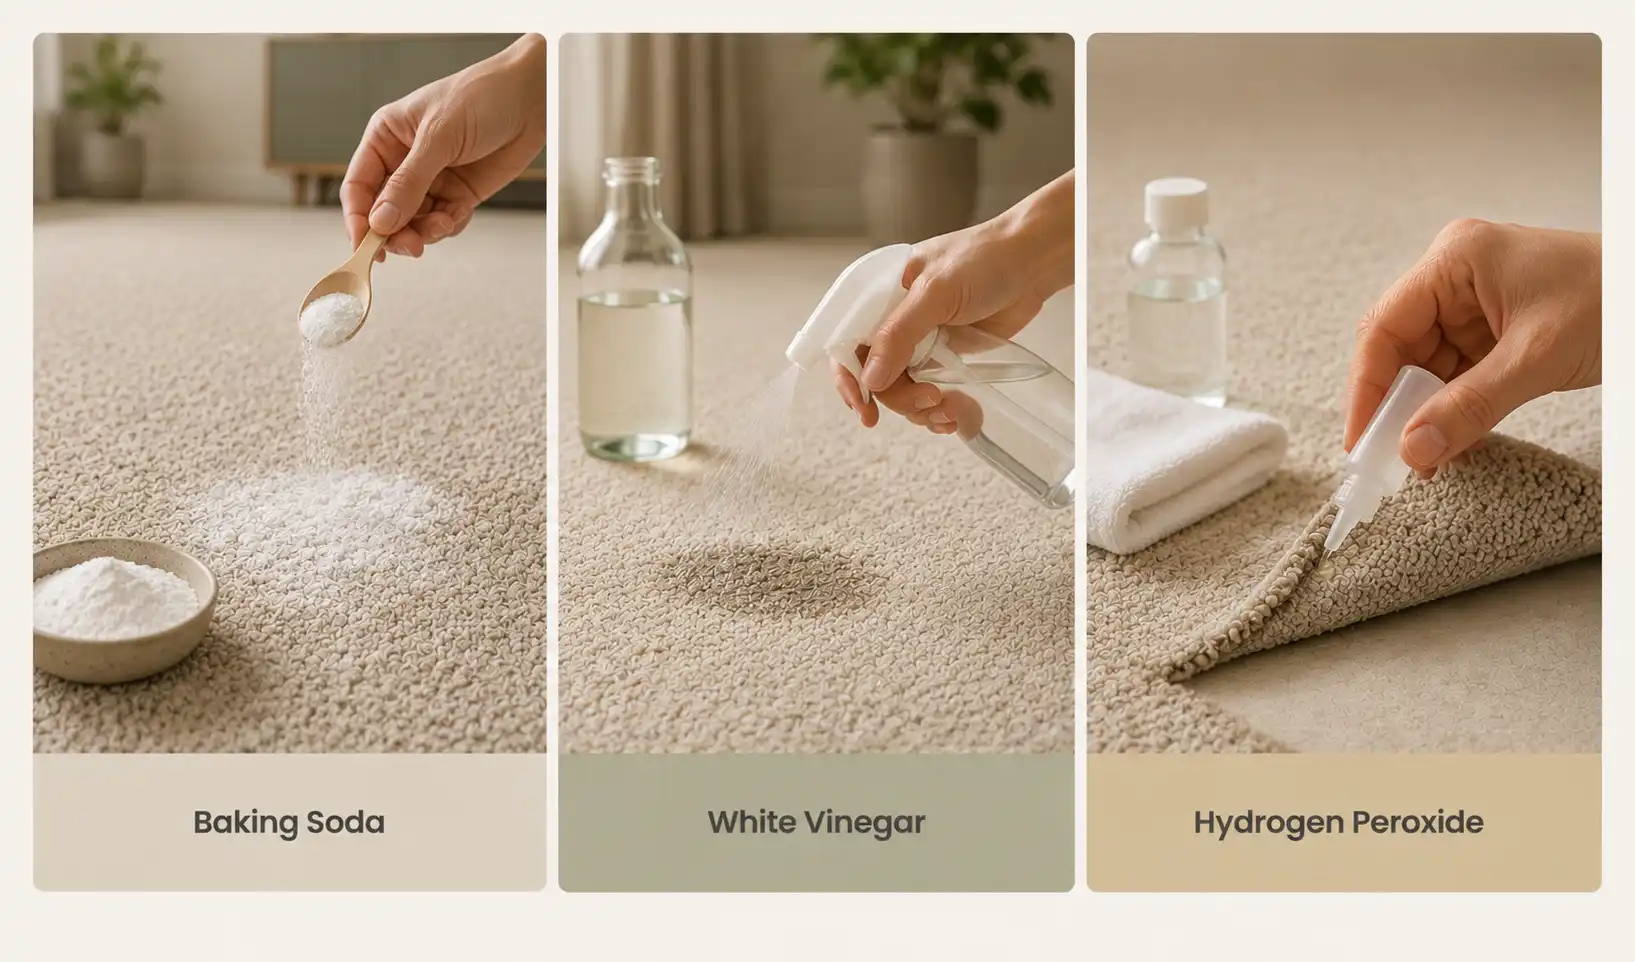
1. Baking Soda
Baking soda absorbs odor and moisture at the surface. It is a good maintenance tool for general pet smell and a useful finishing step after cleaning a spot. It does not travel into the backing or padding, and it does not break down urine residue, so it will not solve a urine problem on its own. Vacuum it up thoroughly, because leftover powder holds moisture and dulls the carpet.
2. White Vinegar
Diluted white vinegar, roughly one part vinegar to two parts water, is mildly acidic and can help neutralize alkaline urine salts near the surface. It is a reasonable first response for a fresh accident if you have nothing else in the house.
The limitations are real, though. It does not digest the organic material causing the smell, and the vinegar odor lingers for a day or two. Some cats also react to the sharp smell by avoiding or re-marking the area. Treat it as a stopgap, not a replacement for an enzyme cleaner.
3. Hydrogen Peroxide
A three percent hydrogen peroxide solution can lift discoloration and help with odor, but it bleaches some carpet dyes. Always test a hidden area first, wait for it to dry, and check for color change before using it anywhere visible. Avoid it on wool.
4. Combinations to Avoid
Some mixtures are useless, and some are dangerous. Keep these straight.
- Never mix bleach with ammonia or with any ammonia-based cleaner. This releases chloramine gas, which is toxic.
- Never mix bleach with vinegar or other acids. This releases chlorine gas.
- Do not mix hydrogen peroxide and vinegar in a sealed container. The result is peracetic acid, which is corrosive.
- Vinegar and baking soda together mostly cancel each other out. You get fizzing, then salt water. Use them at separate stages instead.
- Be careful with essential oils. Tea tree, citrus, pine, eucalyptus, and several others are toxic to cats and can irritate dogs. Scenting a carpet your pet sleeps on is not worth the risk.
Ventilate the room while you work, and keep pets off treated carpet until it is dry.
Why Pet Odor Gets Trapped in Carpet
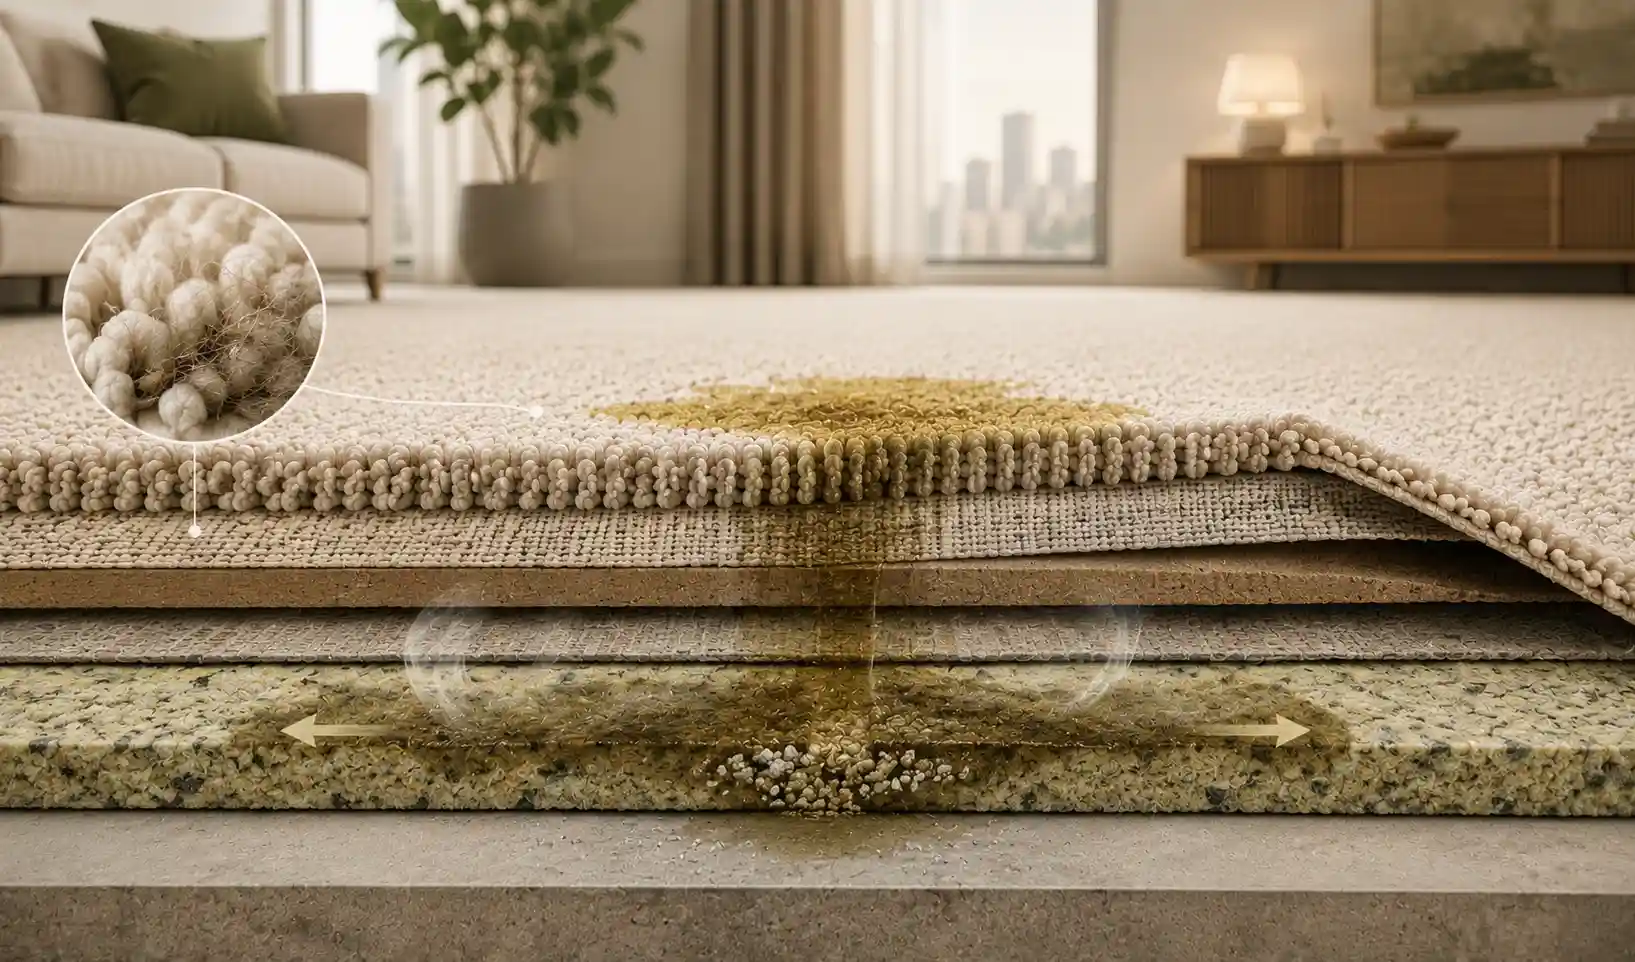
The carpet is built in layers, and each one holds odor differently. The face fibers you see are only the top. Below them are the primary backing, an adhesive layer, a secondary backing, and then the padding, often open-cell foam that soaks up liquid like a sponge.
When a pet urinates or vomits, gravity pulls the liquid straight through those layers. A stain the size of your palm on the surface is frequently twice that size in the padding, because liquid spreads sideways once it hits the backing. Anything you spray on top treats a fraction of the problem.
As urine dries, the water evaporates and leaves behind concentrated salts and crystalline compounds. Those salts attract moisture from the air. On a humid day, or right after you clean, they draw in water, bacteria become active again, and the smell returns. That is why a spot can seem fine for weeks and then announce itself in July.
General pet smell works differently. Skin oils, saliva, and dander coat the fibers and build up over months of foot traffic. There is no single spot to treat, so the fix is mechanical removal through vacuuming and a full-carpet cleaning rather than spot work.
Mistakes That Make Carpet Odor Worse
When tackling stubborn pet messes, using the wrong technique can make the smell significantly worse.
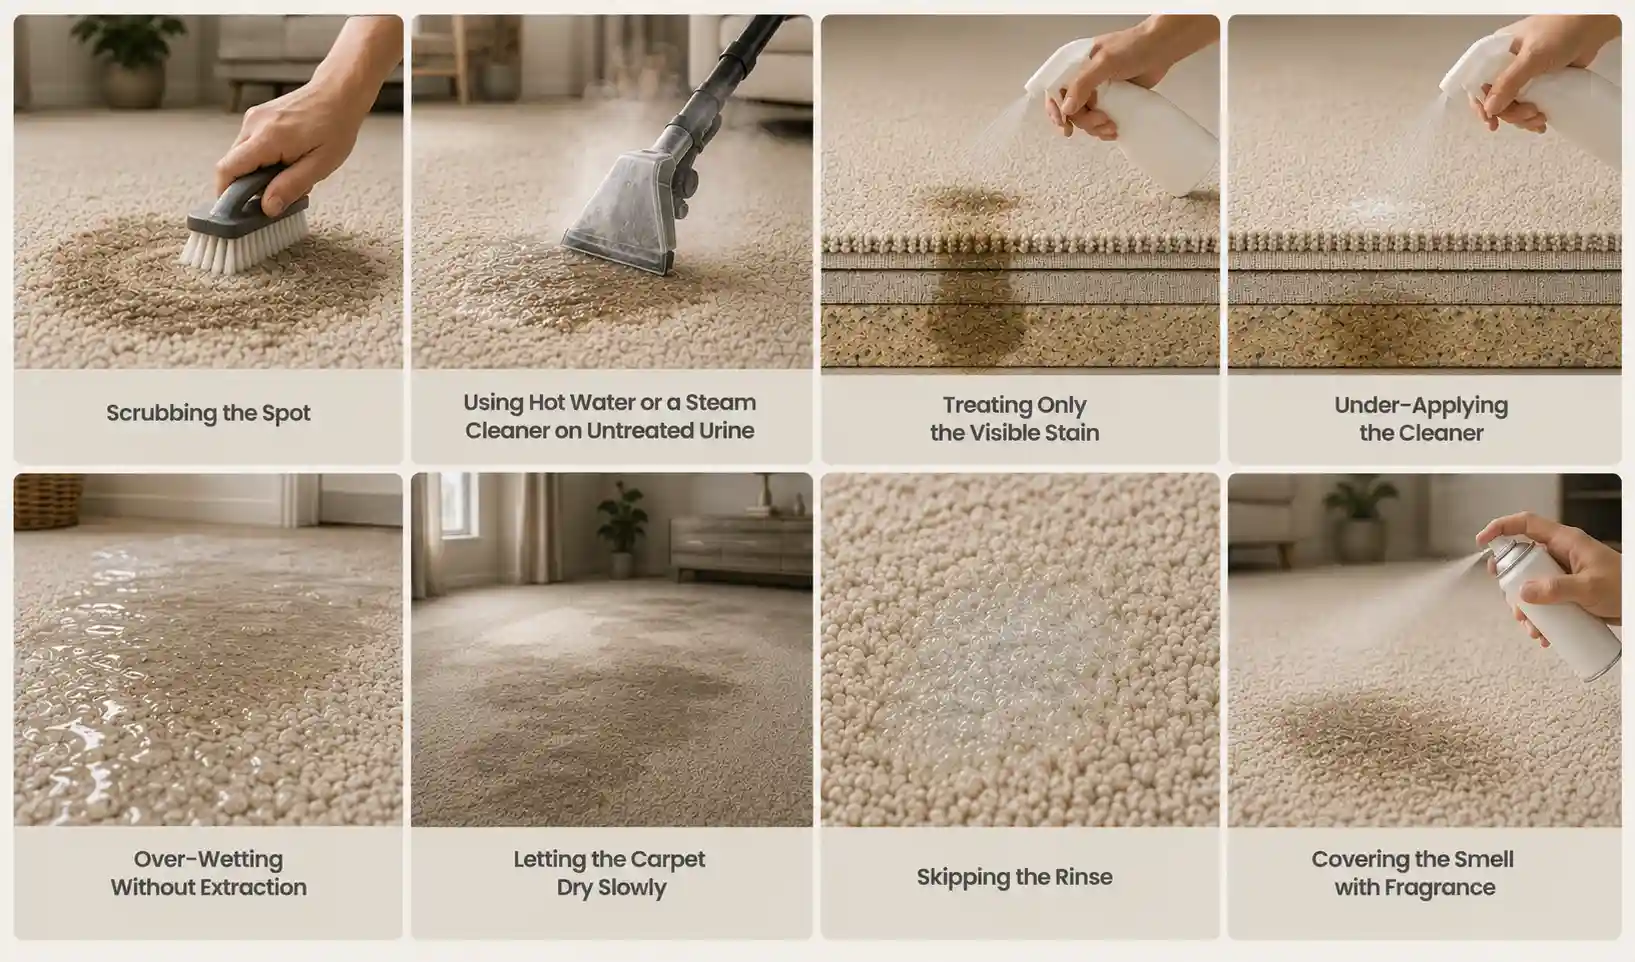
- Scrubbing the spot. This frays the fibers and pushes contamination deeper. Blot with pressure instead.
- Using hot water or a steam cleaner on untreated urine. Heat can bond protein residue to synthetic fibers and reactivate urine salts, which sometimes makes the smell worse right after cleaning.
- Treating only the visible stain. The contaminated area below is wider than what you see. Extend your treatment several inches past the edge.
- Under-applying the cleaner. A light mist on a deep spot is a wasted product.
- Over-wetting without extraction. Pouring in liquid you cannot pull back out feeds the padding and creates a musty smell of its own.
- Letting the carpet dry slowly. Residue in the backing wicks upward as moisture rises, which is how a clean-looking spot reappears two days later.
- Skipping the rinse. Cleaner residue stays tacky and collects soil, leaving a visible traffic mark around the spot.
- Covering the smell with fragrance. The residue keeps breaking down under the scent, and you lose track of whether the problem is improving.
How to Keep Pet Odor From Coming Back
Clean carpet stays clean when you shorten the time between the accident and treatment and reduce buildup in between.
Keep a spot kit within reach: an enzyme cleaner, white towels, and a spray bottle in a closet on each floor. Most odor problems begin as an accident nobody dealt with the same day.
Vacuum high-traffic and pet-preferred areas two or three times a week, and use slow passes so the beater bar has time to lift soil. Groom your pet on a regular schedule, because coat oils and dander end up in the carpet either way. Wash pet bedding weekly in hot water, since a smelly bed re-scents the carpet around it every day.
Wipe paws after wet walks, and keep a washable mat in your pet’s favorite resting spot so you can launder it instead of cleaning the carpet. For senior pets or a dog in training, a washable, waterproof mat over their usual area is far cheaper than repeated carpet work.
Plan a full carpet cleaning once or twice a year in a pet household. Professional hot water extraction removes the oil and soil film that vacuuming cannot, and it resets the baseline so individual spots stay easy to identify.
When DIY Cleaning Is Not Enough
Home methods handle most accidents. There are limits worth recognizing before you spend more weekends on it.
Consider bringing in a professional carpet cleaning service when the smell returns after two or three thorough enzyme treatments, when several accidents have happened in the same spot over months, when the odor gets noticeably stronger in humid weather, or when a spot feels stiff or crusty at the base of the fibers. A strong ammonia smell in a whole room, rather than at one spot, also points to sub-surface contamination.
Professionals approach these spots differently. They use a sub-surface tool that flushes the carpet backing and padding with a treatment solution and extracts it under vacuum, which reaches contamination that topical products cannot. Where the padding is saturated, the practical answer is to lift that section of carpet, replace the affected padding, treat or seal the subfloor, and reinstall. That’s as much a repair job as a cleaning job, and it is worth asking about before you replace an entire room of carpet.
Replacement makes sense when contamination is widespread rather than in a few spots, when urine has reached and stained a large area of subfloor, or when the carpet has aged out anyway. Even then, treating the subfloor before installing new carpet matters. New carpet installed over a contaminated floor will smell again.
Final Words
Carpet odor is a source problem. Fragrance, powders, and quick sprays only change what you smell for a day, while the residue keeps working in the backing and padding underneath. The methods that last are the ones that break the material down and physically pull it out: find every spot, apply an enzyme cleaner deeply enough to reach the contamination, give it real dwell time, extract, rinse, and dry the carpet quickly.
Follow that sequence and most spots clear at home. When the smell keeps coming back on humid days after a few honest attempts, stop repeating surface treatments. The problem has moved below the carpet, and that is the point to bring in sub-surface cleaning or padding replacement rather than another bottle of deodorizer.
Frequently Asked Questions
Start with mechanical removal. Blot the spot dry, rinse with cool water, and blot again. Follow with a plant-based or enzyme-based cleaner, which is biological rather than harsh chemistry. Baking soda works well as a finishing step for surface odor. Natural methods handle fresh and light odors well, but old liquid in the backing usually needs a full enzyme treatment to fully clear.
It absorbs odor at the surface and helps with general pet smell, so it is worth using. It cannot break down urine residue or reach the padding, so it will not remove a urine odor on its own. Think of it as maintenance rather than a cure.
Diluted vinegar can neutralize some surface urine salts and temporarily reduce a fresh smell. It does not digest the organic material producing the odor, so the smell often returns once the vinegar evaporates. Use it as a first response if it is what you have, then follow up with an enzyme cleaner.
Usually one of three reasons. The carpet dried too slowly, and moisture in the backing turned musty. Residue below the surface wicked back up as the carpet dried. Or the cleaning only addressed the fibers while liquid remains in the backing or padding. Improve airflow, extend drying time to under 12 hours, and re-treat the specific spots rather than the whole room.
Rewet the spot with cool water, blot, then saturate it with enzyme cleaner well past the edges of the stain. Cover it with plastic and let it sit for 8 to 12 hours. Extract, rinse with clean water, extract again, and dry with a fan. Old spots commonly need two or three rounds.
Yes, and it commonly does. Padding is absorbent by design, so liquid that passes through the carpet backing spreads through the foam and can reach the subfloor. Padding contamination is the usual explanation for a spot that smells clean when dry and strong when the weather turns humid.
Not reliably on its own, and heat applied to untreated urine can make things worse by setting protein residue in synthetic fibers. Hot water extraction is valuable as the removal step after a proper enzyme treatment, and professionals use it that way. Treat first, then extract.
A fresh accident treated the same day usually clears in one cycle, once the carpet dries within 6 to 12 hours. An older spot can take several days across two or three treatments. If the smell is still present after that, it is a sign that the source is deeper than surface cleaning reaches, not a sign to keep repeating the same treatment.
Consider replacement when pet liquid has affected large areas rather than a few spots, when the padding and subfloor are contaminated across a room, or when repeated professional treatment has not resolved it. For localized damage, replacing a section of padding and sealing the subfloor is usually cheaper and just as effective. Always treat the subfloor before installing new carpet, or the odor will come through again.


