
Flooring Adhesive: Types, Uses, and How to Choose the Right One
Flooring adhesive is a specialized bonding compound designed to secure materials like hardwood, luxury vinyl, tile, and carpet to subfloors. Different floor materials require specific formulations, such as flexible water-based acrylics, heavy-duty polyurethanes, or moisture-resistant epoxies. If you choose the wrong adhesive, it can lead to lifting, buckling, or water damage to the floor. So, selecting the right adhesive formula is crucial for long-lasting, successful flooring adhesion.
Other factors, like subfloor type, room humidity, and cure time, also play critical roles in overall performance. Understanding these options helps you select the ideal adhesive to ensure your new floors remain flat, secure, and beautiful for decades. In this blog post by Floor Land, you will learn about the flooring adhesive types, uses, and ways to choose the best options. So let’s get started.
Which Flooring Adhesive Do You Need?
Match your flooring material to your subfloor. The table below provides you with the different types of flooring adhesives to choose from. Confirm the specific product against your flooring manufacturer’s installation guide before you buy.
| Flooring Type | Concrete (Tested, Passing) | Plywood / OSB | Gypsum Underlayment | Over Existing Tile or VCT |
|---|---|---|---|---|
| LVP / LVT (Dry-Back) | Moisture-rated PSA or Hybrid | PSA or Hard-set Acrylic | PSA Approved for Gypsum | Hard-set Acrylic after Skim Coat |
| Sheet Vinyl | Wet-set Acrylic or PSA | Wet-set Acrylic | Approved Acrylic Only | Skim Coat First, then Acrylic |
| VCT | Clear-drying Permanent PSA | Clear-drying Permanent PSA | Approved PSA | Skim Coat, then PSA |
| Engineered Wood | Urethane or MS Polymer | Urethane or MS Polymer | Rarely Approved – Verify | Not Recommended |
| Solid Wood | Urethane (Moisture-cured) | Usually Nailed, Not Glued | Not Recommended | Not Recommended |
| Carpet Tile | Releasable PSA | Releasable PSA | Releasable PSA | Releasable PSA |
| Broadloom Carpet | Multipurpose Latex | Multipurpose Latex | Approved Latex | Not Recommended |
| Rubber Flooring | Two-part Epoxy or Urethane | Urethane | Verify with Manufacturer | Not Recommended |
| Linoleum | Linoleum-specific Acrylic | Linoleum-specific Acrylic | Verify | Skim Coat, then Acrylic |
The Five Variables That Decide Your Adhesive
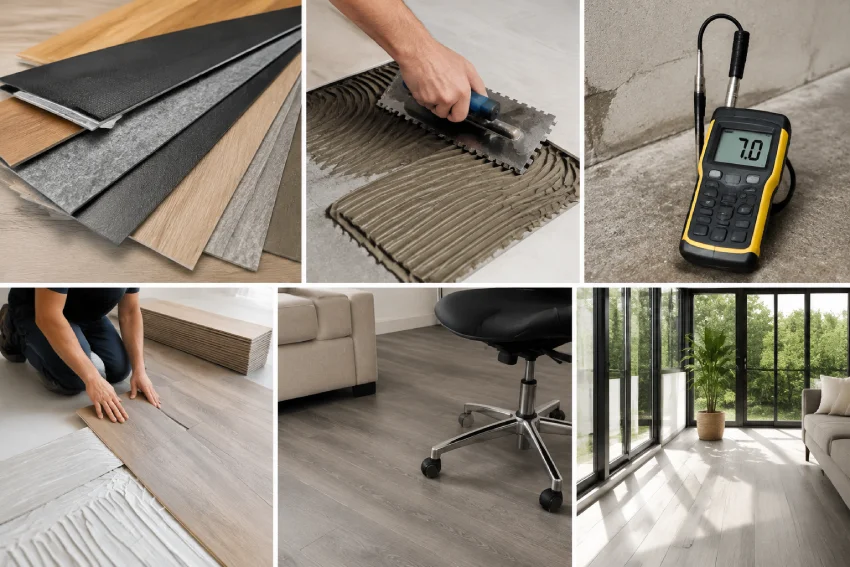
Five factors determine the answer, and they matter roughly in this order. Your flooring material and its backing, your subfloor’s type and condition, moisture and alkalinity, the kind of traffic and loads the floor will carry, and the room’s environment. Get the first three right, and you’ll rarely go badly wrong.
1. Your Flooring Material and Its Backing
The visible surface tells you less than the back does. What matters is dimensional stability. Like how much the product moves with temperature and humidity and what the backing is made of.
A fiberglass-backed sheet vinyl, a dry-back LVT, a felt-back sheet good, a cushion-backed plank, and a bituminous-backed carpet tile all take different adhesives even though several of them are “vinyl.” Turn a sample over before you decide anything.
2. Your Subfloor and Its Condition
Porosity is the variable here. A porous substrate absorbs the water or solvent carrier, which shortens open time and changes the trowel you need. A non-porous one- sealed concrete, existing tile, densified or heavily power-troweled slab- doesn’t, which lengthens flash time and can prevent a bond entirely. Two slabs poured the same week can behave completely differently depending on what was applied to the surface afterward.
3. Moisture and Alkalinity
This causes more adhesive failures than every other factor combined, and it’s covered in full below. Adhesive is not a vapor barrier, and no product on the market fixes a wet slab.
4. Traffic Type | Foot Traffic Vs. Point and Rolling Loads
Most homeowners think about traffic as “busy or not busy.” The distinction that actually matters is between moving loads and stationary ones. A softer pressure-sensitive adhesive is perfectly good under people walking through a hallway all day. When you park a heavy stationary object on that same floor, the adhesive can displace under sustained point pressure. It leaves a permanent indentation. That’s when a hard-set or two-part system earns its cost.
Different rooms in the same building can legitimately need different adhesives for this reason.
5. Environment
Direct sunlight through large glass, unconditioned or seasonally heated spaces, high-humidity rooms, and radiant-heated slabs all push you toward specific chemistries with wider service-temperature ranges.
Flooring Adhesive Types, and What Each is Genuinely For
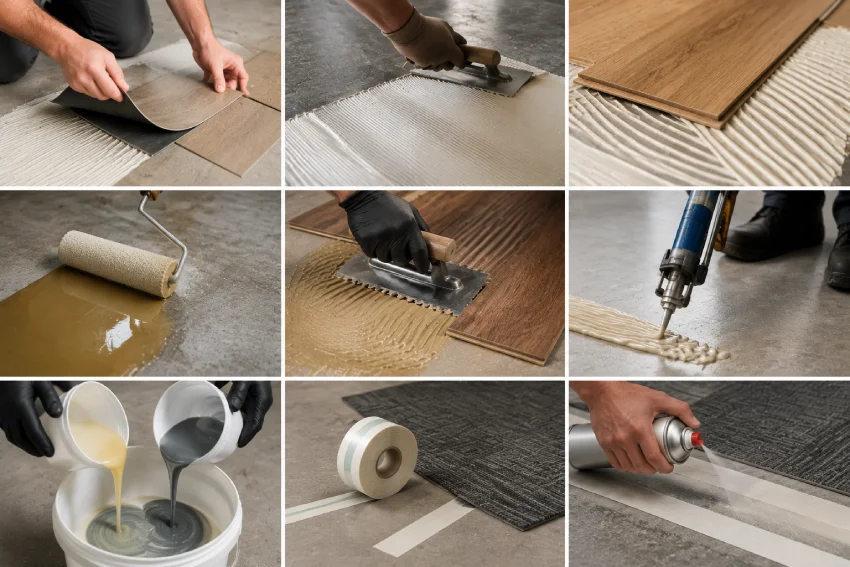
Take a look at adhesive types made for different flooring types:
Pressure-Sensitive Adhesive (PSA)
PSA is applied, allowed to flash off, and then stays permanently tacky rather than hardening. That’s the whole point: planks can be positioned, lifted, and reset, and years later a single damaged plank can be warmed and removed without disturbing anything around it. It’s the default for LVT, LVP, and high-quality carpet in residential and light-to-moderate commercial settings. It is not the choice for heavy rolling loads or stationary point loads, where the permanent tack becomes a liability.
Hard-Set Acrylic
Hard-set cures rigid and gives up the repositioning window in exchange for substantially higher shear strength. Use it where traffic is heavy, where the flooring is less dimensionally stable, or where the covering needs to be locked in place permanently. It’s less forgiving to install; once a plank is set, it’s set.
Urethane and Moisture-Cured Urethane
The workhorse of glue-down wood flooring. Urethane forms a chemical bond with the wood and a mechanical bond with concrete, stays elastic after curing so it can absorb seasonal wood movement, and tolerates moisture well. Many are sound-rated and pair with acoustic membranes for multi-family buildings with IIC and STC requirements. Some all-in-one products act as adhesive, moisture control, and sound membrane in a single trowel pass, expensive per gallon, often cheaper per job.
The catch is cleanup. Cured urethane on a finished wood surface generally cannot be removed without damaging the finish. Wipe every smear while it’s wet, with the manufacturer’s recommended cleaner, or plan on replacing the plank.
Epoxy and Two-Part Systems
Two components mixed on site, producing the highest bond strength and the hardest final set. This is what you specify for concentrated point loads, demanding wet environments, rubber and sports flooring, and installations where nothing can be allowed to move. Two-part systems introduce pot life; once mixed, the clock runs regardless of what else is happening on the job, and mixing ratio discipline is non-negotiable.
Solvent-Based Adhesive
A legacy category that still has specific uses in resilient flooring. Strong and moisture-tolerant, but the VOC content, odor, and ventilation requirements make it a poor default for occupied residential space. Several jurisdictions restrict its use; check local VOC regulations before specifying it.
MS Polymer and Hybrid Adhesives
The most useful recent development and the one you’ll see least in general guides. MS polymer adhesives are solvent-free and low-odor, stay permanently elastic, tolerate moisture, and bond to an unusually wide range of substrates. They sit between acrylic and urethane on cost and are worth asking about specifically, particularly for wood in occupied spaces where urethane odor is a concern.
Tapes and Spray Adhesives
Thin, fast, and genuinely useful for carpet tile, transitions, small repairs, and installations that need to be reversible. They aren’t a substitute for troweled adhesive on a full floor coverage, and shear strength isn’t comparable, but within their scope they work well.
Matching Adhesive to Your Subfloor
Your subfloor disqualifies more adhesives than your flooring does. Four properties decide it: porosity, flatness, cleanliness, and contamination history.
| Subfloor | Required Prep | Compatible Adhesives | Red Flags |
|---|---|---|---|
| Concrete, Above/On Grade | Clean, profile if sealed, moisture & pH test | Most adhesives, based on RH test results | Sealers, curing compounds, densifiers |
| Concrete, Below Grade | Same prep, plus moisture mitigation if RH is high | Moisture-rated adhesives only | Hydrostatic pressure, efflorescence |
| Plywood | Secure fastening, ensure flatness, check moisture content | Most adhesives | Deflection, delamination |
| OSB | Secure, flat surface, seal panel edges | Verify compatibility — many exclude OSB | Swelling at joints |
| Gypsum Underlayment | Verify surface strength, seal if required | Approved products only | Soft or dusting surface |
| Existing Ceramic Tile | Clean, flat, well-bonded, skim coat if needed | Hard-set adhesives, some PSA | Loose tiles, deep grout lines |
| Existing VCT | Clean, well-bonded, skim coat | Hard-set adhesives, some PSA | Unknown age — see below |
| Terrazzo | Profile surface and clean thoroughly | Verify per adhesive manufacturer | Non-porous or sealed surface |
How to Apply Flooring Adhesive Correctly
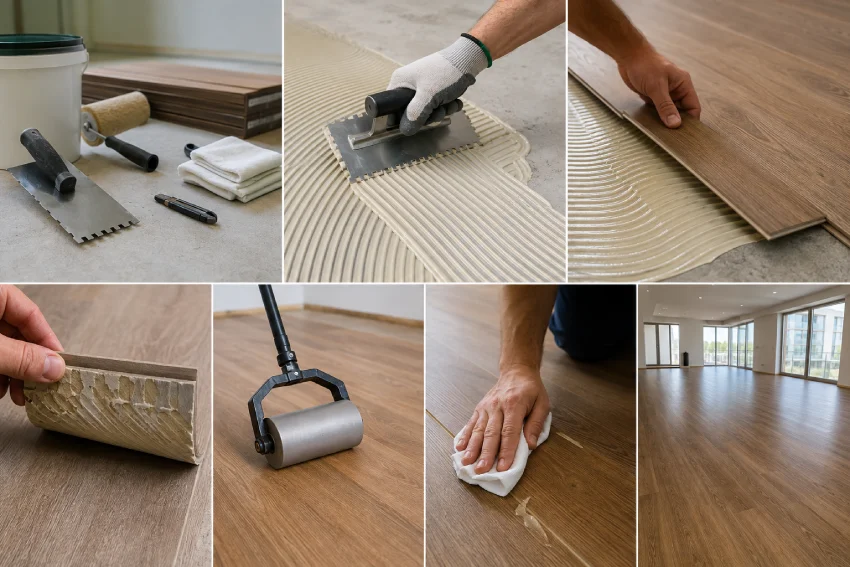
Preparation and timing discipline matter more than trowel technique. Most installers get the technique right and lose the job on the prep.
Before The Lid Comes Off
- Substrate clean, dry, flat, and free of contaminants
- Moisture and pH tested, results documented with photos and dates
- HVAC running at service conditions
- Flooring and adhesive acclimated to the room
- Correct trowel on hand, notch inspected
- Adhesive-specific cleaner and rags within reach, not in the van
The Sequence
Dry-lay your layout and mark your working lines first. Then spread only as much area as you can cover within the open time, or for a first-time DIYer, that means smaller sections than you feel efficient. Set the flooring into the adhesive, check the transfer, continue, and roll the finished area within the specified window. Clean squeeze-out immediately.
The Transfer Check
Early in the install, within the first 100 square feet, lift a plank you’ve just set and look at its back. You want the adhesive ridges to have collapsed into consistent, near-full coverage on the backing. Patchy transfer, visible unbroken ridges, or bare areas mean something is wrong right now: wrong notch, worn trowel, adhesive flashed too long, or a substrate problem.
This is the only real-time verification available. Do it early, and repeat it a few times across the job. It costs two minutes, and it is the difference between catching a problem at 100 square feet and discovering it at 1,000.
Rolling
Most specifications call for a 100 lb roller, run in both directions across the installed area, within the adhesive’s working time. Some products call for a second pass after a set interval. Rolling is what converts adhesive contact into adhesive bond, and skipping it is invisible on day one and obvious in month six. Rent the roller.
Cleanup While It’s Wet
Use the cleaner the manufacturer names, not mineral spirits by default, and not whatever’s under the sink. This is most urgent with urethane on wood: once it cures on a finished surface, removing it damages the finish, and the fix is cutting out and replacing the plank.
Common Mistakes and How Failures Actually Show Up
| Symptom | Likely Cause | What to Do |
|---|---|---|
| Bubbling or Blistering | Slab moisture or trapped solvent | Test the slab; removal and moisture mitigation are usually required. |
| Edge Curl / Lifting | Insufficient adhesive coverage or adhesive flashed too long | Assess the affected area; localized re-setting is often sufficient. |
| Hollow Spots Underfoot | Voids caused by an uneven subfloor or inadequate adhesive coverage | Inject adhesive where possible or lift and re-set the flooring. |
| Telegraphing (Subfloor Pattern Visible) | Uneven or contaminated substrate | Correct the substrate before reinstalling the flooring. |
| Seam Peaking | Restricted expansion or floating product glued down | Verify the installation method matches the flooring manufacturer's recommendations. |
| Indentation Under Furniture | Adhesive too soft for the applied load | Use protective pads; choose a hard-set adhesive for similar installations in the future. |
| Adhesive Bleed on Wear Layer | Over-application or incorrect trowel notch | Clean immediately using the manufacturer's recommended cleaner. |
| Squeaking | Loose subfloor or incomplete adhesive bond | Inspect the subfloor and secure any loose fasteners before repairing the flooring. |
| Discoloration Through the Floor | Adhesive incompatibility or high substrate alkalinity | Test the substrate pH and verify the adhesive is approved for the flooring product. |
Removal, Repair, and Maintenance
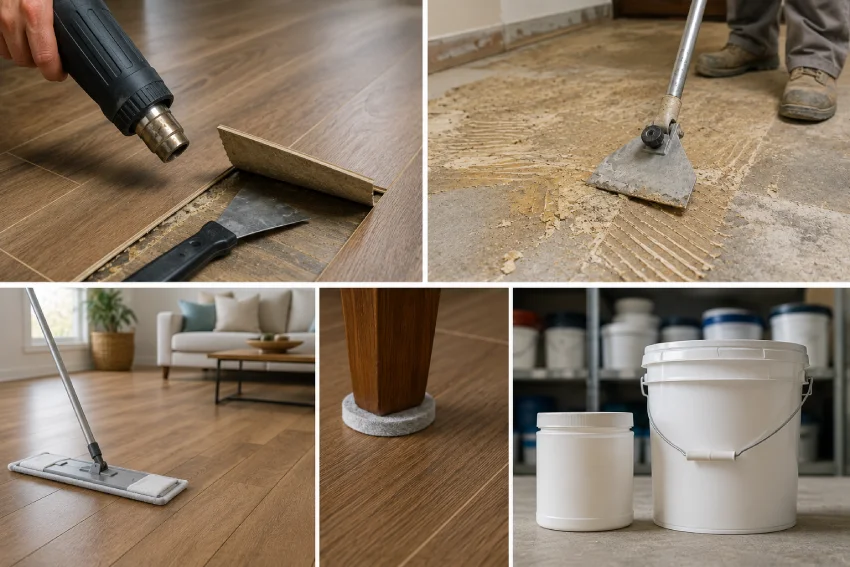
In this section, you will learn about removal and repair, and maintenance of flooring adhesives.
1. Replacing a Single Plank
One of the genuine advantages of a pressure-sensitive glue-down floor: gentle heat softens the adhesive enough to lift an individual plank. A replacement can be set into fresh adhesive without disturbing anything around it. Work slowly with moderate heat. Excessive heat damages the wear layer of the surrounding planks. This is considerably easier than the equivalent repair in a floating floor, where a mid-room plank means disassembling back to it.
2. Removing Old Adhesive from a Subfloor
Approach depends on chemistry. Water-based and pressure-sensitive residues often respond to scraping with a long-handled floor scraper, sometimes with warm water or a citrus-based softener. Urethanes and epoxies are mechanical removal problems, grinding or shot-blasting, which is usually a rental-equipment or contractor job.
Often the better answer is encapsulation: leaving well-bonded residue in place and covering it with a compatible skim coat or self-leveling underlayment. This is faster, cleaner, and specifically preferred where the old flooring may predate 1980, in which case it should be professionally tested before anyone disturbs it.
3. Caring for a Glued-Down Floor
Avoid wet-mopping during the cure window, typically 48 to 72 hours, longer for some products. After that, follow the flooring manufacturer’s cleaning guidance rather than the adhesive’s. Put protective pads under furniture legs and heavy stationary items, particularly on pressure-sensitive installs. Keep indoor humidity reasonably stable; large swings stress every bond in the assembly.
4. Storage, Shelf Life, and Freezing
Water-based adhesives can be permanently ruined by freezing. In this situation, the emulsion breaks, and the product never recovers, no matter how thoroughly it’s stirred. Most adhesives carry an unopened shelf life of roughly one to two years, printed on the pail. An opened pail resealed properly may last months; one left open overnight generally won’t.
Discard adhesive that has separated and won’t recombine with stirring. Additionally, it has gone lumpy or stringy, has formed a skin throughout rather than just on top, or has developed a sour smell. Never thin adhesive to make it workable again; you’ve changed the formulation and the coverage rate, and you’ve voided any claim.
Safety, VOCs, and indoor air quality
Modern solvent-free adhesives have largely solved the odor and off-gassing problem that gave floor glue its reputation. Most water-based, acrylic, and MS polymer products now available for residential use are low-VOC and low-odor.
Verify that with certification rather than marketing language. Look for FloorScore certification or a stated conformance with CDPH Standard Method v1.2 (also referenced as California Section 01350). These involve actual chamber emissions testing. Phrases like “eco-friendly,” “green,” or “low odor” on a label mean nothing on their own.
Ventilate during installation and for at least the first 24 to 48 hours regardless of the product. If anyone in the household is pregnant, an infant, elderly, asthmatic, or chemically sensitive, extend that and keep them out of the space during application and initial cure. Pets, especially birds, which are unusually sensitive to airborne compounds, should be kept away from the area entirely until it’s fully ventilated.
Dispose of leftovers properly. Dry water-based adhesive out solid before discarding, and treat solvent-based and two-part products as hazardous waste per local regulations. Never pour any adhesive down a drain.
Final Thoughts
Choosing the right flooring adhesive is about more than sticking one surface to another. Every flooring material has different bonding needs. The condition of your subfloor matters just as much. Moisture, room conditions, and daily foot traffic also affect long-term performance. Taking time to check these factors before installation can prevent expensive repairs later.
Always follow the flooring manufacturer’s recommendations and use an adhesive approved for your flooring type. Preparing the subfloor properly and applying the adhesive the right way will give you a stronger and longer-lasting bond. Small steps like moisture testing, using the correct trowel, and allowing enough curing time make a noticeable difference.
If you are unsure which product to use, ask a flooring professional before starting the project. A little guidance at the beginning can save both time and money. With the right adhesive, proper preparation, and careful installation, your floor will stay secure, stable, and attractive for many years. Investing in the correct materials from the start is the simplest way to achieve durable, professional-quality flooring results.
Frequently Asked Questions
No. Construction adhesives are formulated for structural bonding, not for the shear movement, spread rate, and thermal cycling a floor assembly sees. They also can’t be applied at the coverage rate a floor requires. Using one typically voids the flooring warranty.
Yes to both. Water-based adhesives can be permanently damaged by freezing, and most products carry a shelf life of roughly one to two years unopened. Separated, lumpy, or foul-smelling adhesive should be discarded, never thinned.
No. Different chemistries can be mutually incompatible, and layering causes failure at the interface between them. If you switch products mid-job, the previous adhesive must be fully removed from the affected area first.
Thinset mortar is cement-based and doubles as a leveling bed for ceramic and stone. Flooring adhesive is a thin-film polymer bond for resilient and wood goods. They are not interchangeable in either direction.
Not reliably. Most adhesives require the space to be held within their specified temperature and humidity range for 48 hours before, during, and after installation. Cold slabs are a common cause of installations that never reach full bond.
Never down a drain. Water-based adhesive can usually be dried solid and discarded with household waste; solvent-based and two-part products are typically hazardous waste. Check local regulations.
Generally yes, no hollow gap and no click movement underfoot. Some urethane wood adhesives are specifically sound-rated and pair with acoustic membranes for multi-family buildings with IIC or STC requirements.
Often, but the adhesive, the flooring, and the heating system must all be rated for it. The system typically needs to be cycled to a specified temperature and then held there before, during, and after installation. Verify all three specifications.
Material cost usually favors glue-down; total installed cost usually favors floating, because of the labor in subfloor prep and adhesive handling. The gap narrows on large open spans, where floating requires transition strips.
Stop and contact both the flooring and adhesive manufacturers before removing anything. Documenting the situation early preserves whatever warranty position remains; pulling the floor up first can eliminate it entirely.


