
How to Declutter Your Home: A Designer’s Guide to Calmer, Better-Looking Rooms

To declutter your home, edit one room or zone at a time. Clear every surface and storage area, keep only what you use or love, give each item a defined place, and remove everything else within 48 hours. Then restyle the space with fewer, better-placed objects and enough closed storage to keep everyday items out of sight. Decluttering is the first step of any successful renovation, because no color palette, statement sofa, or lighting plan can shine in a room crowded with things.
Interior designers rarely talk about decluttering as a chore. They call it editing, and they treat it as part of the design itself. A well-edited room has clear sightlines, a single focal point, surfaces with breathing space, and storage that matches how the household actually lives. This guide by Floor Land shows you how to declutter your home with that designer’s eye, room by room, so the result looks considered rather than simply tidied.
Why Decluttering Comes Before Any Interior Design Upgrade
Clutter does more than make a room look messy. It disrupts the principles that make a space feel balanced, and it measurably affects how people feel at home.

- It adds visual weight. Designers judge objects partly by how heavy they look, not just how much they weigh. Dozens of small items scattered across shelves and tables add up to a large amount of visual weight, which makes a room feel smaller and more crowded than it is.
- It competes with the focal point. Every well-designed room has one place the eye lands first: a fireplace, a view, an artwork, a headboard. When the surfaces around it are covered, the eye has nowhere to rest, and the feature you invested in disappears into the background.
- It blocks sightlines and light. Stacks on windowsills, piles against walls, and custom furniture crowded into corners interrupt the clear sightlines that make a room feel open. They also absorb and block daylight, so cluttered rooms often feel darker.
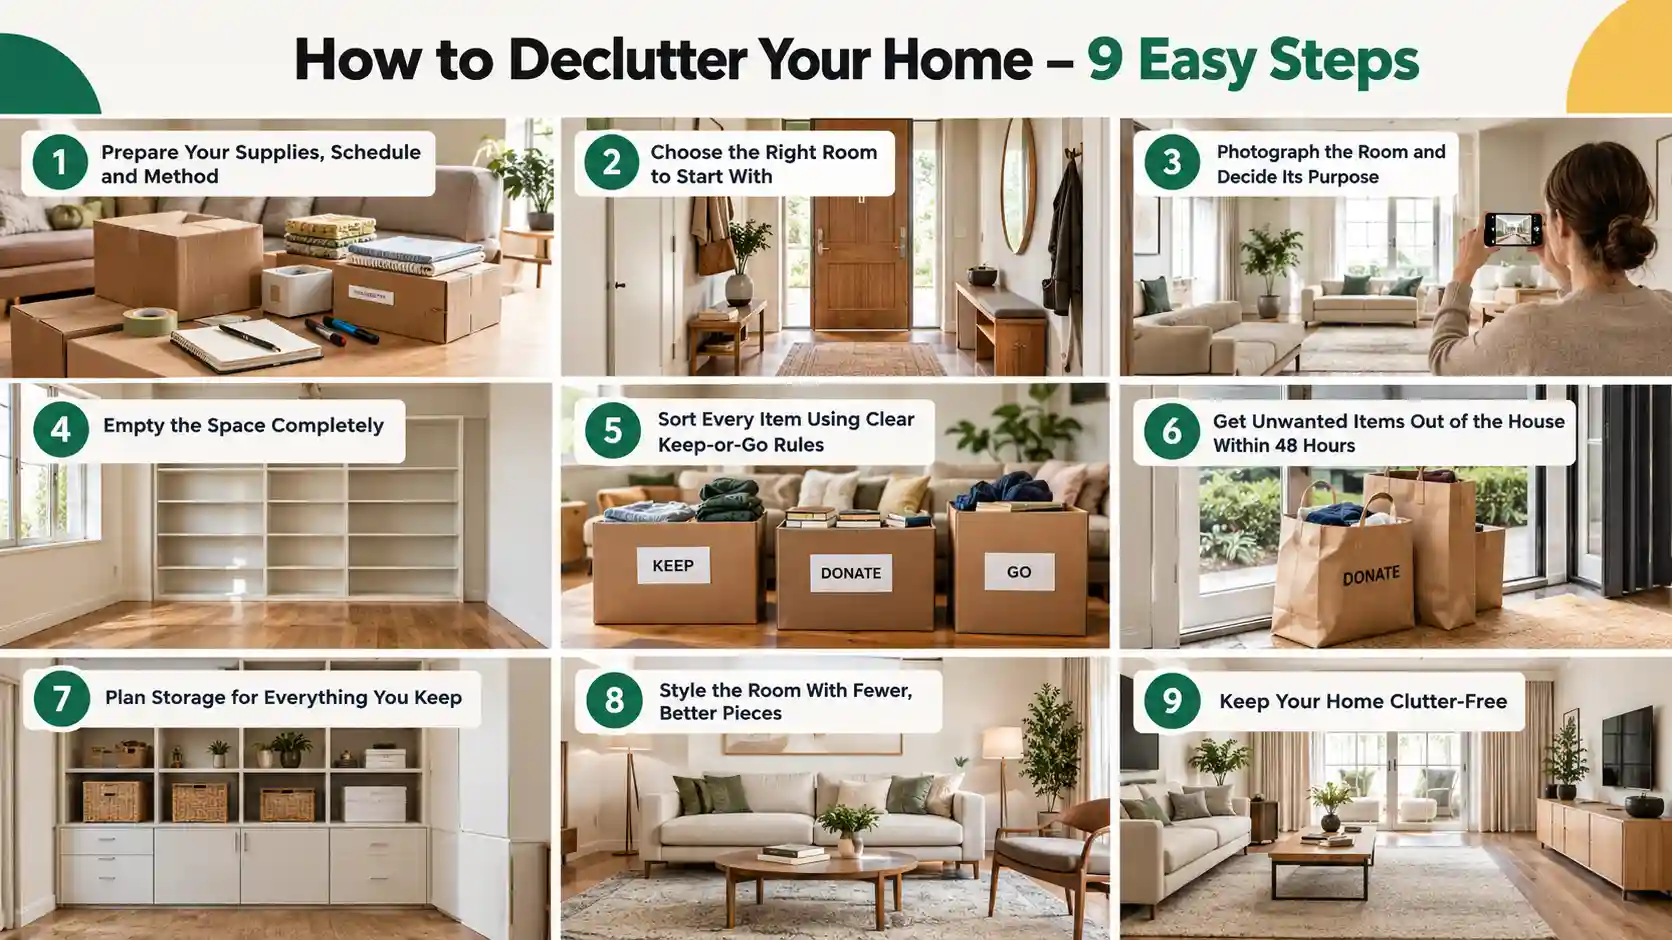
How to Declutter Your Home – 9 Easy Steps
Follow these steps in order for each room. Each one is explained in detail below.
Step 1: Prepare Your Supplies, Schedule, and Method
Ten minutes of preparation stops a declutter from stalling halfway. Before you touch a single drawer, get these three things in place. Set out four boxes or bags labeled Keep, Donate/Sell, Bin/Recycle, and Relocate (for items that belong in another room), plus bin bags, a marker pen and a cloth for wiping empty shelves.
Book short 20- to 30-minute sessions in your diary rather than one exhausting weekend. Decision-making gets worse the longer you go, so short, regular sessions produce better choices. Set a charity drop-off or collection date now so you have a deadline to get things out.
Method. Pick one approach and stick with it:
| Method | How it works | Best for |
| Four-box method | Sort every item into Keep, Donate/Sell, Bin, or Relocate | First-timers who want structure |
| KonMari | Sort by category across the whole house, keeping only what you value | A complete, one-time overhaul |
| 12-12-12 challenge | Find 12 items to bin, 12 to donate and 12 to put back in place | Quick wins on busy days |
| Swedish death cleaning | Steadily reduce belongings so family are not left to sort them | Downsizing and later life |
If you are unsure, use the four-box method. It works in every room and is the method this guide follows.
Step 2: Choose the Right Room to Start With
Start small and easy, and save the emotional areas for last. Early wins build the confidence and decision-making skills you need for harder spaces.
The order that works for most homes is: start with the entrance hall or bathroom, then the kitchen, living room, bedroom, and home office; then the children’s rooms. After that the garage, loft, and storage spaces; and finally sentimental items. The hallway and bathroom are small, hold almost nothing emotional, and you use them every day, so you feel the benefit immediately. Sentimental belongings come last because by then you will have practiced making decisions on dozens of easier items.
Within each room, start with the surface you see first when you walk in, such as a coffee table, kitchen worktop, or bedside table. Clearing it changes how the whole room looks in minutes.
Step 3: Photograph the Room and Decide Its Purpose
Before removing anything, take a photo from the doorway and decide what the room is for. These two actions turn a vague tidy-up into a focused edit.
A photo flattens the room into a picture, so clutter you no longer notice in person stands out clearly on a screen. Interior designers use the same trick to judge their own schemes. Keep the photo to compare with your finished room; the difference is highly motivating.
Next, write one sentence about the room’s job and where the eye should land. For example: “The living room is for conversation and films, and the fireplace is its focal point.” Anything that doesn’t serve that purpose should leave the room, and anything that distracts from the focal point should move.
Step 4: Empty the Space Completely
Take everything off the surface, out of the drawer, or off the shelf you are working on. Deciding with items still in place rarely works, because the eye skims over familiar objects out of habit.
Work one zone at a time, such as one shelf, one cupboard or one table, so the room never becomes unusable. With the space empty, wipe it clean and look at it bare. This is the moment to notice the proportions, light, and finishes of the room, and to remember that whatever goes back has to earn its place.
Step 5: Sort Every Item Using Clear Keep-or-Go Rules
Pick up each item one at a time and put it straight into one of your four boxes. Firm rules make this fast; vague questions like “Might I need this?” lead to keeping everything.
Ask three questions of every object. Have I used it in the past 12 months? Would I buy it again today? Would I choose it if I were furnishing this room from scratch? If the answer to two of them is no, it goes in the Donate/Sell or Bin box. Anything broken, expired, or missing parts goes straight in the bin.
For the few items you genuinely cannot decide on, use a holding box. Seal it, write today’s date on it, and store it out of sight. If you haven’t needed anything from it in six months, donate it unopened. At the end of each session, take the Relocate box around the house and put every item back in its proper room. This stops clutter from simply moving from one space to another.
Step 6: Get Unwanted Items Out of the House Within 48 Hours
A declutter is only complete when items have left the house. Wherever possible, send them somewhere they will be reused rather than to landfill.
| Item | Best route | What to know |
| Furniture | Furniture charities (many collect for free), online marketplaces | Some charities need fire-safety labels on upholstered pieces |
| Designer and vintage pieces | Specialist dealers, auction houses, resale platforms | Price from recently sold items, not asking prices |
| Decor, clothes, books, toys | Charity shops, community groups | Clean items first; damaged goods cannot be resold |
| Electronics and lighting | E-waste recycling points, retailer take-back schemes | Wipe personal data from devices |
| Paint, batteries, chemicals | Household hazardous-waste or recycling centers | Never put batteries in general waste |
| Worn-out textiles | Textile recycling banks | Damaged fabric is recycled into insulation and rags |
If you are selling, set a 30-day limit. Anything unsold by then goes to charity, so the decision does not linger in a corner of the room.
Step 7: Plan Storage for Everything You Keep
Good storage keeps a decluttered room from sliding back. Aim for a home where every everyday object has a place that is easier to use than the nearest flat surface. Plan storage only after you have decluttered, so you design for what you actually own.
- Favor closed storage over open. Open shelving looks beautiful in photographs but only when it is carefully edited. In most homes, a balance of roughly 80% closed storage (cupboards, drawers, lidded boxes) to 20% open display keeps rooms calm while leaving room for personality. Cabinet doors hide visual noise in a way no amount of tidying can.
- Choose furniture that stores. Ottomans with lift-up lids, beds with drawers or gas-lift bases, sideboards rather than open consoles, and benches with storage beneath all add capacity without adding pieces. In small homes, this dual-purpose furniture often makes the biggest difference.
- Go up and go built-in. Floor-to-ceiling joinery around a chimney breast, above a door or under the stairs uses wasted space and reads as architecture rather than furniture. Painting built-in units the same color as the walls makes them recede, so even a wall of storage looks light.
- Create a drop zone. Decide where things land when you come home: hooks for bags, a tray for keys, a basket for post, and a place for shoes. Without one, these items spread across the kitchen and dining table every day.
- Keep containers consistent. Baskets, boxes and jars in one material or color look intentional; a mixture of odds and ends looks like clutter even when it is organized. Woven seagrass, linen boxes or simple white containers suit almost any interior style.
Step 8: Style the Room With Fewer, Better Pieces
A decluttered room can sometimes feel bare or unfinished. Styling it with fewer, better-chosen pieces is what turns an empty-looking room into a calm, considered one.
- Treat empty space as part of the design. Designers call it negative space: the clear areas around objects that let each piece be seen. A sideboard with three well-chosen objects and a stretch of clear surface looks more expensive than one covered edge to edge. Resist the urge to fill every gap.
- Group objects instead of spreading them. Single small items dotted around a room read as clutter; the same items gathered into a group read as a display. Odd numbers, usually three, tend to look most natural, and varying the height (a tall vase, a medium lamp, a low bowl) gives the group shape. A tray is a useful device, because it makes any collection look deliberate.
- Mix texture rather than adding more things. Once quantity drops, texture does the work of making a room feel warm: a wool throw, a linen cushion, a wooden bowl, a stone or ceramic vase. A pared-back room with varied textures feels rich, not sparse.
- Rotate your decorative pieces. Keep a small store of objects, artwork, and textiles, and swap them with the seasons. The room stays fresh without anything new being bought, and items you love stop disappearing into the permanent background.
- Let a few large pieces replace many small ones. One large artwork instead of a cluster of small frames, or one generous plant instead of several small pots, gives a room more impact with less visual noise.
Step 9: Keep Your Home Clutter-Free
A beautifully edited room stays that way only if you control the flow of new things. The habits below protect the look you have created.
Buy for the room, not the moment. Before buying any decorative item, decide exactly where it will go and what it replaces. Designers rarely buy accessories without a destination in mind, which is why their rooms stay coherent. A 48-hour pause before non-essential purchases filters out most impulse buys.
Follow one in, one out. Each new cushion, vase or piece of clothing means an existing one leaves. Quantities stay stable, and every addition becomes an upgrade.
Reset surfaces every evening. Ten minutes returning things to their homes keeps kitchen worktops, coffee tables and the dining table clear, which are the surfaces that most affect how a home looks.
Know when to call in help. A professional organizer or interior designer is worth considering when you are downsizing, combining two homes or planning built-in storage. If clutter comes with intense distress at the thought of discarding things, or rooms can no longer be used for their purpose, it may be hoarding disorder, a recognized mental health condition. In that case, speak to a doctor or mental health professional rather than forcing a clear-out.
Room-by-Room Decluttering Tips
Each room has its own clutter hotspots and its own design priorities. Here is how to edit the main spaces so they look as good as they function.

-
Entrance Hall
The hallway is the first impression of your home and the place clutter arrives. Display only the coats and shoes you use seasonally, and move the rest to a wardrobe. A slim console with a single tray or bowl for keys, a closed shoe cabinet and a wall mirror (which bounces light and visually widens a narrow hall) will do more for this space than any amount of tidying.
-
Living Room
Start with the coffee table and shelves, the surfaces that most affect how the room looks. Clear everything, then return only what earns its place. Tame remote controls, chargers, and gaming kit in a lidded box or a media unit with doors, so screens and wires stop dominating the room. Edit cushions and throws hard: two to four cushions per sofa usually look more deliberate than six. Books read better grouped by color or size, with some laid flat to break up long rows and leave space for an object or two.
-
Kitchen
Worktops are the single biggest factor in whether a kitchen looks calm. Keep only the appliances you use daily out, and store the rest in cupboards. Most kitchens also hold far more mugs, glasses and containers than any household uses at once, so edit duplicates first. Decant everyday staples into matching jars only if you will genuinely keep it up; otherwise a closed larder cupboard looks cleaner. Open shelving works when it holds a small, consistent set of items, such as matching white crockery, rather than a mix of everything.
-
Bedroom
A bedroom should feel restful, so anything unconnected with sleep or dressing, such as paperwork, exercise equipment or laundry, needs a home elsewhere. Keep bedside tables to a lamp, a book, and one personal object.
In the wardrobe, use the reverse hanger test: turn every hanger backward, flip each one after you wear the item, and at the end of a season donate what is still facing the wrong way. Uniform slim hangers alone make a wardrobe look more ordered and fit more in.
-
Bathroom
Bathrooms look hotel-like when surfaces are almost bare. Edit half-used and expired products (the open-jar symbol on packaging shows how many months a product lasts once opened), return old medicines to a pharmacy, and store everything except a soap dispenser and perhaps a plant behind closed doors. Matching dispensers and a single set of towels in one color instantly make a small bathroom look calmer.
-
Home office
Paper is the enemy of a good-looking workspace. Go paperless where possible, scan what you need to keep, and shred anything with personal details. Keep the desk surface to a lamp, your screen, and one object you enjoy looking at, and run cables through a tray or clip under the desk so they disappear.
-
Children’s rooms
Children’s spaces work best with low, open storage they can reach and a strict limit on containers. Rotate toys, keeping a selection out and swapping them every few weeks, so the room stays manageable and old toys feel new. Choose a few favorite drawings to frame properly, which turns children’s art into a design feature rather than fridge clutter.
-
Garage, loft and storage spaces
Leave these until last. Out-of-sight spaces are where homes hide items already decided against. Clear them in a half-day session with help, take old paint and chemicals to a recycling center, and store what remains in clear, labeled boxes on shelving rather than on the floor.
How to Declutter Sentimental Items
Sentimental belongings are the hardest to declutter, so leave them until last. The interior designer’s answer is not to hide them all in boxes, but to keep the best pieces and give them the presentation they deserve.
Start by remembering that the memory does not live in the object. Letting go of a gift does not reject the person who gave it. Then set a limit, such as one memory box per person or one display shelf for family pieces, which turns an emotional question into a practical one: is this among the best things to keep in the space available?
The pieces that make the cut should be seen. A grandmother’s teacups can become a small grouping on an open shelf; an old map or letter can be framed with a deep mount; a child’s best drawing can hang in a proper frame alongside adult artwork. You can turn textiles such as old shirts or fabric into a cushion or quilt. Displayed this way, sentimental items add character and a sense of history to a room, which is exactly what makes a home feel personal rather than showroom-perfect. Offer remaining family heirlooms to relatives before donating, and allow extra time after a bereavement; there is no deadline for this part of the process.
Final Thoughts
Decluttering is the most affordable interior design upgrade there is. Editing what you own reveals the proportions, light, and character of your rooms, and gives the pieces you love the space to be seen. Start with one surface, decide with a designer’s eye, invest in storage that fits what remains, and style with restraint. The result is a home that looks calmer and feels better to live in.
Frequently Asked Questions
These answers cover the questions homeowners ask most often when decluttering and restyling a home.
Which room should I declutter first?
Start with the bathroom or the entrance hall. Both are small and low in sentimental value, and a clear hallway changes how the whole home feels the moment you walk in.
Should I declutter before redecorating?
Always. Decluttering first shows you how much storage you really need, prevents you from designing around items you will later remove, and makes painting and furniture planning far easier.
How do I stop a decluttered room from looking empty?
Add texture rather than more objects: layered textiles, natural materials, plants, and one or two larger pieces of art. Group the decorative items you kept into small, varied-height arrangements so the room feels finished.
Is minimalism the same as decluttering?
No. Minimalism is a design style built on very few possessions. Decluttering simply removes what you do not use or love, and suits any style, from maximalist to Scandinavian.
How long does it take to declutter a house?
A one-bedroom flat usually takes three or four focused weekends. A family home typically needs six to twelve weeks of regular short sessions, plus extra time for the loft or garage.