
Can You Paint Over Wallpaper? Steps, Primer & Tips
Yes, you can paint over wallpaper. Under the right conditions, it can produce a better wall than stripping. It works when the high-quality wallpaper still bonds tightly to the wall, the room stays dry, and the surface carries little or no heavy texture. It goes wrong when seams lift, moisture sits behind the paper, or a previous owner hung a second layer over the first.
Painting over the wall covering depends entirely on what you find when you inspect the wall. So before you buy anything, spend ten minutes properly inspecting the wall. In this guide by Floor Land, you will learn which conditions are suitable for painting over wallpaper and when removing it is most appropriate.
When to Paint Over vs. Remove Wallpaper
| Situation | Paint over it | Remove it | Why |
| One tight layer, dry room, light texture | Yes, best choice | Optional | Sound bond, low risk, fast result |
| Two or more layers | No | Yes | Hidden bond lines fail unpredictably under paint |
| Unprimed drywall underneath | Yes | No | Stripping tears the drywall face and forces a full skim coat |
| Bathroom or laundry with real steam exposure | No | Yes | Paint reduces drying capacity and traps moisture behind paper |
| Woodchip, anaglypta, lining paper | Yes | Optional | Made to be painted |
| Grasscloth or textile wallcovering | No, if you want smooth | Yes | Texture and fiber pattern survive any number of coats |
| Peel-and-stick | No | Yes | Edges curl under paint film tension; removal is quick |
| Isolated bubbles or small tears | Yes, after repair | Optional | Repairable with adhesive and filler |
| Mold, musty odor, or damp staining | No | Yes | Moisture source needs fixing before any coating |
| Old paper on plaster, hollow-sounding but stable | Judgment call | Risky | Stripping can bring plaster with it |
How to Prepare Wallpaper for Painting
Preparation carries this job. The paint itself takes an afternoon. What happens before the first coat decides whether the wall still looks good in five years.
Step 1: Fix Loose Seams and Edges First
Work around the room with a putty knife and find every seam that lifts. Slide a small amount of wallpaper seam adhesive underneath with an artist’s brush or a glue syringe, press the edge back, and roll it flat with a seam roller. Wipe the squeeze-out immediately with a barely damp cloth, because dried adhesive shows as a glossy ridge through paint.
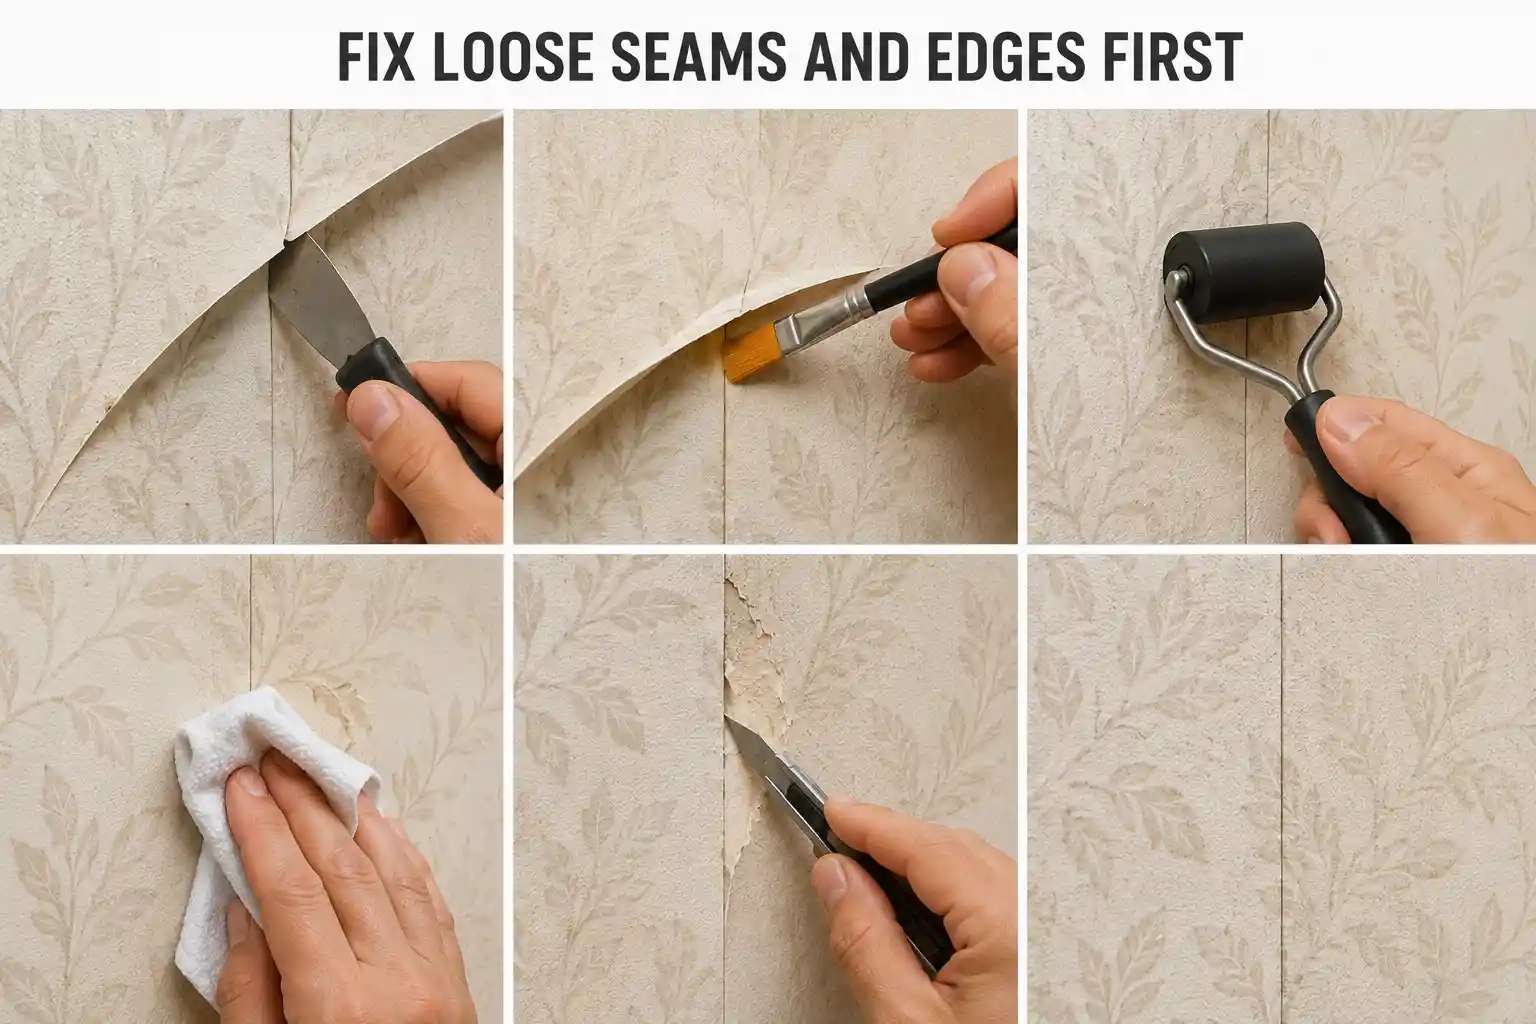
Where an edge has torn or gone brittle, cut the damaged section back to sound paper with a sharp blade rather than trying to glue a frayed edge. A clean cut edge fills neatly. A ragged one never does.
Step 2: Deal with Bubbles Properly
Slit each bubble with a fresh utility blade, ideally with two short cuts in a shallow X rather than one long slash. Work adhesive under both flaps, press them back down, and roll. If you inject adhesive without cutting, you trap air and the bubble returns.
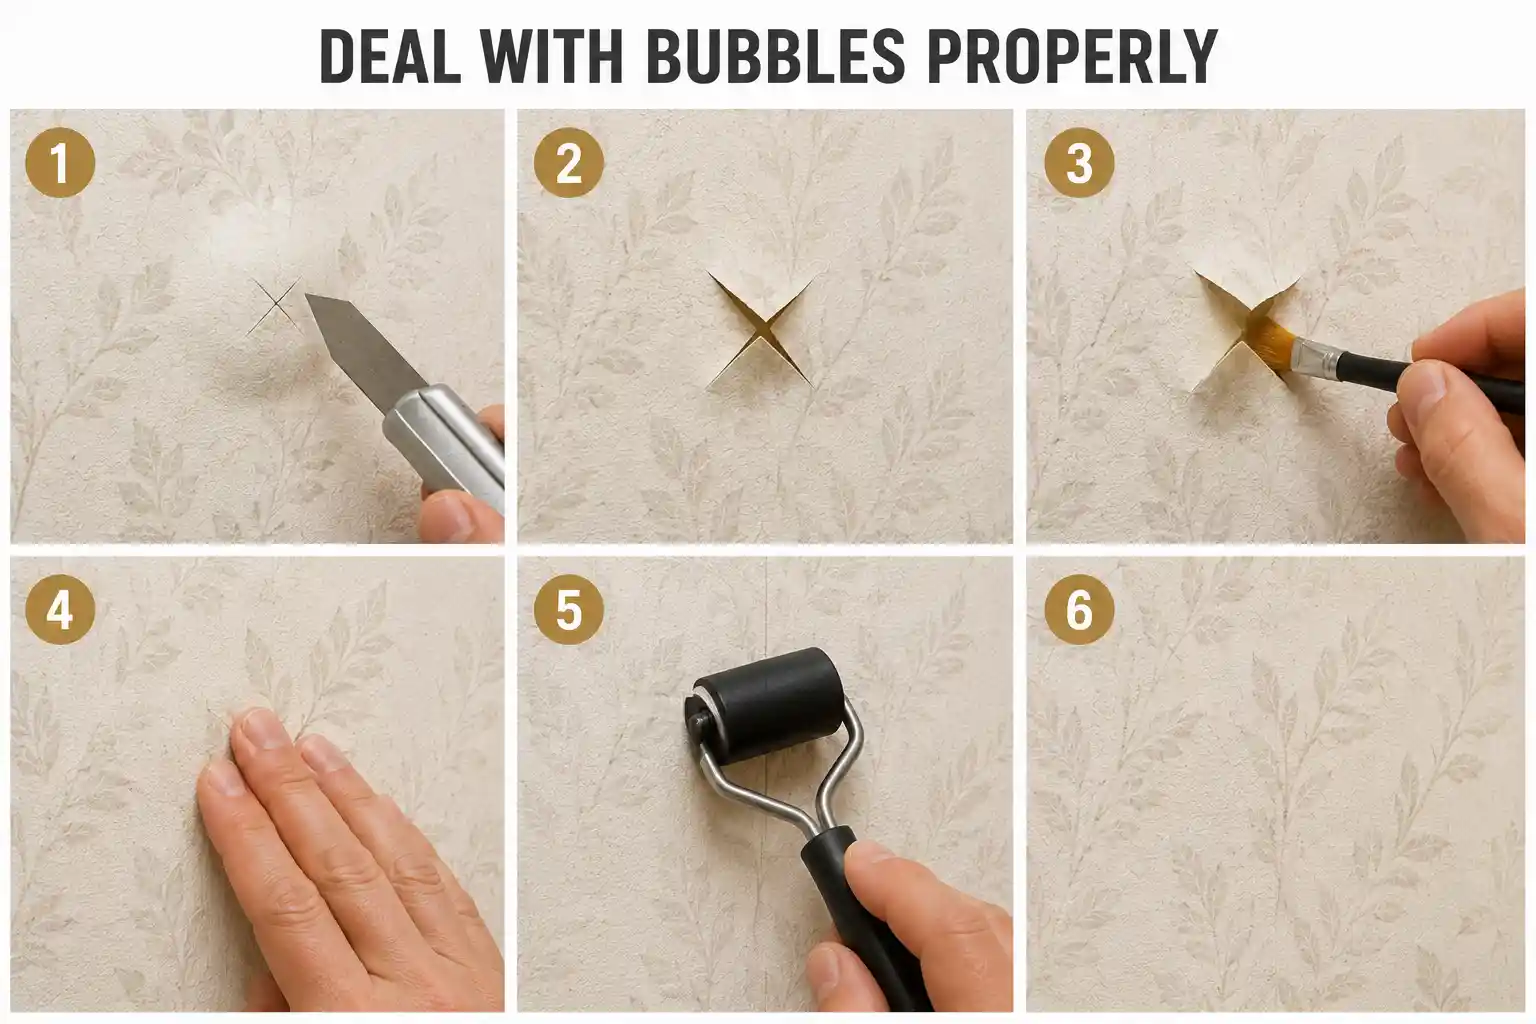
Bubbles that reappear after repair are telling you something. Either moisture is moving through the wall, or the adhesive fails across a wide area. Both point to removal.
Step 3: Do Proper Cleaning
Grease, nicotine, and cooking residue stop primer from bonding, so the wall needs cleaning. The mistake people make is washing wallpaper the way they would wash painted drywall. Water reactivates wallpaper paste. A soaked wall will lift seams and blisters before you even open a paint can.
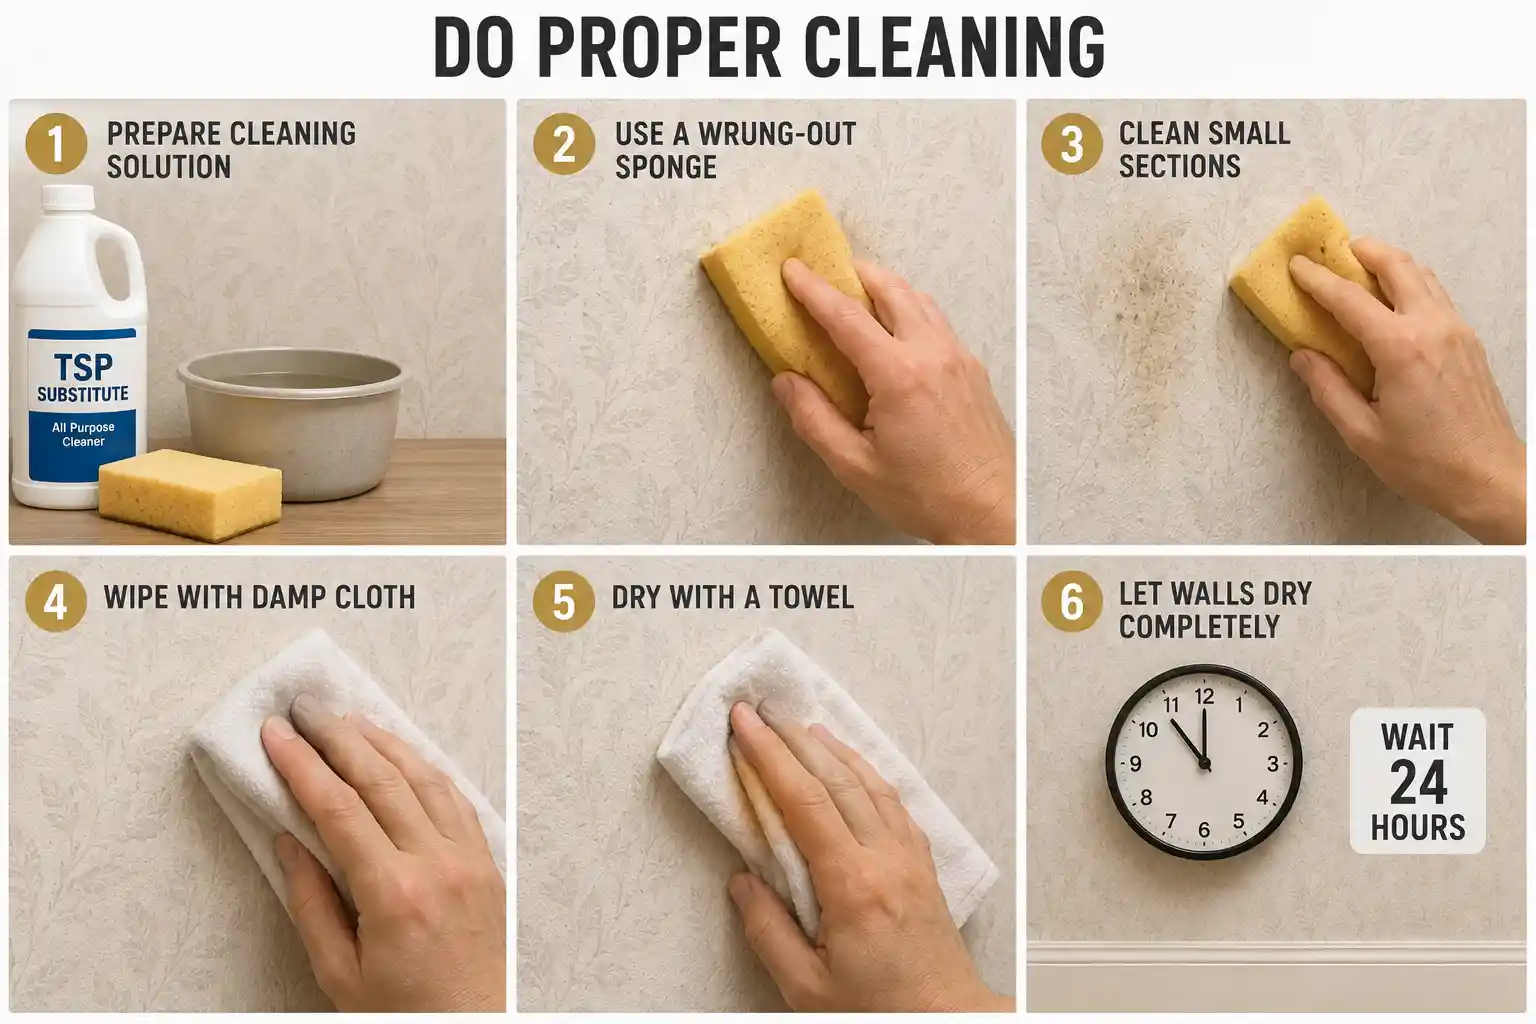
Use a degreaser, a TSP substitute, or sugar soap on a sponge you have wrung out until it barely feels wet. Work in small sections, wipe with a clean, damp cloth, and dry each section with a towel as you go. Give the walls a full 24 hours to dry before priming.
Step 4: Decide How Far to Go on Texture and Seams
This step separates an acceptable result from a professional one. Wallpaper seams sit slightly proud of the surface. Paint does not hide them. Side light from a window or a lamp picks out every ridge.
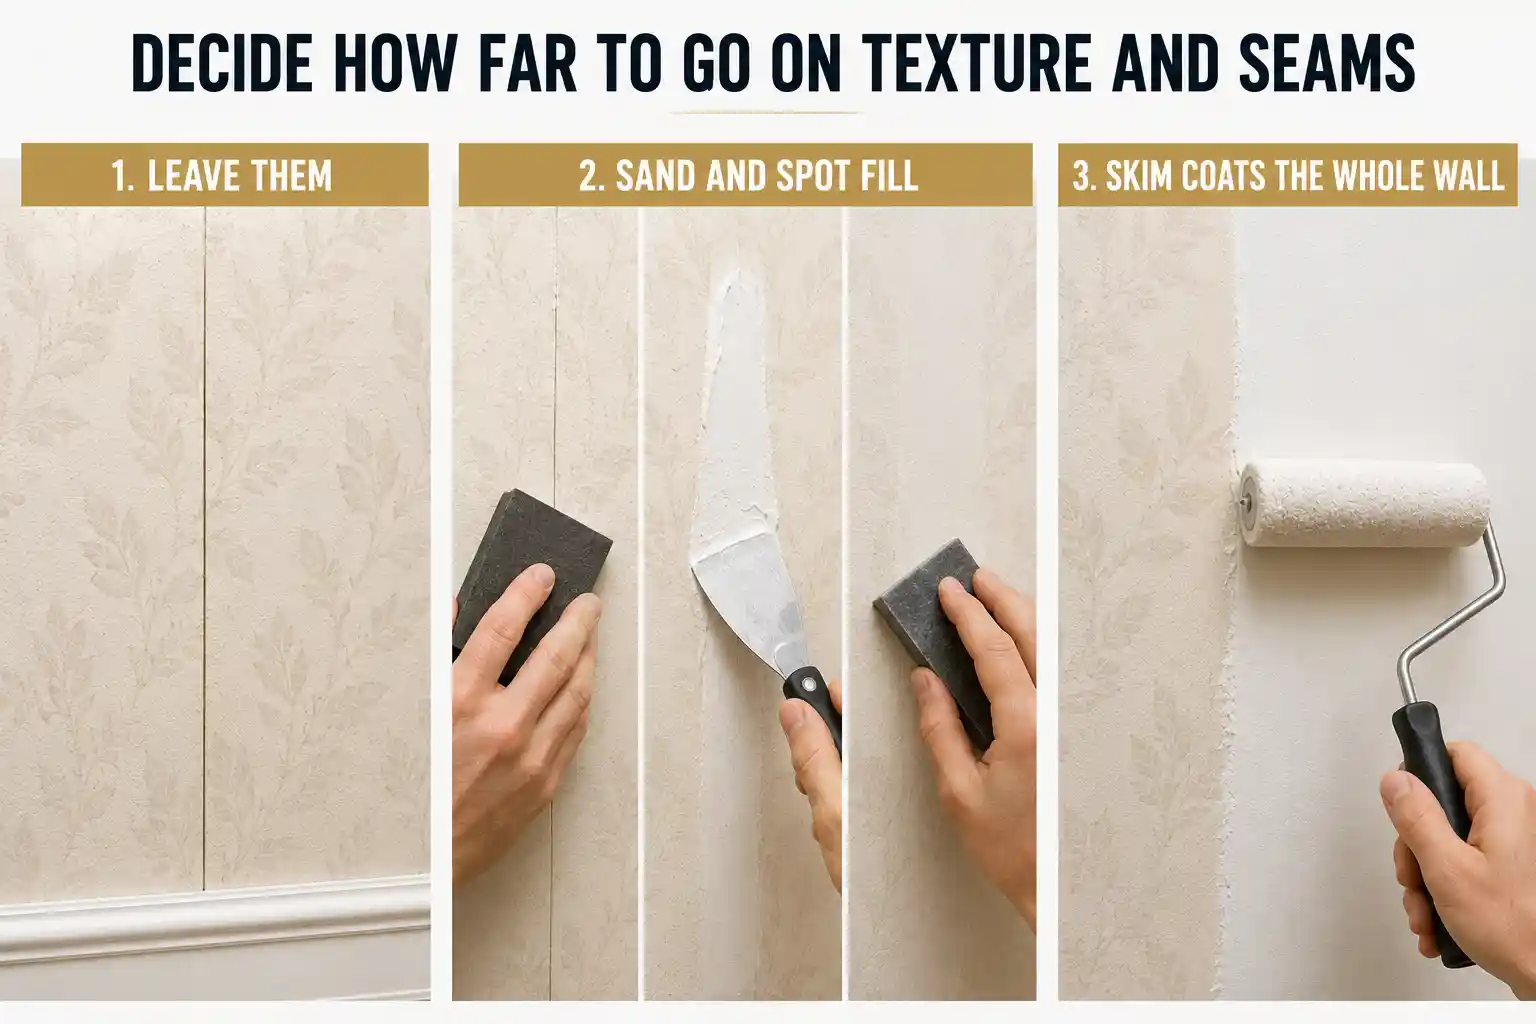
You have three options, in ascending order of effort and quality:
- Leave them. Fine in low-light rooms, on textured papers, and under a flat finish.
- Sand and spot fill. Feather the seam edges with 120 to 150 grit, then apply a thin skim of lightweight joint compound about four to six inches wide across each seam. Sand at 180 grit once dry. This is the sweet spot for most rooms.
- Skim coats the whole wall. Prime first, then apply a full thin coat of compound. Reserve this for heavily patterned or embossed paper you want gone visually.
A word on caulk in seams: it is quick, and it is the most common shortcut that shows. The flexible caulk stays slightly rubbery, holds a different sheen from the surrounding wall, and reads as a soft line down the wall in raking light. Joint compound sands flush and disappears. Save caulk for the junction between wall and trim.
Do You Need a Primer While Painting Over Wallpaper?
Primer is not optional here. The type of primer that you use for the wallpaper matters more than the brand.
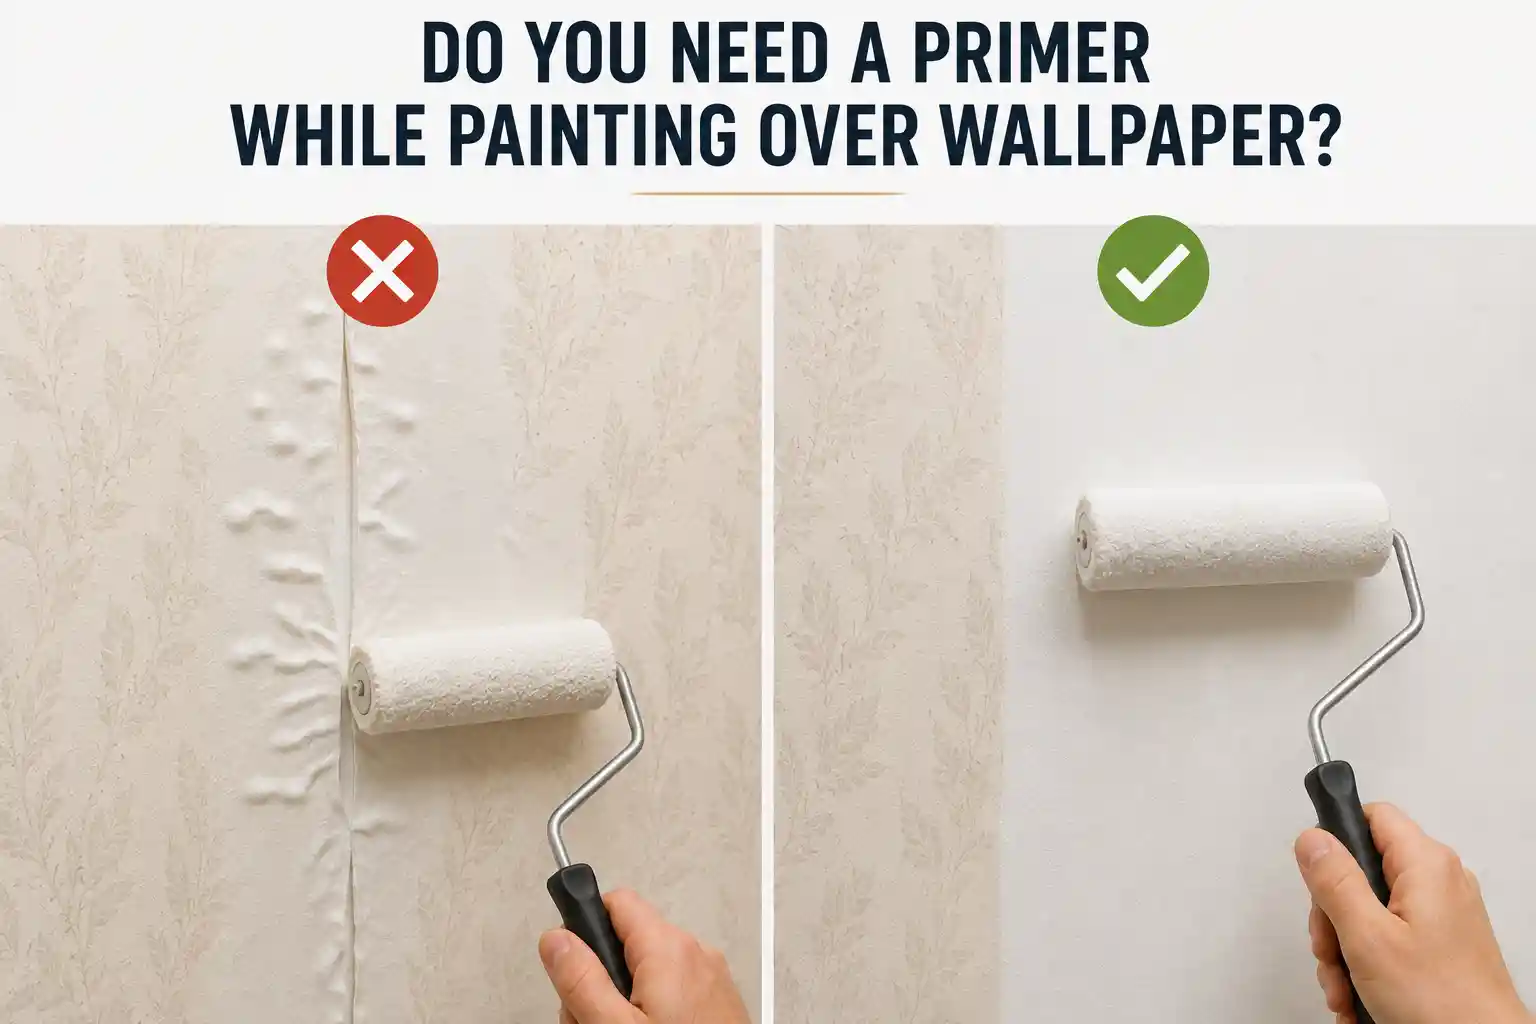
Wallpaper paste is water-soluble by design. Roll a water-based primer or standard emulsion straight onto paper, and you rewet that paste. The paper swells, bubbles appear within minutes, and seams open up. It looks fine while wet and terrible an hour later.
A solvent-based primer avoids that because it carries no water into the paste. It also seals the paper face so the finish coat sits on a uniform surface, and it blocks the dyes, inks, and old wall sizing that otherwise bleed yellow or pink through light-colored paint. Older papers were often hung over glue size, which is a classic bleed-through culprit.
| Primer type | Best for | Watch out for |
| Pigmented shellac | Strong patterns, dye bleed, water stains, fast turnaround | Strong fumes, needs ventilation, clean tools with denatured alcohol |
| Oil-based (alkyd) stain blocker | General sealing, slightly more forgiving to apply | Slow drying, usually 8 hours or more before recoat |
| Purpose-made wallpaper cover primer | Textured or patterned paper you want to level slightly | Thicker body, heavier to roll, still needs sound seams underneath |
| Water-based/acrylic primer | Only over previously painted, fully sealed wallpaper | Rewets paste on bare wallpaper and causes bubbling |
Pigmented shellac earns its reputation on this job. It dries in fifteen to thirty minutes, so you can prime and recoat in the same day, and it pulls moisture out of the paper rather than adding it. Ventilate the room properly and wear a respirator, because the fumes are strong.
How to Paint Over Wallpaper
Painting over the wallpaper is an easy job once you know the right steps. Take a look at the steps you can follow when painting over wallpaper.
- Mask and protect. Run decorator’s tape along the trim and cover the floor. Solvent primer splatters more than emulsion and does not wipe off easily once it grabs.
- Prime the problem spots first. Hit repaired seams, filled patches, and any stain with a brush coat of primer, let it dry, and check for bleed-through before you commit to full walls.
- Prime the walls. Cut in the edges, then roll. Keep the coat even and moderate, not heavy.
- Inspect under a work light. Hold a lamp close to the wall and look along the surface at a shallow angle. Primer reveals every flaw the wallpaper was hiding. Fill and sand anything you find now, then spot prime the repairs.
- Apply the first finish coat. Cut in, then roll.
- Let it dry fully, then apply the second coat. Follow the recoat time on the can rather than guessing, because a second coat over a soft first coat drags and lifts.
- Pull the tape while the last coat is still wet. Dried paint tears at the tape line.
Can You Use a Roller on Wallpaper?
Yes, and a roller is the right tool. The technique needs one adjustment. Use less pressure than you would on drywall.
Pressing hard drives paint and moisture into seam lines and softens the paper underneath. Load the roller properly and let the nap do the work. Choose a 3/8 inch nap for smooth and lightly textured papers, and a 1/2 inch nap for woodchip or deep embossing, where a short nap skips the recesses and leaves pinholes.
Roll each section once and move on. Going back over an area that has started to set is what lifts seams and leaves roller marks. Cut in seams gently with a brush rather than running a loaded roller repeatedly along them.
How to Paint Over Patterned Wallpaper
Patterned paper is paintable. The pattern is a primer problem, not a paint problem. Dark inks, metallic accents, and saturated reds and blues bleed through water-based coatings readily. A pigmented shellac or oil-based stain blocker stops them in a single coat. Expect a light pattern to disappear under primer plus two finish coats, and a bold high-contrast pattern to need a second primer coat in place.
Deep embossing behaves differently. The primer seals the ink but does nothing about relief. If the raised design will bother you, level it with a skim coat over the primer, or accept that you are painting a textured wall rather than a flat one. Testing one wall before doing the room saves a lot of regret.
How to Paint Wallpaper in Bathrooms, Kitchens, and Damp Rooms
Treat these rooms with more caution than any other. Wallpaper paste stays sensitive to moisture for its whole life, and a paint film slows how quickly the wall dries after each shower. Moisture that would previously have passed through and evaporated now sits behind a sealed surface, softens the paste, and grows mold where you cannot see it.
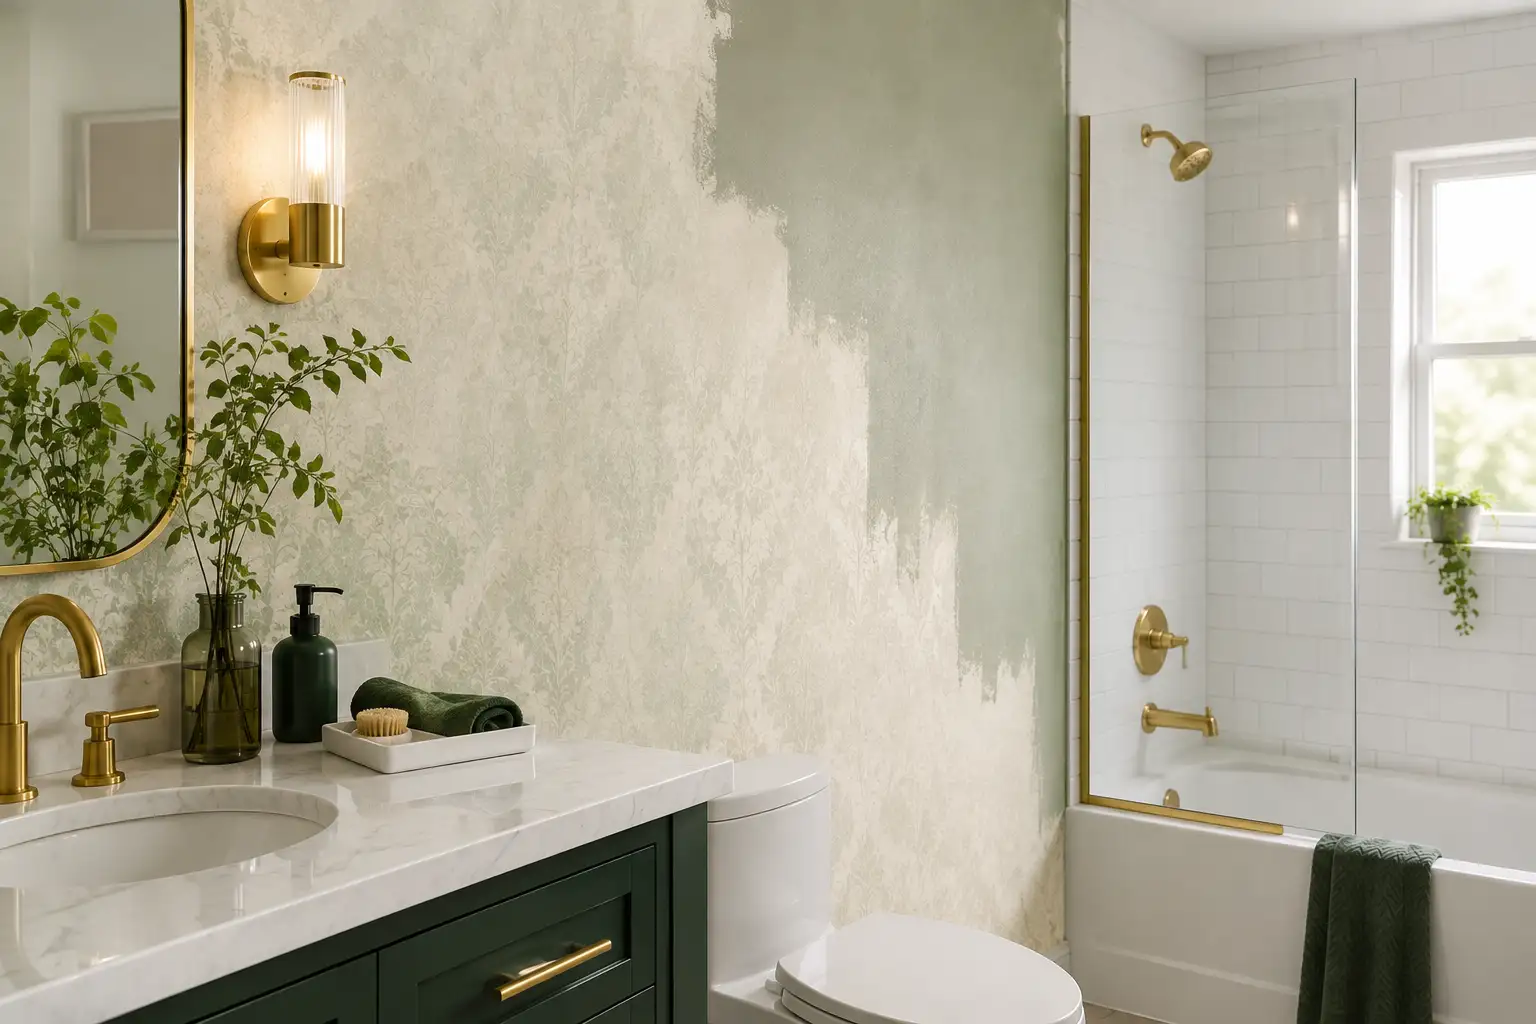
Paint work over wallpaper in a powder room with no shower, decent ventilation, and paper that passes every check is usually fine. A family bathroom with a shower running twice a day is a different situation. Strip it, repair the wall, and use a moisture-resistant paint. That answer holds up.
If you paint anyway because removal is impractical, use a solvent-based primer, choose a bathroom-grade topcoat with mildewcide, run the exhaust fan reliably, and treat it as a temporary finish rather than a permanent one.
What Paint to Use Over Wallpaper?
Once the primer has sealed the surface, the wallpaper stops being a factor. You are painting a sealed wall. Standard acrylic latex wall paint works, and yes, acrylic paint is fine, provided it goes over solvent-based primer rather than directly onto paper.
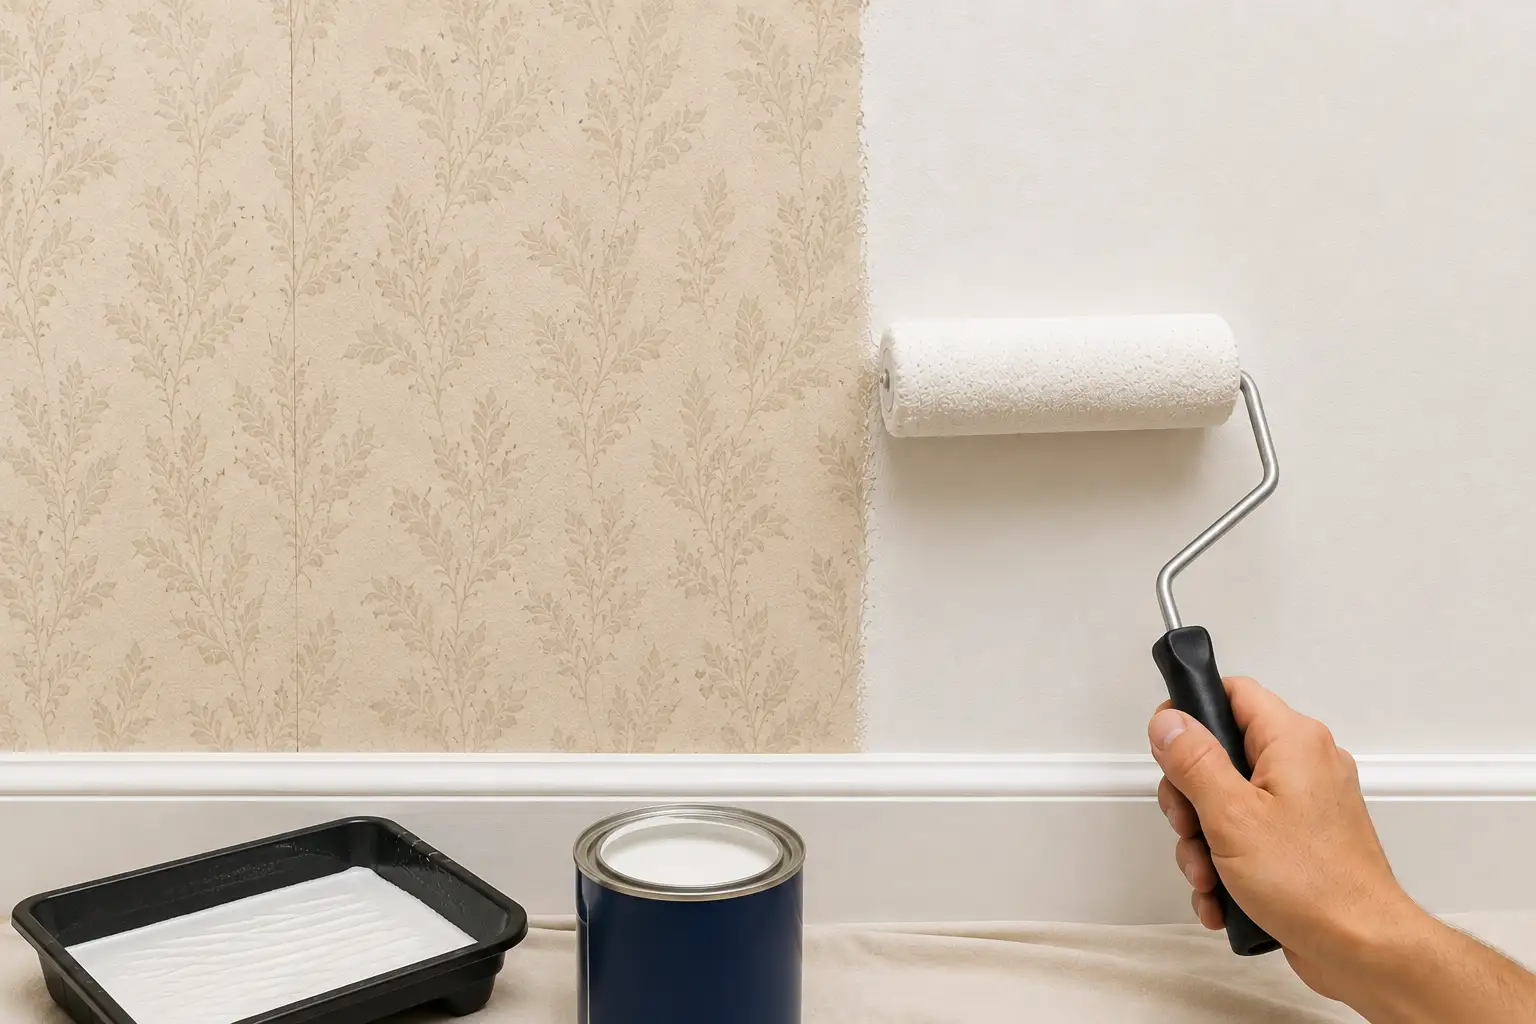
Sheen deserves more thought than color. Glossier finishes reflect light across the surface and expose every seam, ridge, embossing line, and filled patch. The flatter the finish, the more forgiving the wall.
- Matte or flat: hides seams and texture best. Choose a scrubbable matte for hallways and family rooms.
- Eggshell: a reasonable compromise, slightly washable, still fairly forgiving.
- Satin and above: only over walls you have a skim-coated flat. On raw wallpaper seams, satin makes them obvious.
Apply two thin coats rather than one heavy one. A thick coat carries more water and more shrinkage stress, and shrinkage is what pulls at seams as the film cures.
Do You Need to Sand Wallpaper Before Painting?
Not as a whole-wall task, no. Sanding an entire wallpapered wall risks cutting through the face paper. Once you tear the surface, you create a repair that needs filling and feathering.
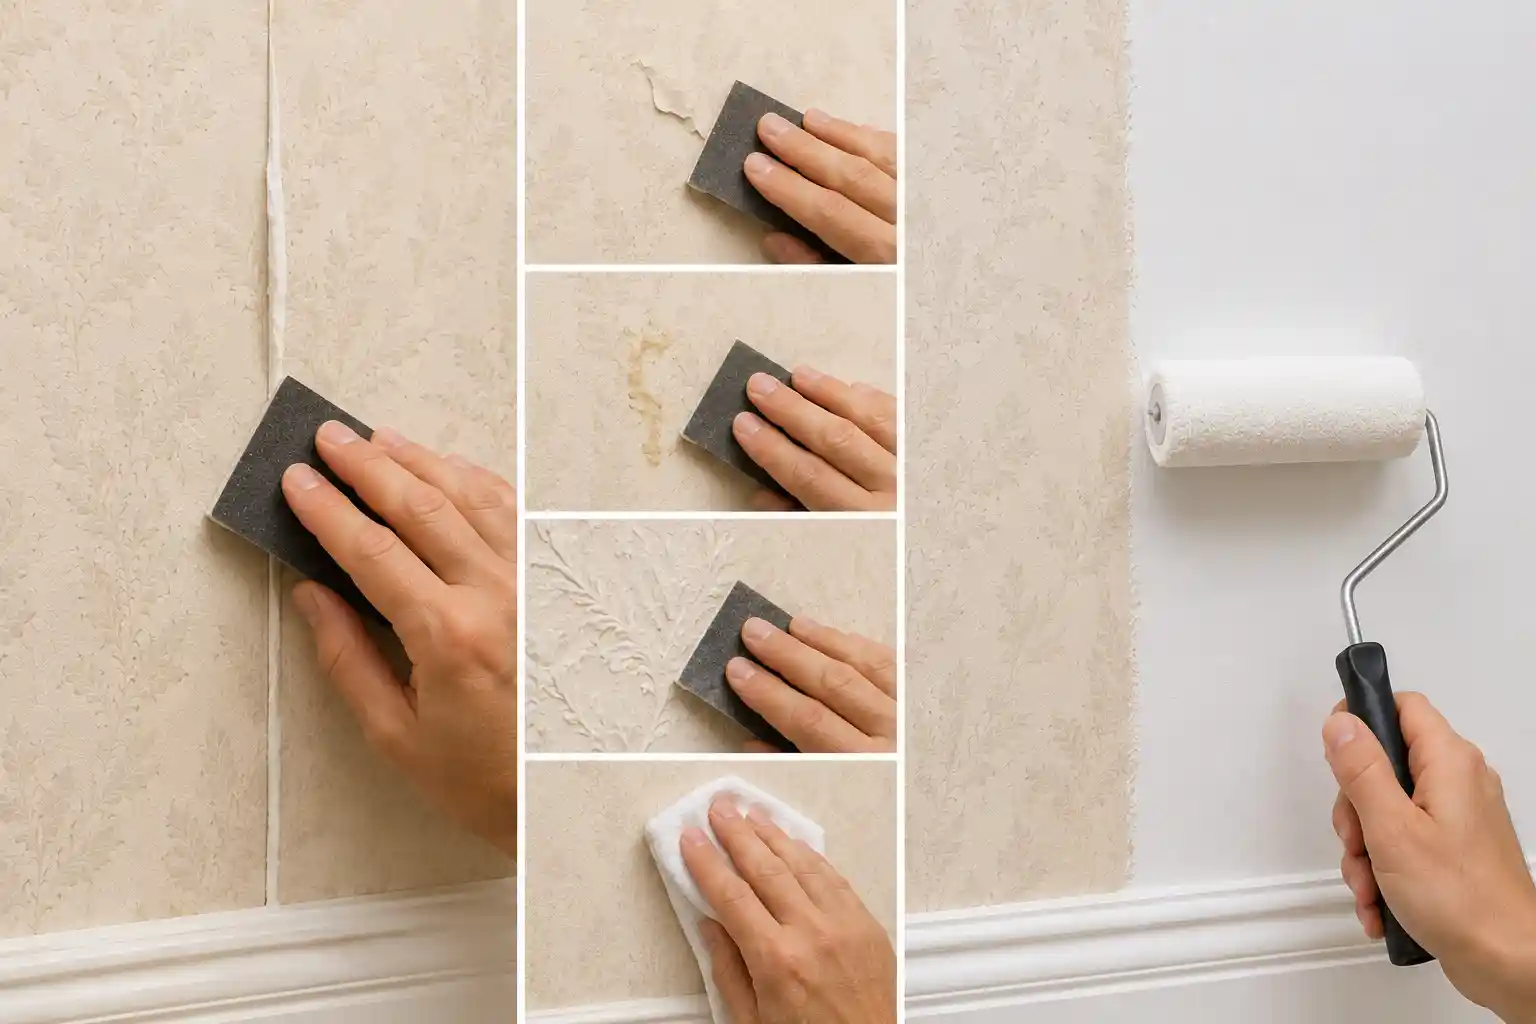
Sand selectively instead:
- Feather the raised edges at seams
- Knock down lifted flecks, dried adhesive ridges, and repair patches
- Scuff slick vinyl-coated surfaces with 150 to 180 grit to give the primer some tooth
- Level heavy embossing only if you are committed to skim coating afterward
Vacuum the dust and wipe with a dry microfiber cloth before priming. Damp wiping puts water back into the paper right when you least want it.
What Not to Do When Painting Over Wallpaper
Some mistakes feel minor but can ruin the overall painting job over the wallpaper.
- Rolling water-based primer onto bare wallpaper. This is the single most common failure. Bubbling starts within the hour.
- Washing the walls is too wet. In this condition, soaked paste releases and the seams open.
- Skipping seam repair to save an hour is another common mistake. You spend the hour later on a wall that is now wet and painted.
- Caulking seams instead of filling them. The line stays visible under every light.
- Choosing satin because it wipes clean. It also spotlights every ridge you left.
- Painting over paper you never checked for layers. Hidden bond lines fail after the paint cures, weeks later.
- Ignoring a musty smell. Sealing a damp wall turns a small problem into a rebuild.
- Forgetting what you are handing the next person. Once painted, that wallpaper needs scoring and steaming to remove. Note it somewhere.
Final Thoughts
Painting over wallpaper can save time and prevent unnecessary wall damage. But it works only when the existing paper gives you a sound surface to work with. Check the seams, layers, texture, moisture, and condition of the wall before reaching for a roller. A properly repaired and sealed surface can deliver a clean, durable finish, while loose paper, trapped moisture, heavy layers, or unstable wallpaper call for removal instead.
The primer also matters. Using the wrong one can reactivate the adhesive and leave you with bubbles, lifted seams, and bleed-through. The key is to treat the wallpaper as the substrate it is, not simply as something to cover. Good preparation determines whether the finished wall looks professionally painted or merely painted over.
Frequently Asked Questions
You can, but only in one case. It works when the wallpaper has already been painted with a sound, well-bonded coat and you are simply refreshing the color. The existing paint film is doing the sealing job.
Use a solvent-based primer first, either pigmented shellac or an oil-based stain blocker, then a standard acrylic latex wall paint in matte or eggshell. The primer does the sealing work, so the topcoat can be whatever you would normally use on that wall.
Yes, over primer. Acrylic and latex paints carry water, so applying them directly to unprimed wallpaper reactivates the paste and causes bubbling. Seal first, then acrylic performs well.
Usually yes. Sanding matters at seams, repairs, and on slick vinyl faces. If your paper is flat, matte, and free of raised edges, cleaning and priming is enough.
Yes. Use light pressure, a 3/8 inch nap on smooth paper or 1/2 inch on textured paper, and avoid rolling repeatedly over the same seam.
Only in a low-moisture bathroom with good ventilation and paper that is tightly bonded. In a room with a working shower, removal is the durable answer.
Color and pattern disappear cleanly. Texture and seams do not. After two finish coats, you get a wall that reads as painted from normal viewing distance, with faint vertical seam lines visible when light rakes across the surface. Skim coating the seams removes those lines. Anyone expecting new drywall from a paint job alone will be disappointed.
Give it 24 to 48 hours in a ventilated room. Painting over paste that has not cured traps moisture and causes blistering.
Not reliably. You are then hanging a heavy, wet covering on a paint film that sits on old paste. Strip back to the wall first.


