
How to Remove Wallpaper: Methods, Tools & Step-by-Step Guide
To remove the wallpaper, loosen the wallpaper glue with warm water or a commercial wallpaper removal solution. After that, scrape it off carefully with a scraper. For vinyl wallcovering, score it first so moisture can penetrate easily. For the best result, work in small sections. Also make sure to keep the surface damp while scraping. Once you remove all the wallpaper, remove the glue and let the wall dry completely. Strippable and peel-and-stick papers usually pull away in full sheets. Drywall is the surface most at risk, since its paper face tears about as easily as the wallpaper above it. Plaster tolerates more water and firmer scraping, so the wall matters as much as the paper.
In this blog post by Floor Land, you will learn the ways to remove different wallpapers. Additionally, the mistakes that you must avoid while doing this process.
What You’ll Need for Removing Wallpaper
You don’t need every tool on this list. Some of the tools that are crucial for this process are given below:
- Plastic putty knife or wide plastic scraper (the metal 5-in-1 is for tough spots only)
- Scoring tool, for coated or vinyl paper
- Pump sprayer or spray bottle
- Wallpaper steamer, rented or borrowed
- Bucket, sponge, and old towels
- Drop cloths and painter’s tape
- Wallpaper removal solution or dish soap
- Joint compound, sanding sponge, and primer for the repair stage
- Gloves and safety glasses
A garden pump sprayer beats a spray bottle in any room bigger than a powder room. Your hand will thank you an hour in.
Best 4 Ways to Remove Wallpaper
Below is a list of methods you can follow to remove wallpaper easily.
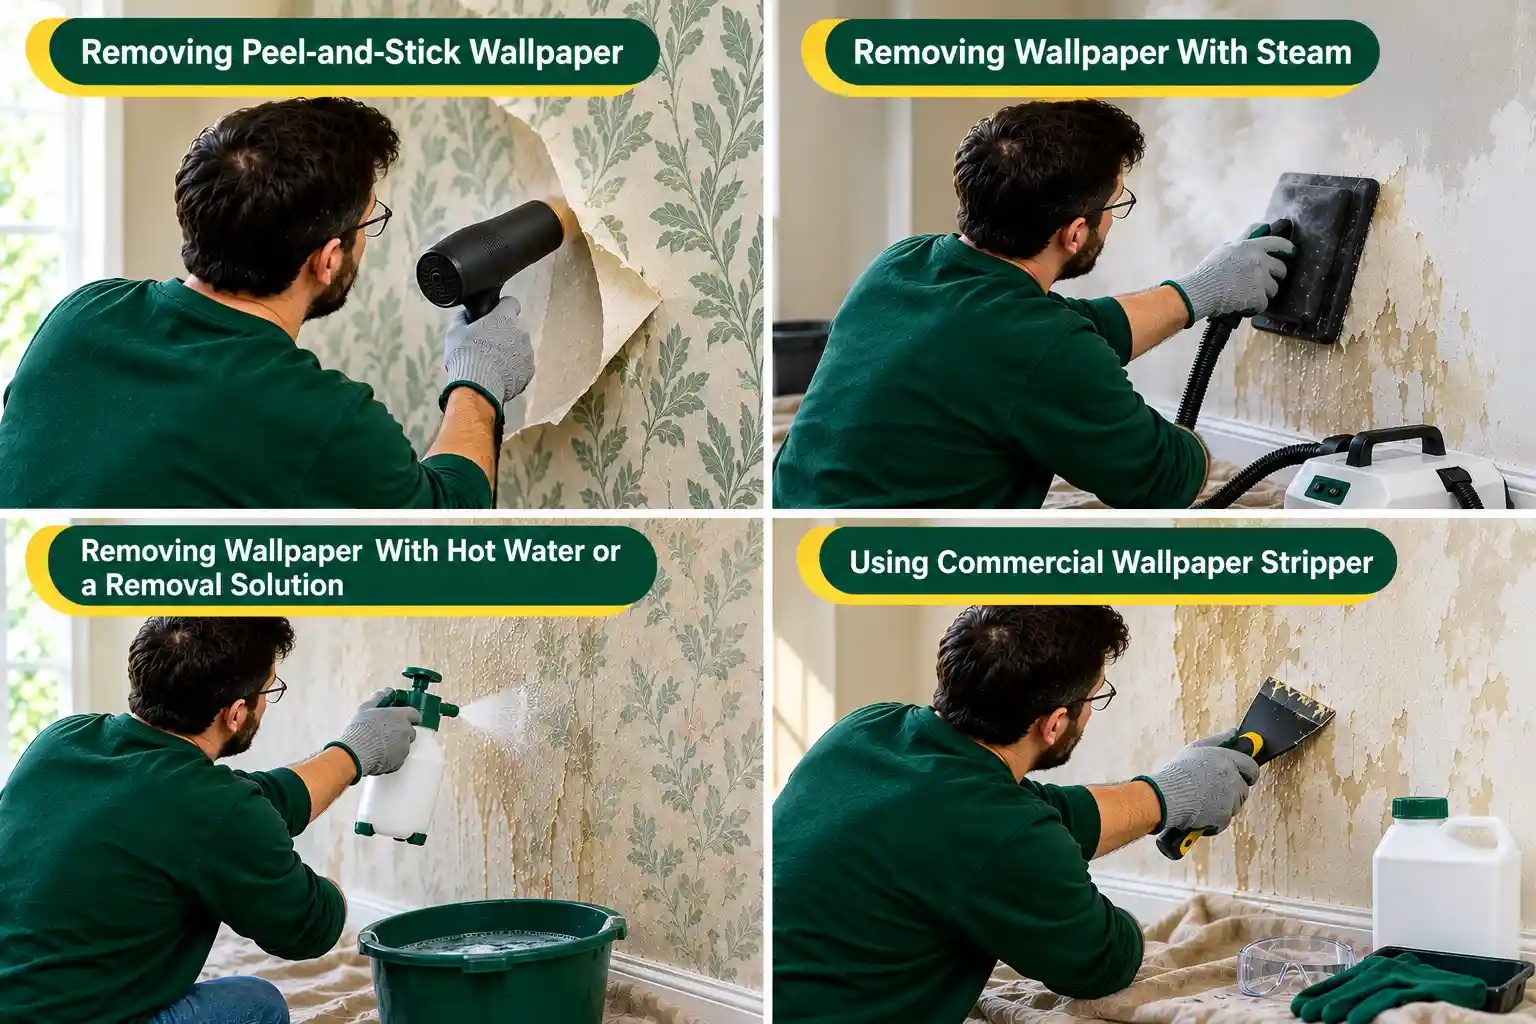
1. Removing Wallpaper With Steam
Steam pushes hot moisture through the paper and into the paste layer. Soft the glue that surface water cannot reach. It is the most effective option for old paper, several layers, and anything that has been painted over.
- Fill the tank, let the unit come up to temperature, and start at the top of your section.
- Hold the plate flat for twenty to thirty seconds, then move it to the adjacent spot and scrape the area you just steamed while it is still hot.
- Steaming and scraping alternate continuously once you find a rhythm.
- Watch the wall, not the clock. Paper that puckers and lifts at the edges is ready.
- Paper that looks unchanged needs another pass, though not a longer one in the same position.
Steam has real limits. Extended heat on drywall softens the gypsum core and the paper facing, and you will feel the spot go spongy under the plate. Move on as soon as that happens. Wear gloves and long sleeves, keep the plate below shoulder height where you can, and let condensation run down the wall rather than back onto your forearm. Follow the manufacturer’s instructions for your specific unit, particularly the refill procedure, since the tank stays pressurized while hot.
2. Removing Wallpaper With Hot Water or a Removal Solution
This is the cheapest approach, and the right one for porous paper on sound plaster.
- First, score the wallpaper if water beads.
- Mix hot water with a squirt of dish soap, or use a commercial concentrate like DIF diluted per the label.
- Fabric softener at roughly one part to three parts hot water works on the same principle.
- Keep the vinegar and water ratio 1:1. It helps break down older wheat-based paste.
- Saturate a single section and wait. The waiting is the method. Most failures here come from scraping after five minutes instead of fifteen.
Reapply as the surface dries. On a warm day with the windows open, a wall can dry faster than the paste can soften. Under these conditions, you can spray each section three times.
3. Using Commercial Wallpaper Stripper
Reach for a commercial stripper when the paste has resisted water and steam. This option is also beneficial when there are several layers to get through, or when the room is large enough that saving an hour per wall matters.
Gel formulas cling to vertical surfaces instead of running down onto your baseboards. It makes them worth the extra cost on ceilings and above door headers.
Score coated paper first, apply per the label, and respect the dwell time printed on the container. Ventilate the room and wear gloves and eye protection. Every product has its own dilution ratio and contact time, so follow the manufacturer’s instructions rather than a generic ratio.
Keep in mind that stripper residue is alkaline and stays on the wall. Wash it off thoroughly with clean water before you prime. If you skip this process, then you will fight adhesion problems later.
4. Removing Peel-and-Stick Wallpaper
Peel-and-stick uses a pressure-sensitive adhesive rather than paste. It never fully cures, so there is nothing to dissolve. It simply lets go.
- Lift a top corner with your fingernail or a plastic card.
- Pull slowly at a 45-degree angle, keeping your hand close to the wall as you go.
- Then pull straight out from the wall and concentrate the force on one line, which is what lifts paint.
- Warm the panel with a hairdryer on low if it resists, especially along the edges and over seams.
- Heat softens the adhesive within seconds.
Fresh paint is the real risk here. Paint needs about four weeks to cure fully.
Wallpaper Removal Process Explained
Removing wallpaper requires following a proper step-by-step guide for flawless results. Take a look at the steps that you have to follow:
Step 1: Identify the Wallpaper Type
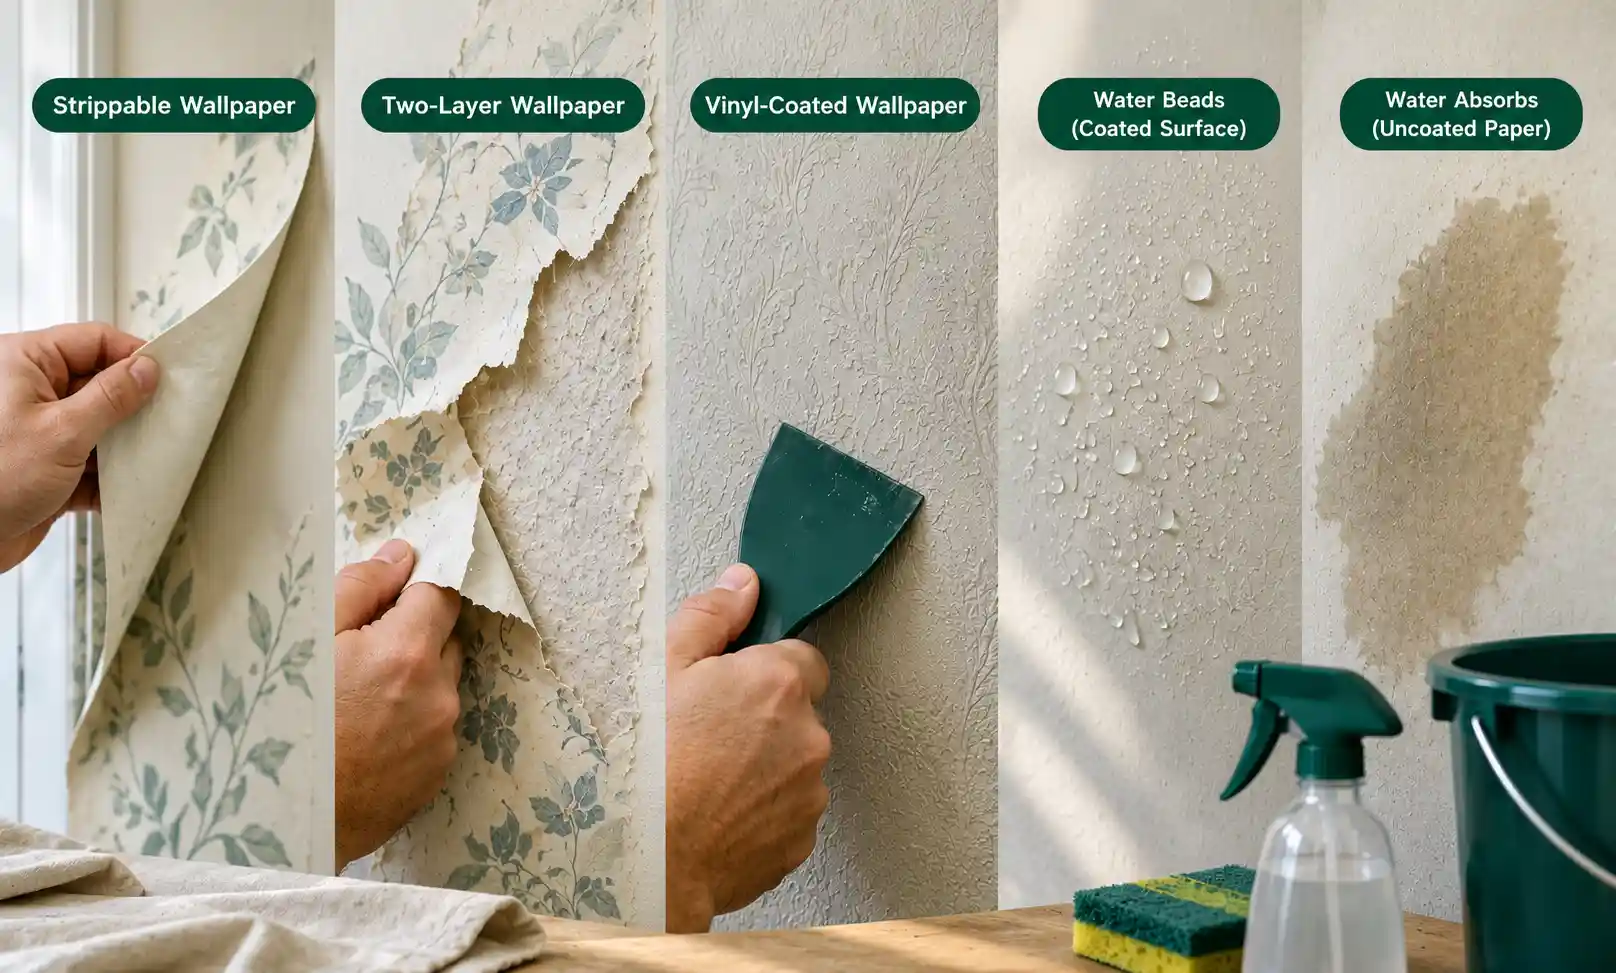
Before removing the wallpaper, you must know what type it is. Lift a corner near a doorway with a putty knife and pull gently.
- If the whole sheet lifts away dry, you have strippable or peel-and-stick paper.
- If the printed layer peels off and leaves a fuzzy paper backing behind, that is a two-layer paper, and you have a second removal job underneath.
- If nothing moves, the paper is either vinyl-coated or glued to bare drywall.
Flick a few drops of water on the surface. Water that beads means a coating you will need to score. Water that darkens the paper means moisture will get through on its own.
Step 2: Prepare and Protect the Room
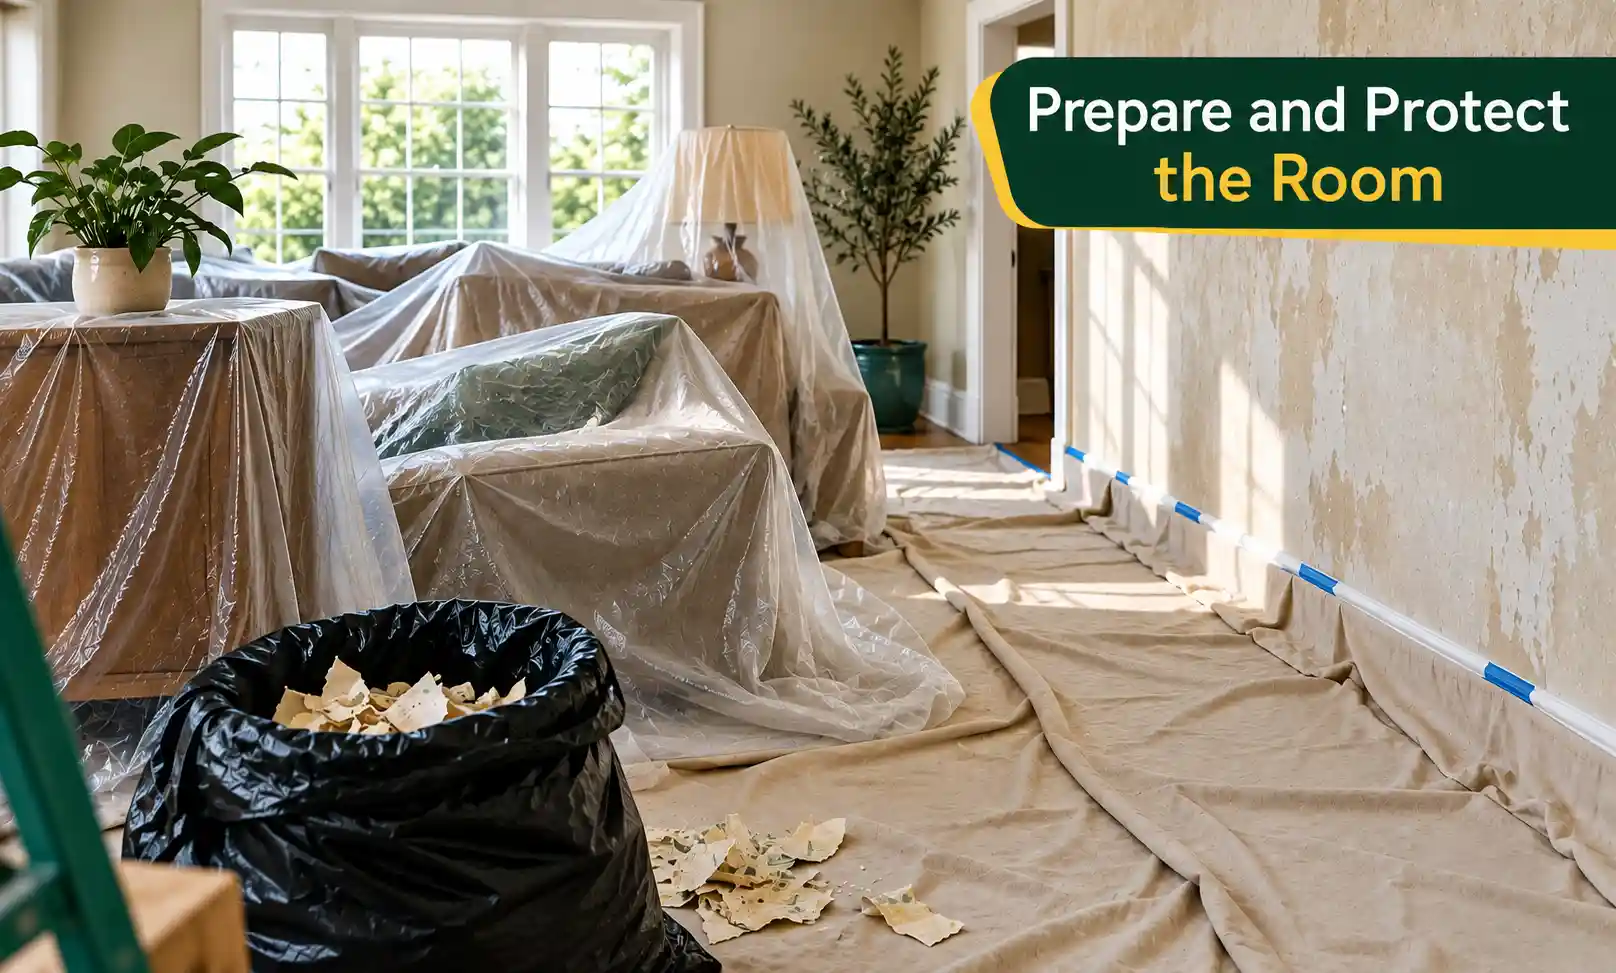
Move custom furniture out or into the center and cover it. Lay drop cloths along the base of every wall you plan to strip, and overlap them onto the baseboard. Wet wallpaper scraps stick to everything and dry hard. Keep a trash bag on the floor beside you and drop scraps straight in.
Step 3: Shut Off Power and Cover the Outlets
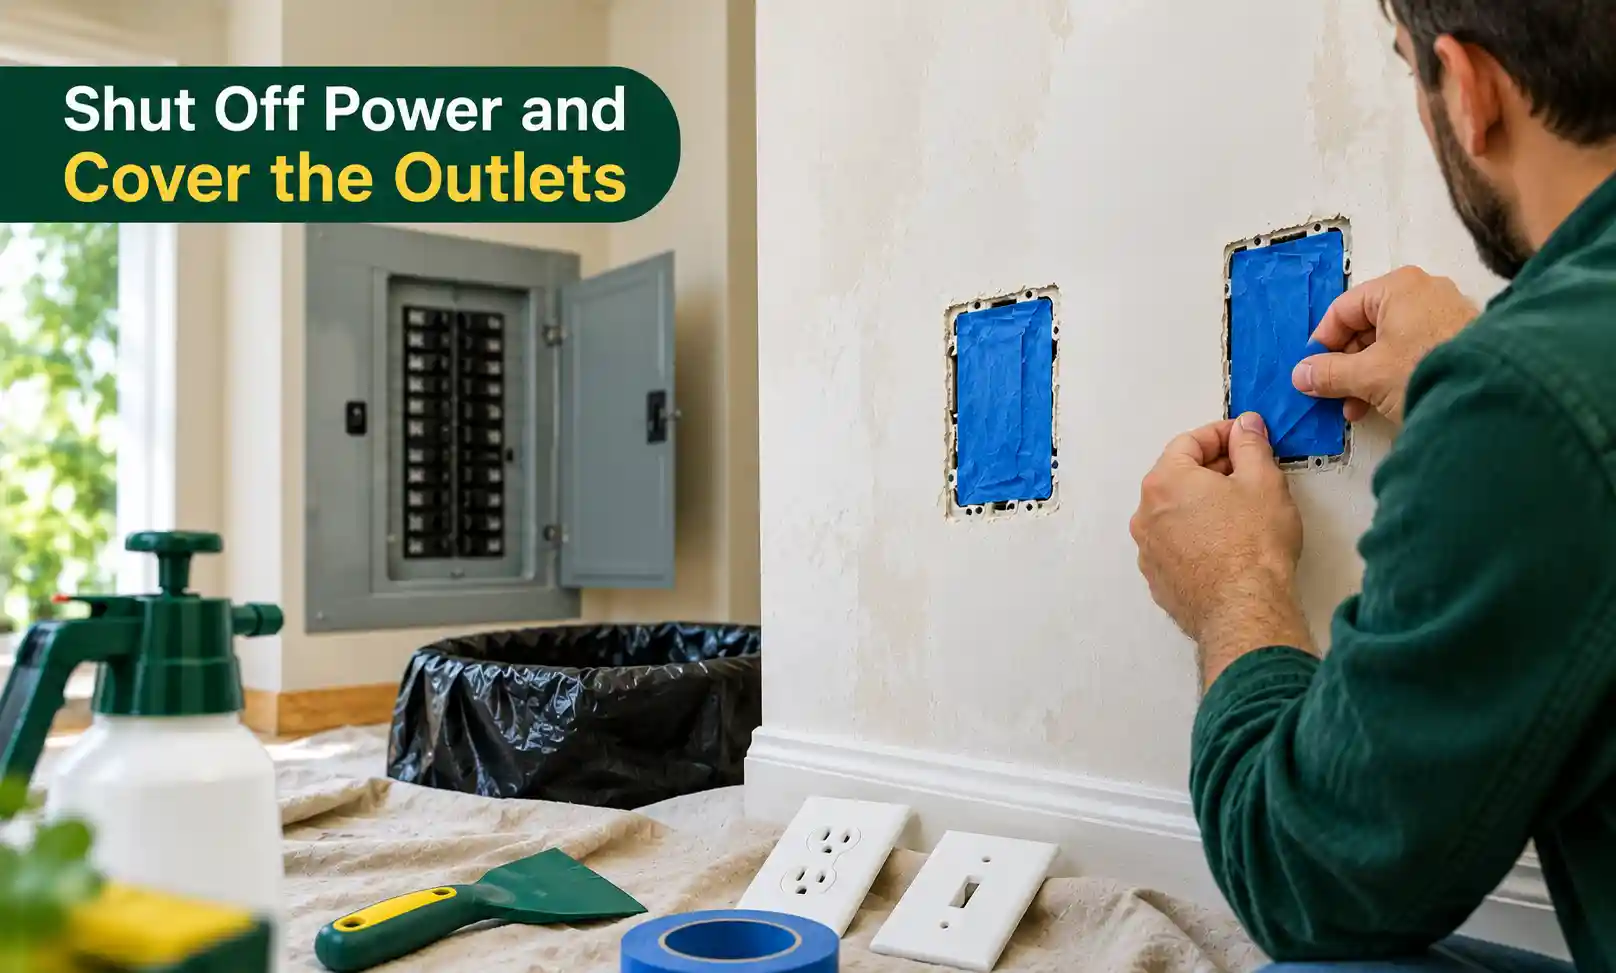
Turn off the circuit at the breaker for the room you are working in. Remove the outlet and switch plate covers, then tape over the openings with painter’s tape. Water plus live electricity is the one part of this job that can hurt you badly. Don’t skip it, and don’t rely on tape alone.
Step 4: Test a Small Section
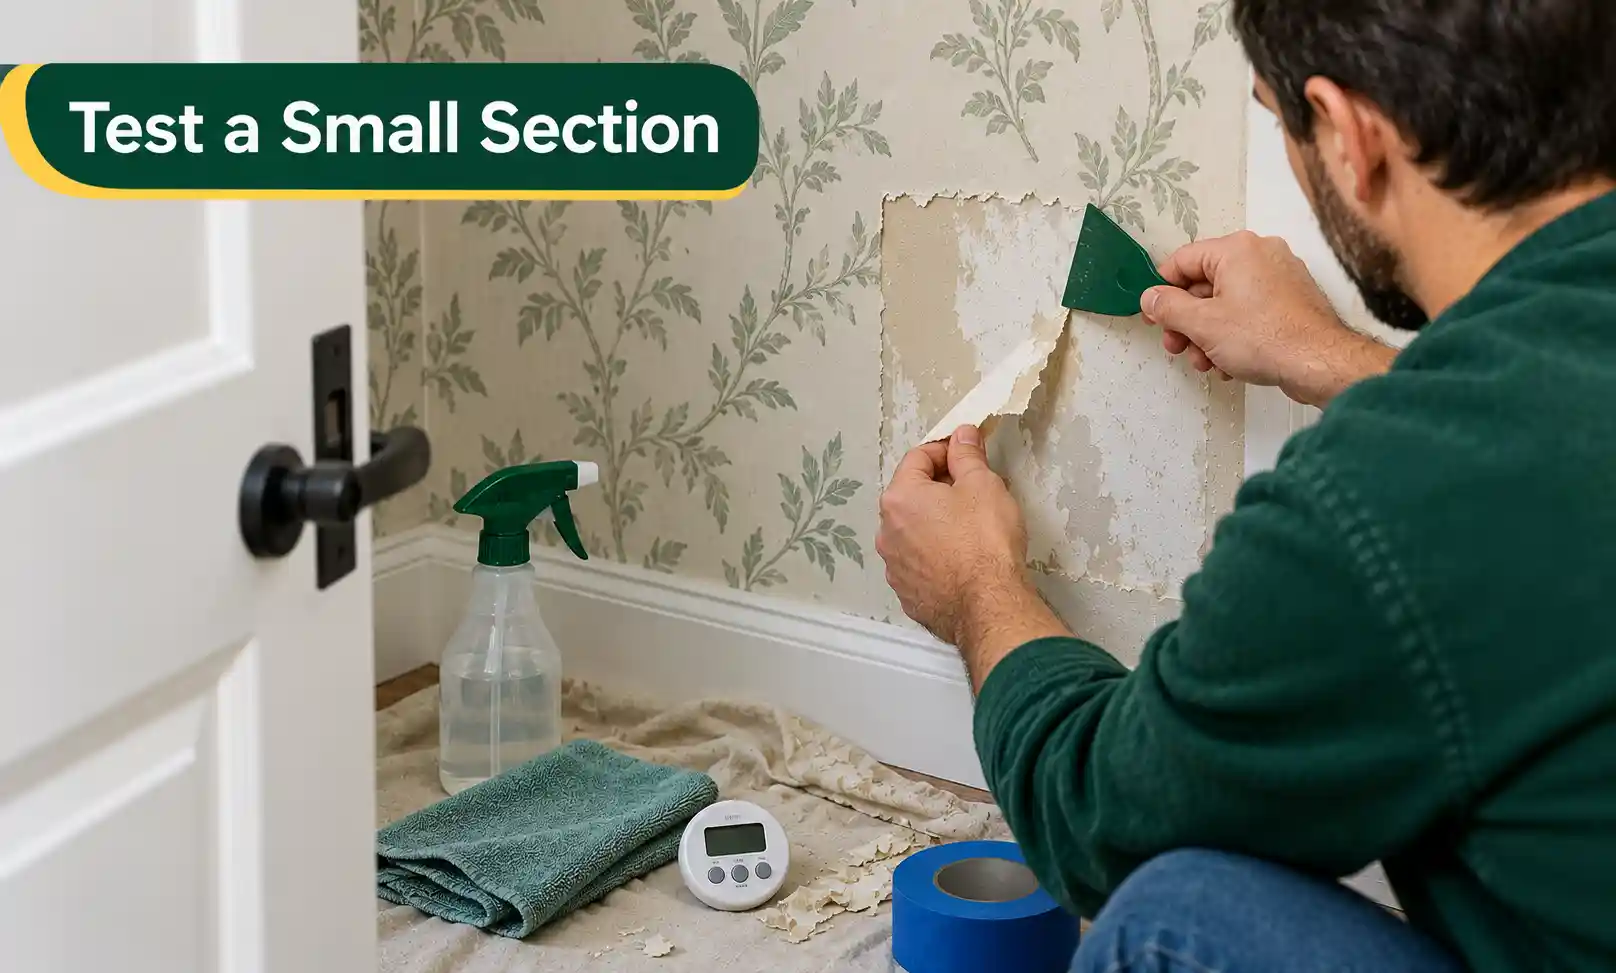
Pick a low-visibility spot, roughly a foot square, behind a door or below the light switch line. Try dry peeling first. If that fails, wet the area and wait 15 minutes. Scrape lightly and watch what happens. Does the custom wallpaper release cleanly? Does the wall surface come with it? Does the paint underneath blister? This test decides your method and tells you roughly how long the room will take. It is worth twenty minutes.
Step 5: Score the Wallpaper (Optional)
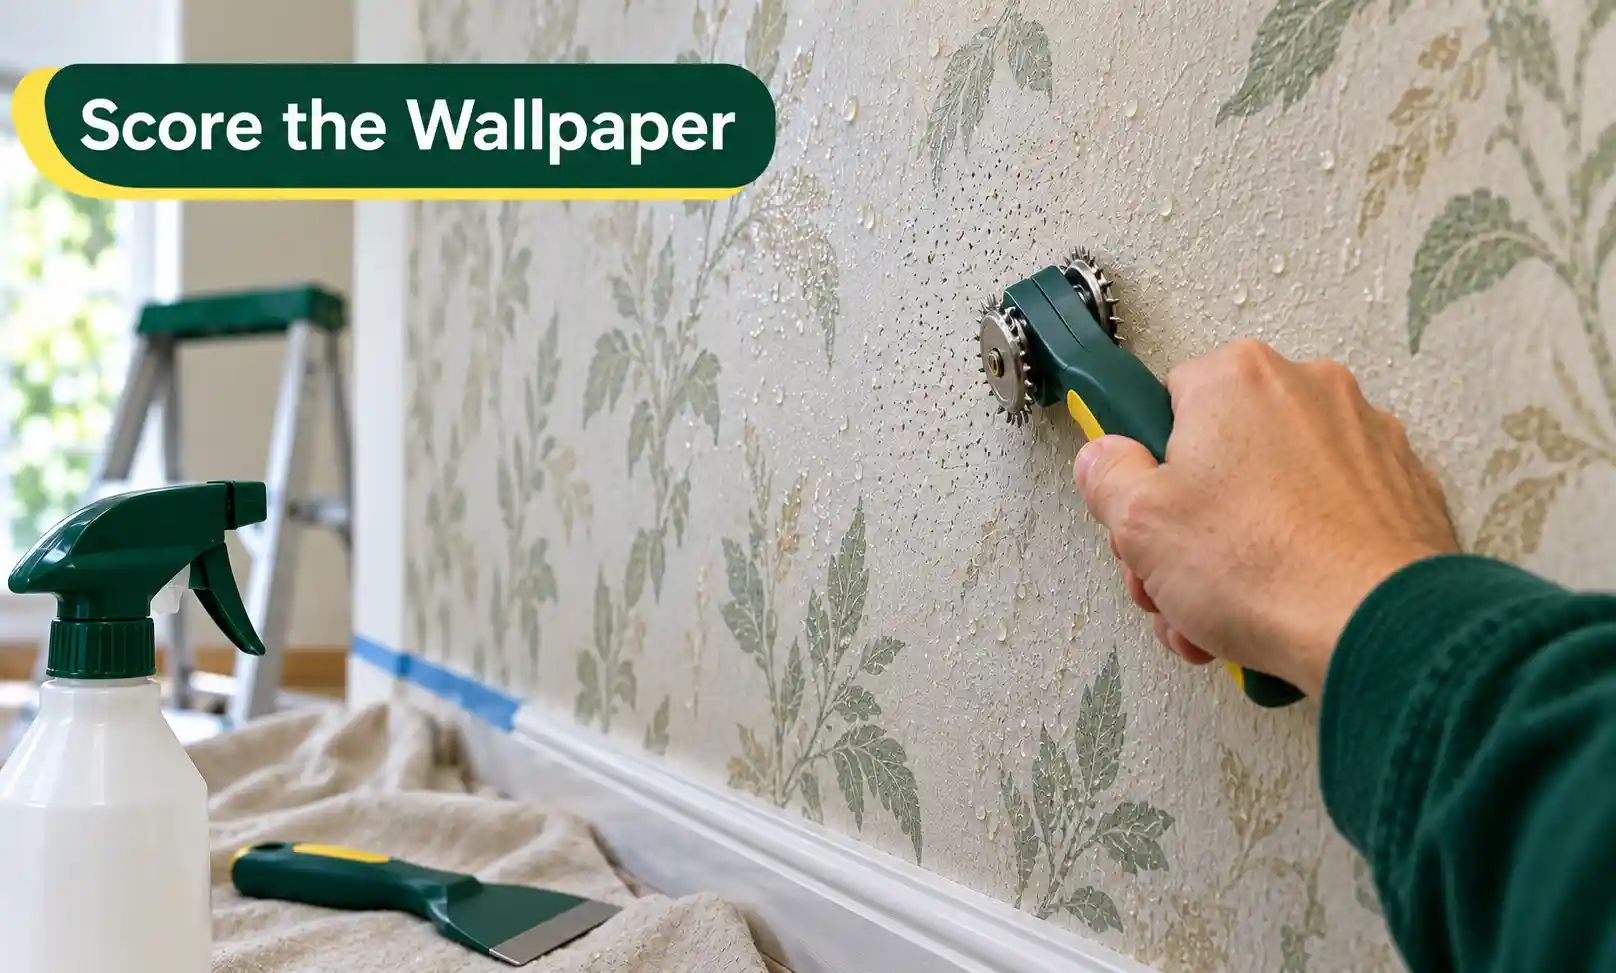
Skip this step for porous paper. Scoring uncoated paper creates hundreds of small holes in the wall for no reason. You can score only when water beads on the surface. Run the scoring tool in loose overlapping circles with light pressure. Let the wheels do the work. You want to perforate the face layer, not the wall.
If you press hard, you will punch through into the drywall. Those pinholes then need filling and sanding, which turns a stripping job into a patching job.
Step 6: Choose Your Method and Work in Sections
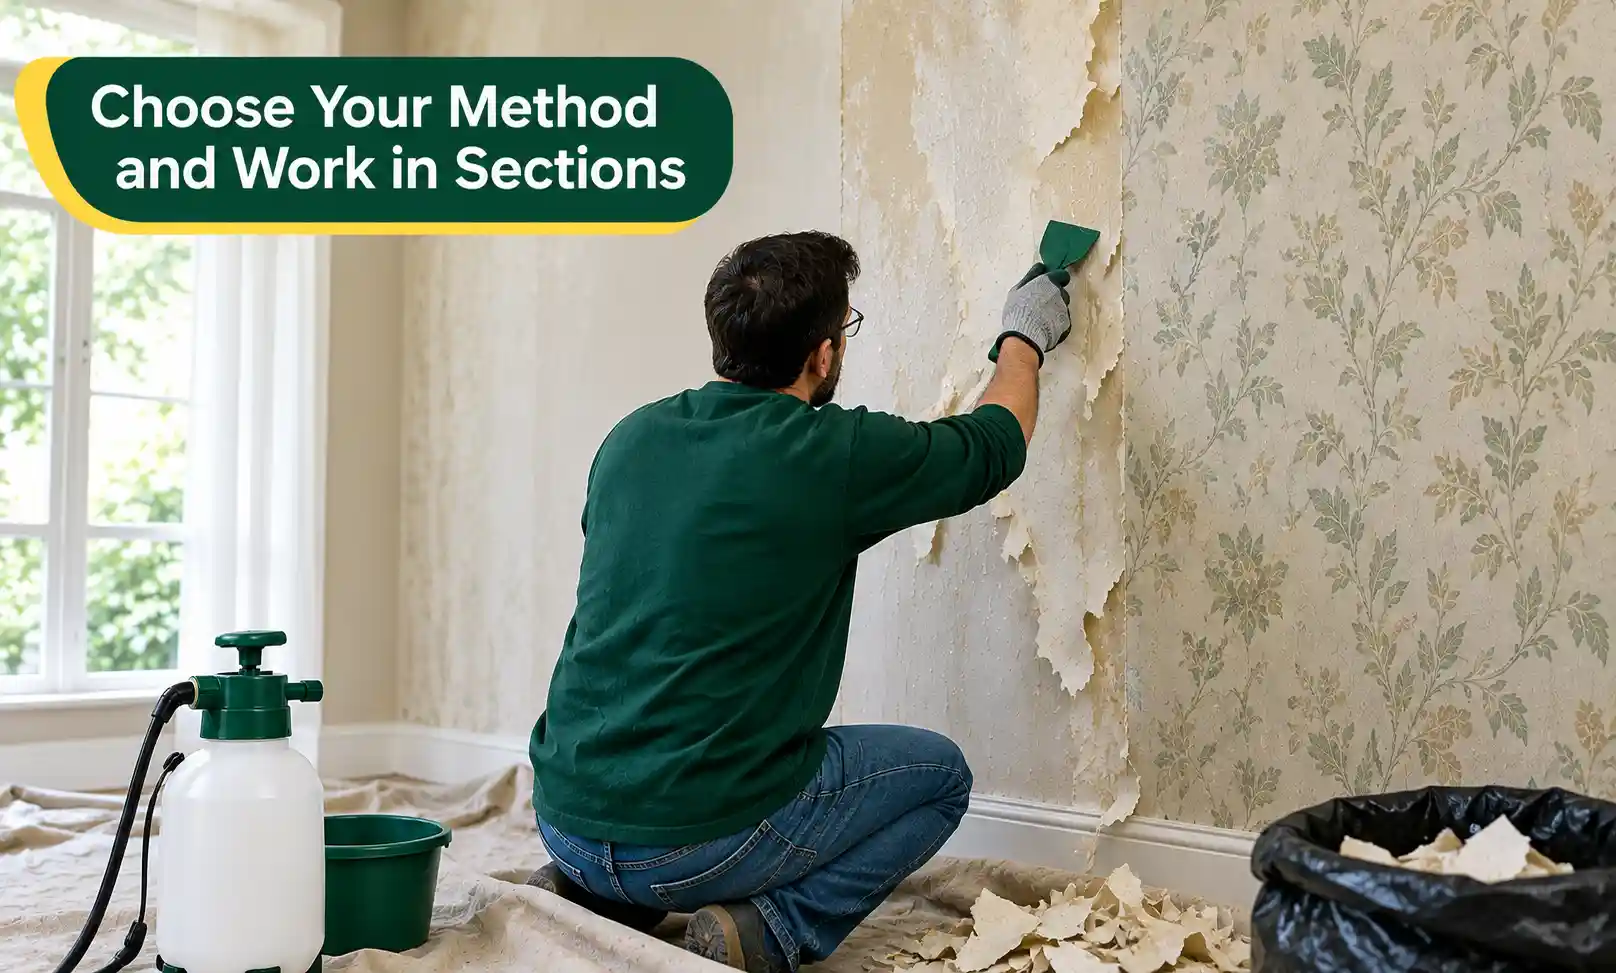
Pick a three-foot-wide section, floor to ceiling. Finish it before you move on. Working the whole room at once means your first section dries out before you reach it. Wet paper releases. Then re-dried paper fights back.
Step 7: Loosen the Wallpaper
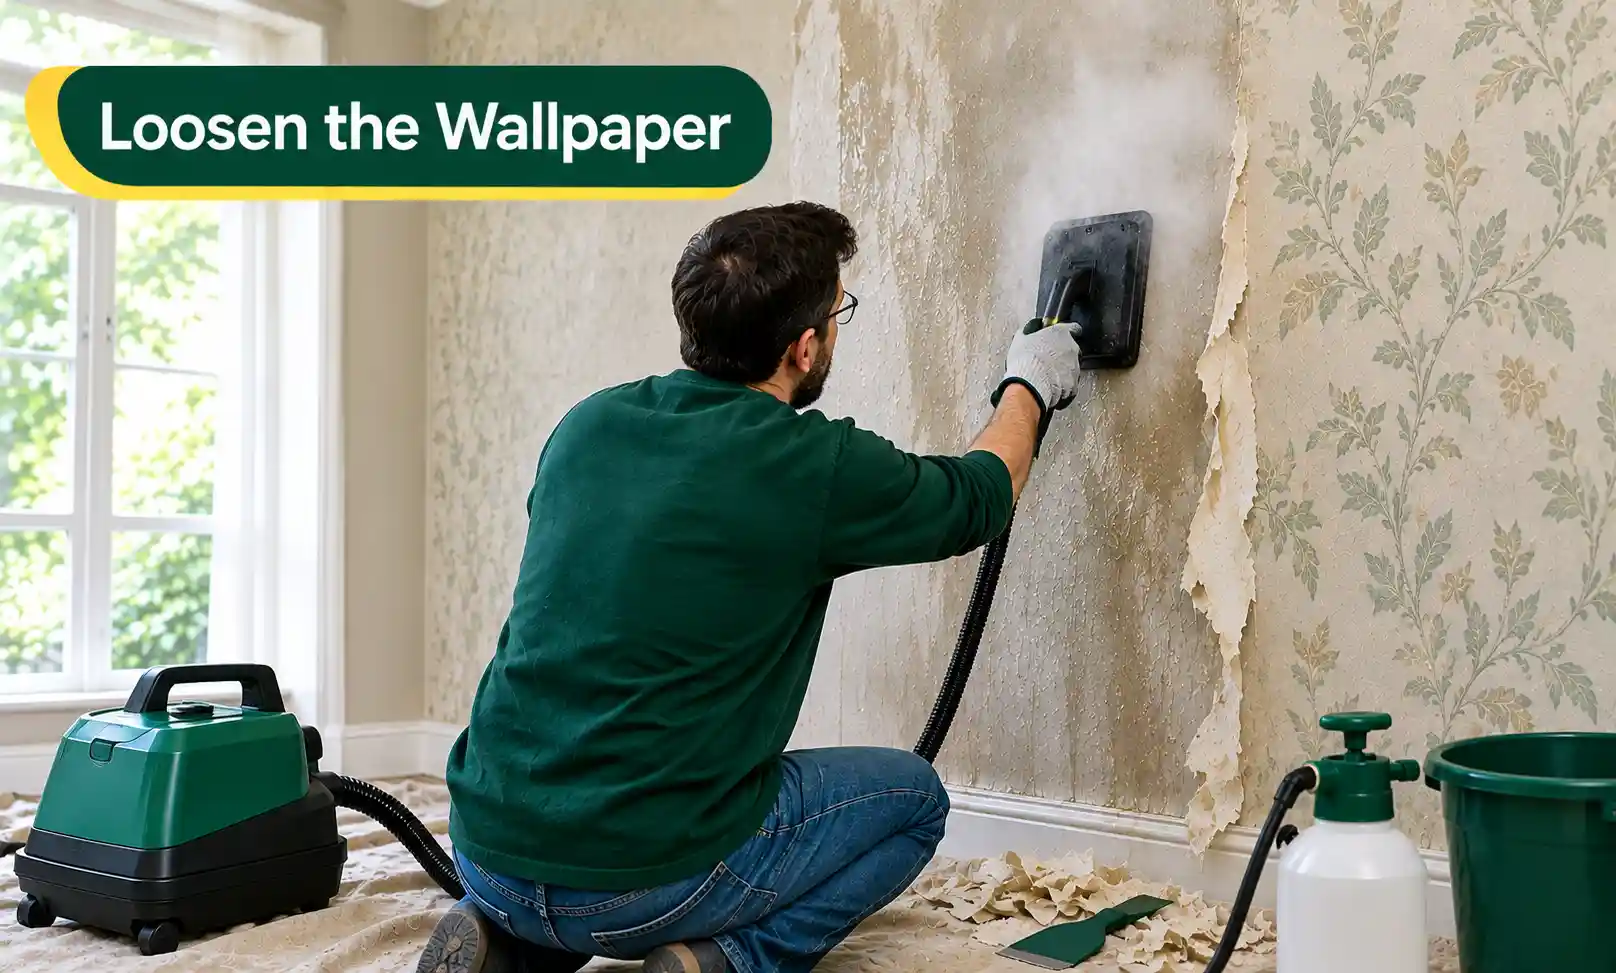
The next step is to loosen the wallpaper. For this, apply hot water, removal solution, or steam to your section. With water or solution, saturate the paper and wait. 15 minutes is usually the minimum, and older paste may need a second application. The paper should look darkened and feel spongy, not merely damp.
With steam, hold the plate flat against the wall for twenty to thirty seconds, then move to the next spot. Keep the plate moving. Holding steam in one place cooks the drywall behind the paper and leaves a soft patch you will have to cut out and repair.
Step 8: Peel and Scrape
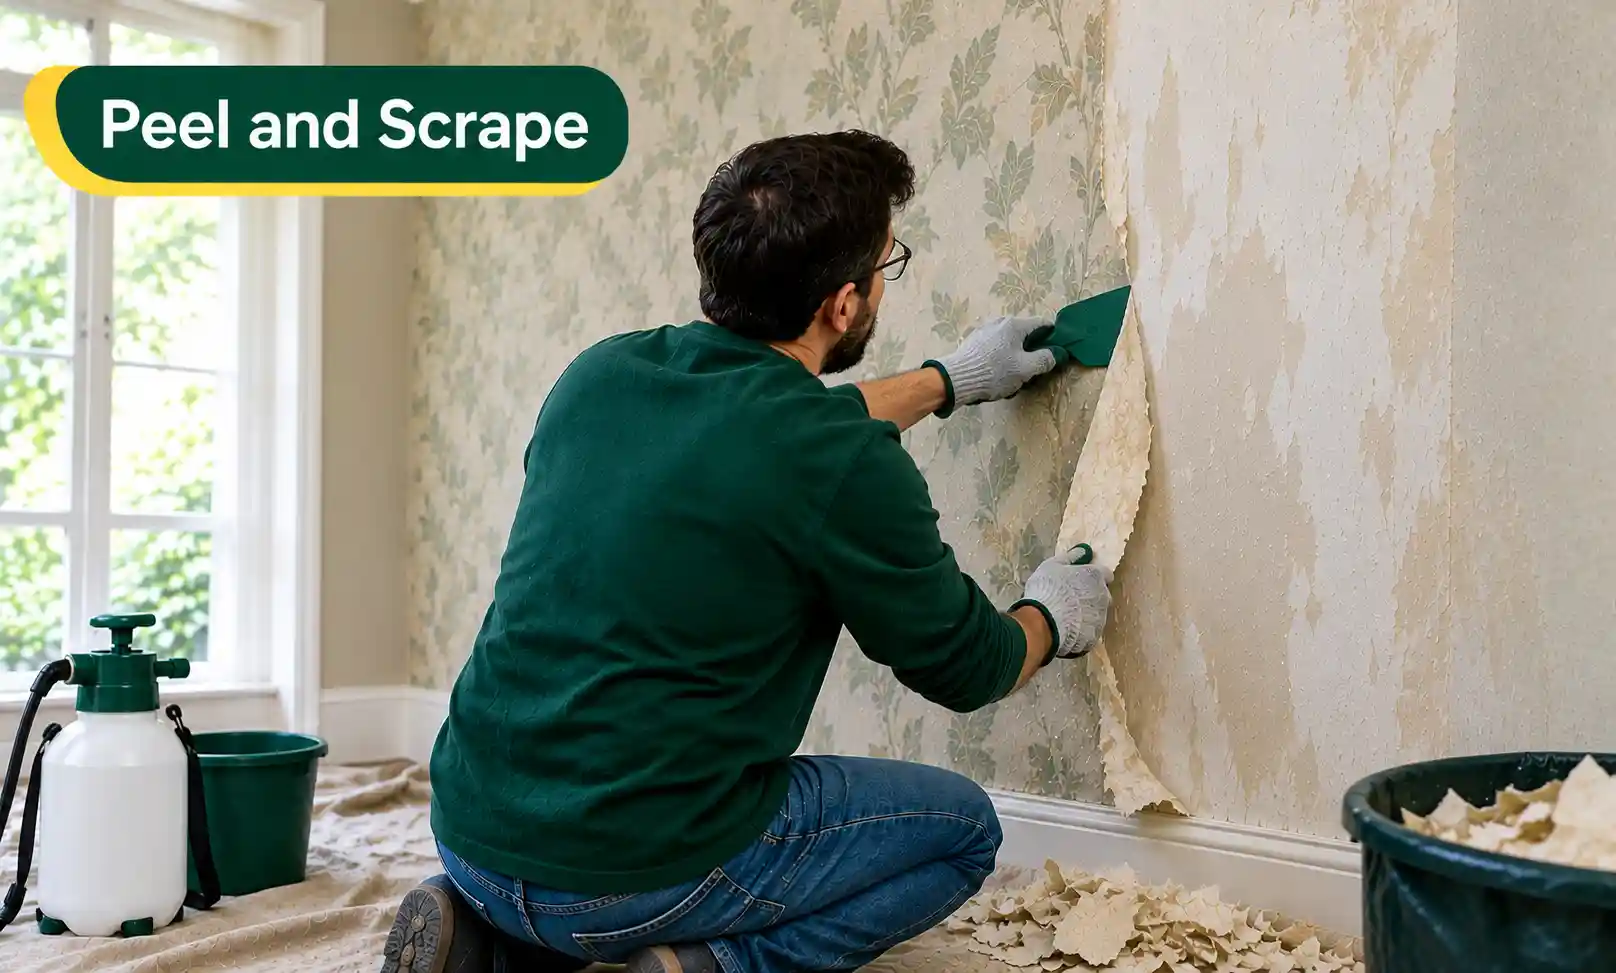
Start the peeling and scraping at a seam. Slide the plastic scraper under the edge at a low angle and push forward. Keep the blade almost flat to the wall. If a strip starts lifting, drop the scraper and pull by hand. Hands do less damage than tools. Pull slowly and downward at an angle rather than straight out from the wall.
When the paper resists, it is not wet enough. Re-wet it and wait. Forcing a scraper into dry paper is where nearly all wall damage starts.
Step 9: Remove the Backing Paper
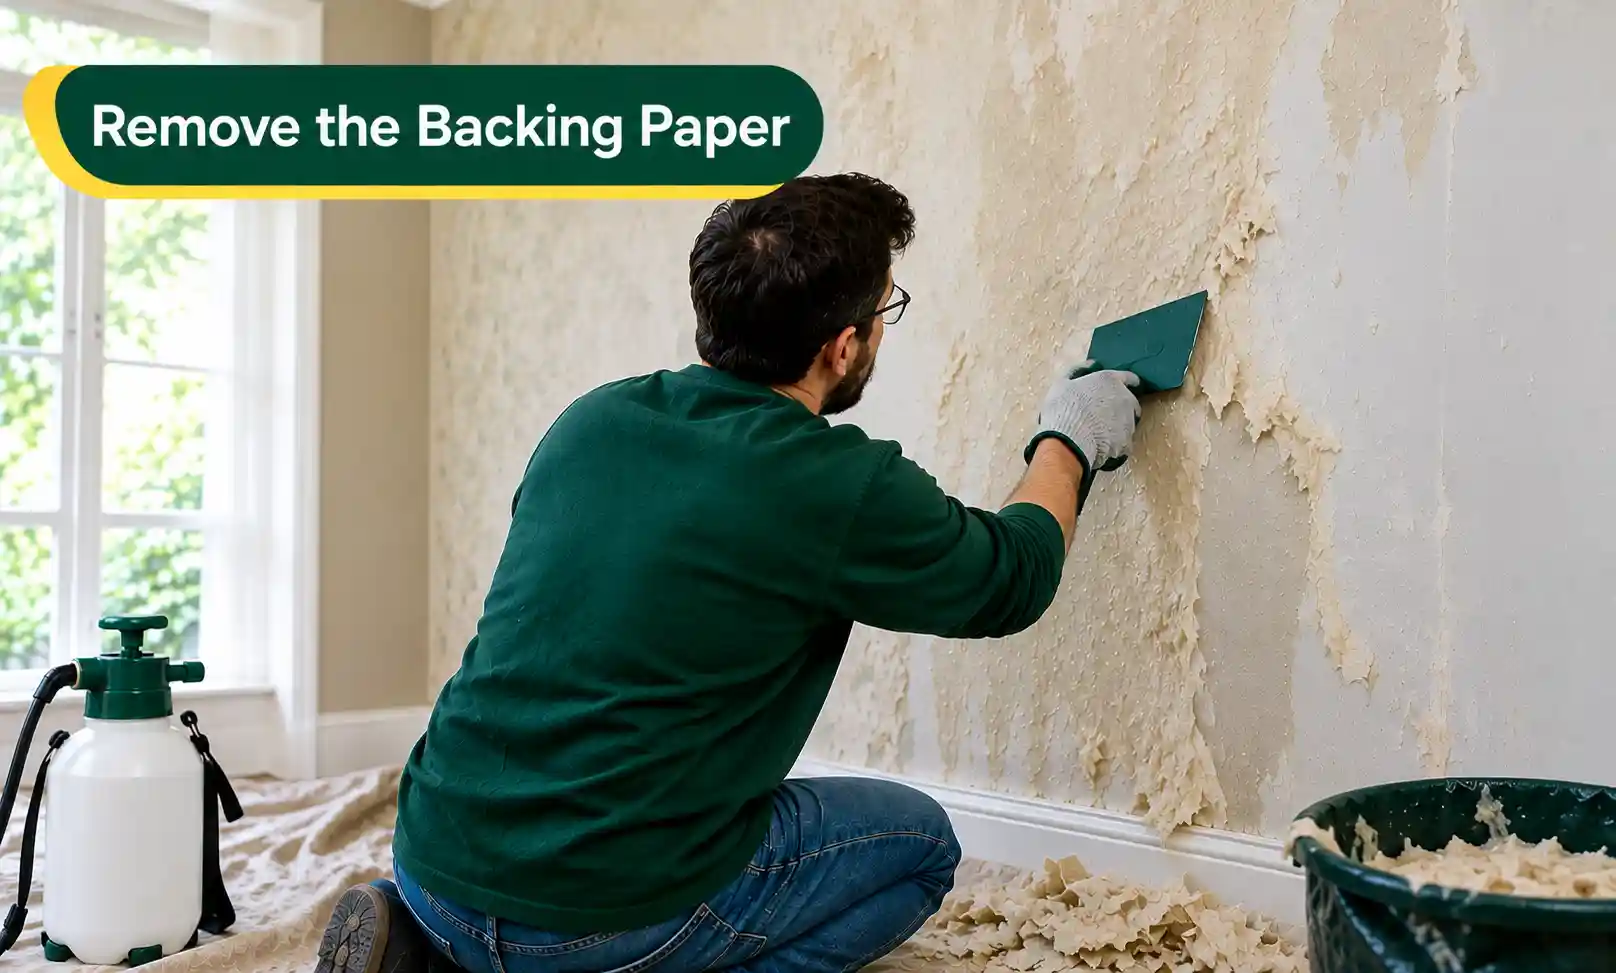
Two-layer papers leave a thin fibrous backing glued to the wall. Many people paint over it. It always shows. Backing paper is porous, which makes it an easy layer. Wet it thoroughly, and it turns to pulp. You can lift the pulp with a wide scraper in long sweeps. Two soakings are normal. If the backing pills up into little rolls under the scraper, it is still too dry.
Step 10: Remove the Leftover Adhesive
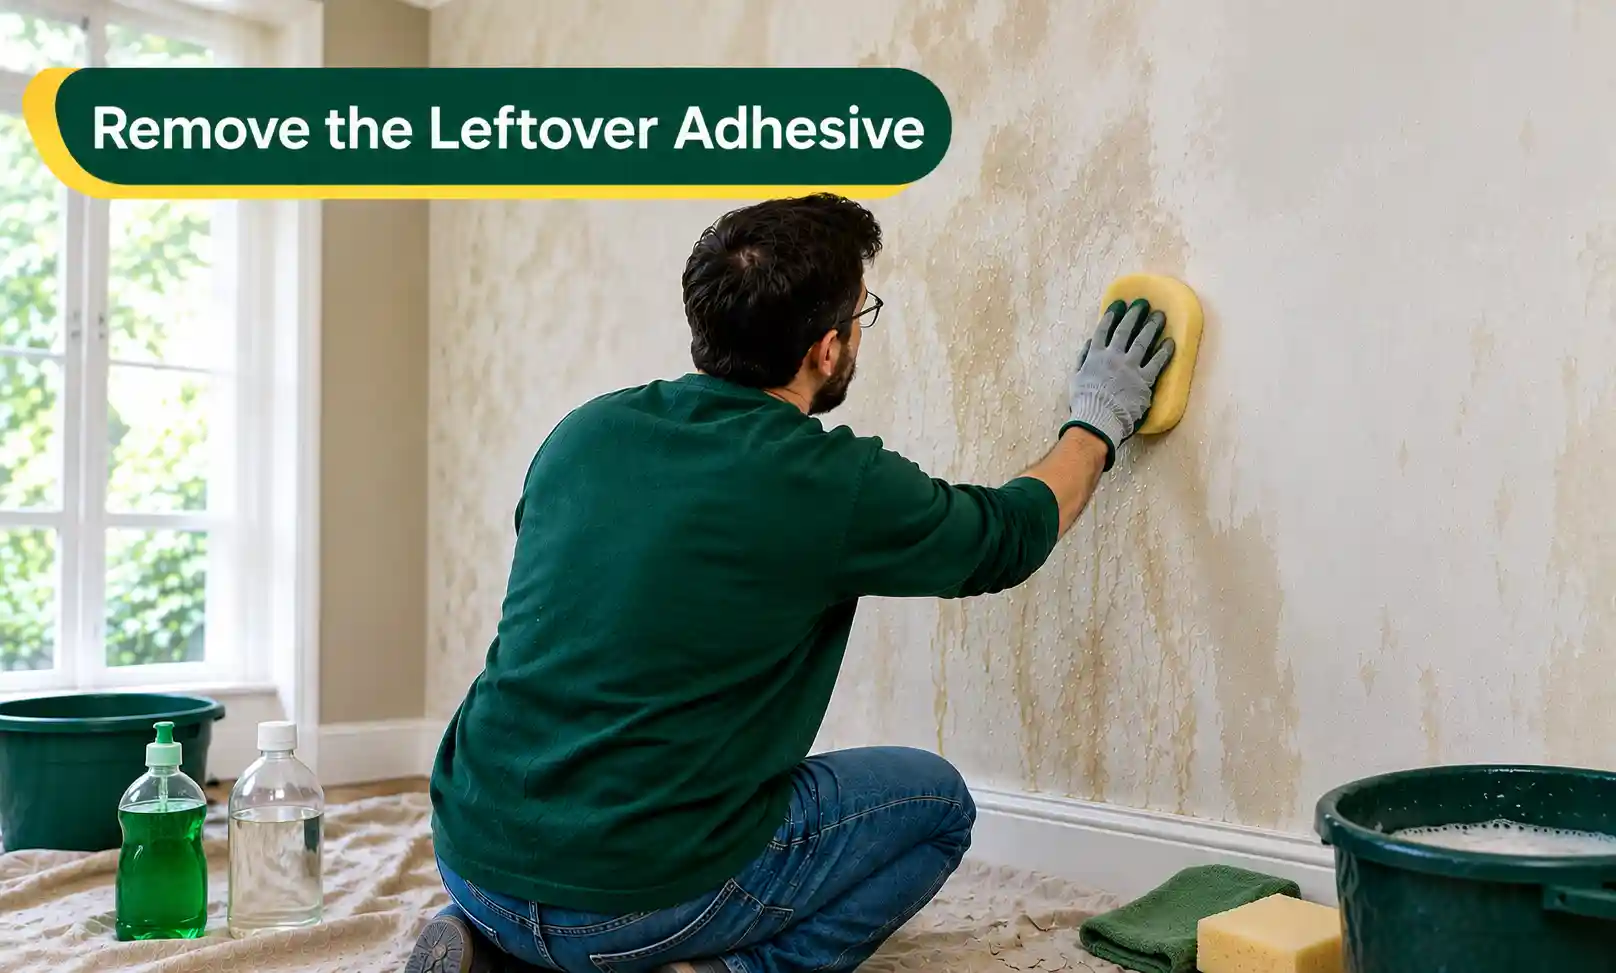
The wall will feel tacky even after the paper is gone. That is old paste, and paint will not stick to it properly. Remove the wallpaper glue properly before installing the new covering. Wash with hot water and a few drops of dish soap, or a 1:1 mix of white vinegar and hot water for heavier residue. Work in sections with a sponge, then go back over each section with clean water and a fresh sponge. Run a dry palm across the wall to check. Any drag or tackiness means paste is still there.
Step 11: Let the Wall Dry Completely
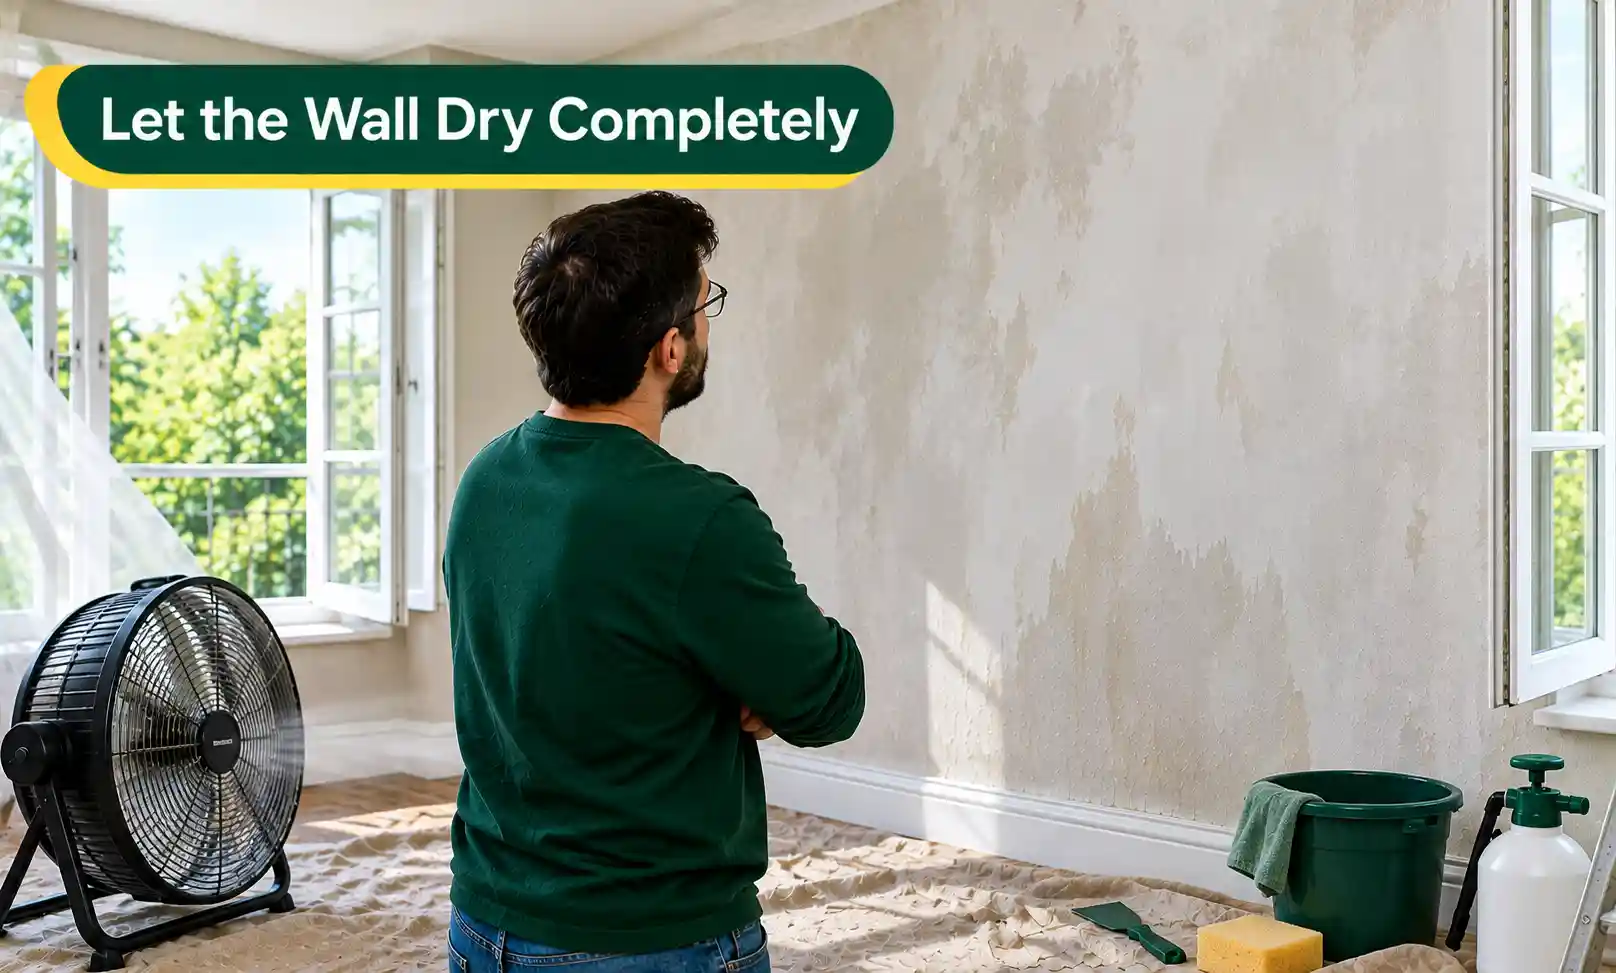
Give the wall at least 24 hours to dry completely. Longer in a humid room or a bathroom. To speed up the drying process, open windows and run a fan. Damp drywall will not hold a patch, and primer applied over a damp wall can trap moisture and blister weeks later.
Step 12: Repair and Prepare the Surface
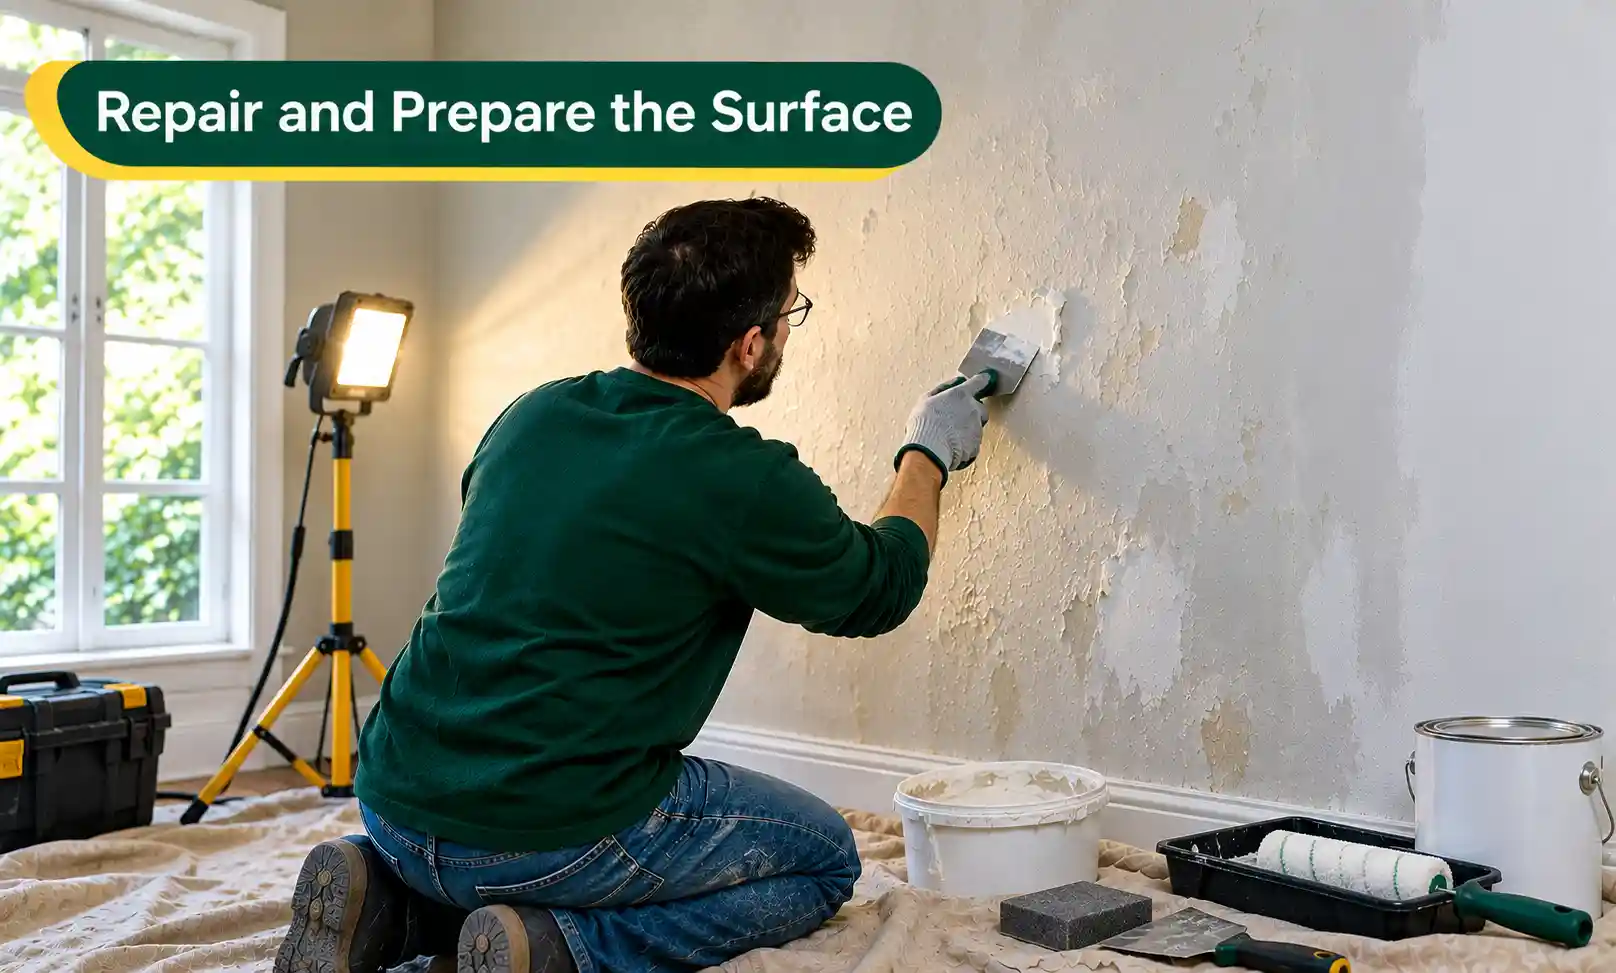
Inspect the wall in raking light. Hold a work light close to the surface at a shallow angle, and every gouge, torn paper facing, and scoring mark will show. Fill the low spots with joint compound, let them dry, and sand smooth. Torn drywall facing needs a thin skim coat over the whole damaged area, not a dab in the middle.
Prime the wall before doing the paint work. A shellac-based or water-based problem-surface primer seals any trace of remaining paste so it does not reactivate under fresh paint. Skipping this is the single most common reason wallpaper-removal paint jobs bubble.
Which Removal Method Should You Use?
Start with the gentlest method that works. If that does not work, you can go for a bit harsher one.
| Removal Method | Best For | Difficulty | Main Advantage | Main Risk |
| Dry peeling | Strippable and peel-and-stick papers | Easy | No moisture, no mess, no drying time | Pulls paint or drywall face if the bond is stronger than the surface |
| Hot water and soap | Porous, uncoated paper on plaster or primed drywall | Easy | Cheap, low odor, forgiving | Slow, and over-wetting softens drywall |
| Removal solution (DIF, fabric softener, vinegar) |
Older paper with stubborn paste | Moderate | Breaks down paste faster than plain water | Needs repeat applications and full soak time |
| Steam | Multiple layers, painted-over paper, thick vinyl | Moderate | Softens paste the water cannot reach | Burns, and prolonged heat swells drywall |
| Commercial gel stripper | Heavy adhesive, large stubborn areas | Moderate | Clings to vertical surfaces without running | Fumes, plus residue that must be washed off before painting |
Most jobs use two of these. Homeowners often steam the top-left corner, discover the paper peels dry, and finish the wall by hand.
Warm water and dish soap handle most residue. For a stubborn film, rubbing alcohol or an adhesive remover works, but test it on one tile first, and keep solvents away from natural stone entirely.
How to Remove Wallpaper Without Damaging Paint
Damage does not come from the wallpaper. It comes from impatience with a tool in your hand.
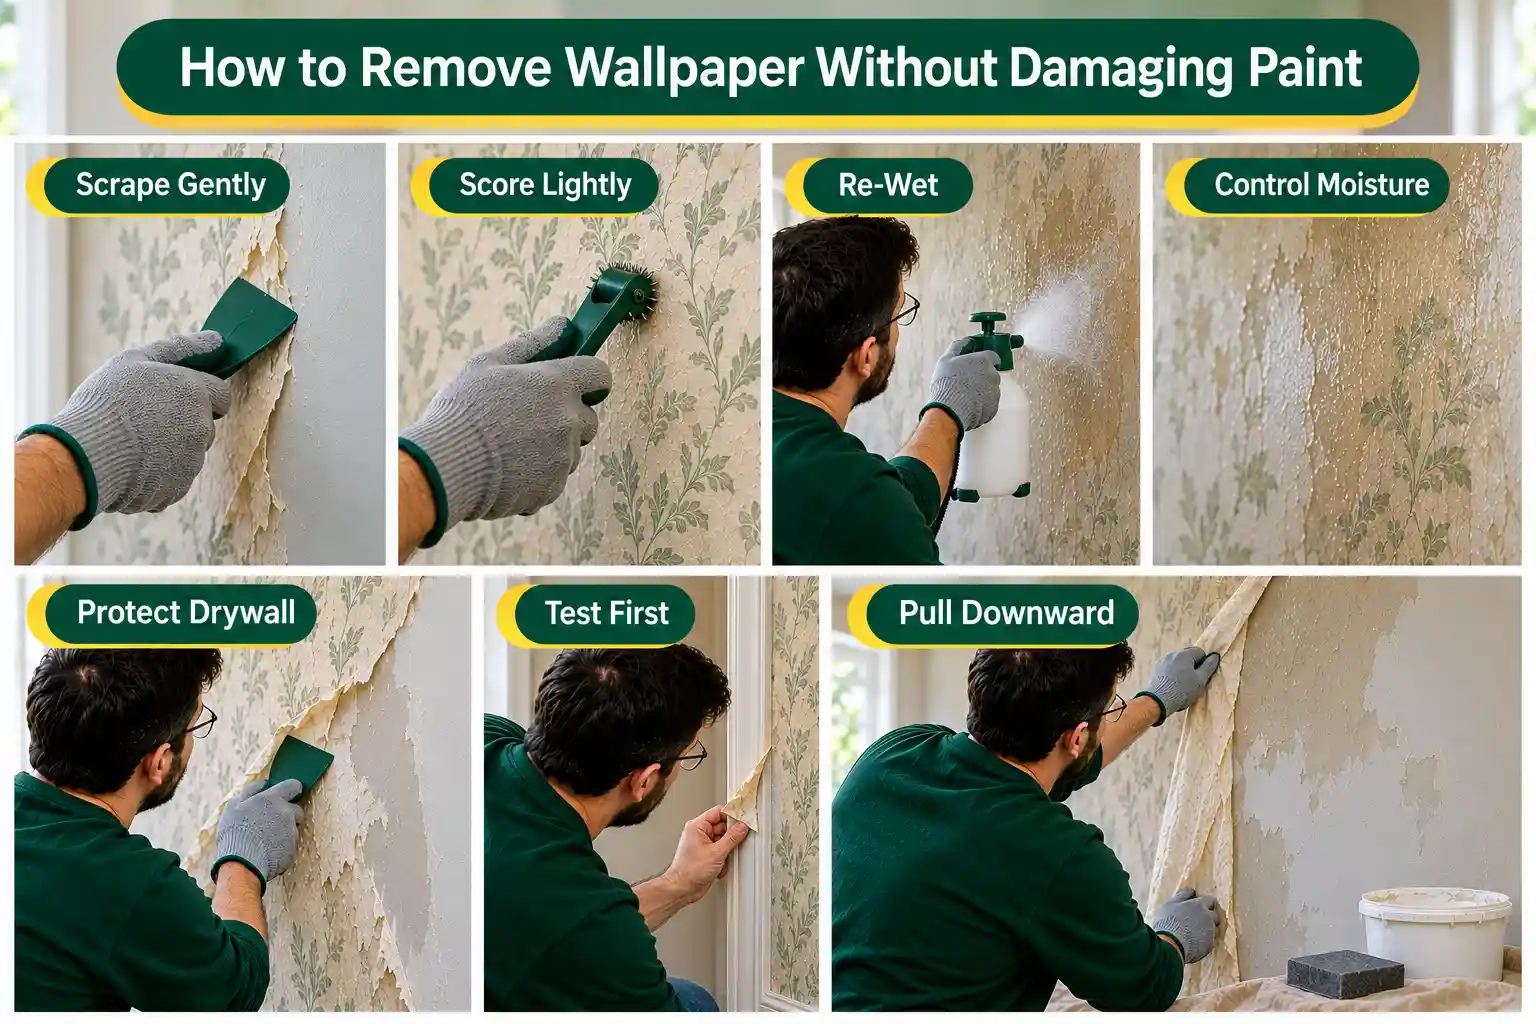
- Aggressive scraping is the main cause. A scraper held at a steep angle acts like a chisel. Held nearly flat, the same tool slides under the paper and lifts it. Angle matters more than the tool you choose.
- Score only when you have to, and score lightly. Every scoring tool wheel is a small cut. On coated paper, those cuts open a path for water. On uncoated paper, they just create work.
- Know when to stop scraping. If a section is not releasing after two firm passes, put the scraper down and add moisture. The paper is telling you the paste has not softened. A third pass will take the wall surface with it.
- Use enough moisture, but not standing water. The paper should be uniformly dark and slightly soft. Water running down the wall onto the baseboard is wasted, and on drywall it is actively harmful.
- Give drywall extra care. It is the surface most likely to tear, and the tear takes a skim coat to fix. Plastic tools, less water applied more often, and lower expectations for a perfectly clean result.
- Test before you commit. Five minutes in an inconspicuous corner tells you whether the paint will survive. If it will not, you know now, and you can plan on repainting instead of discovering it halfway across the feature wall.
- If paint starts lifting, change direction. Pull the paper down and back on itself, keeping your hand close to the wall, rather than pulling outward. Slow the pull down. Where paint lifts in one small area anyway, stop trying to save it, remove the loose edges, and feather the spot with joint compound later.
How Do Professionals Remove Wallpaper?
Generally, professionals use the same tools. The main difference is in its sequencing and the amount of assessment that happens before anything gets wet.
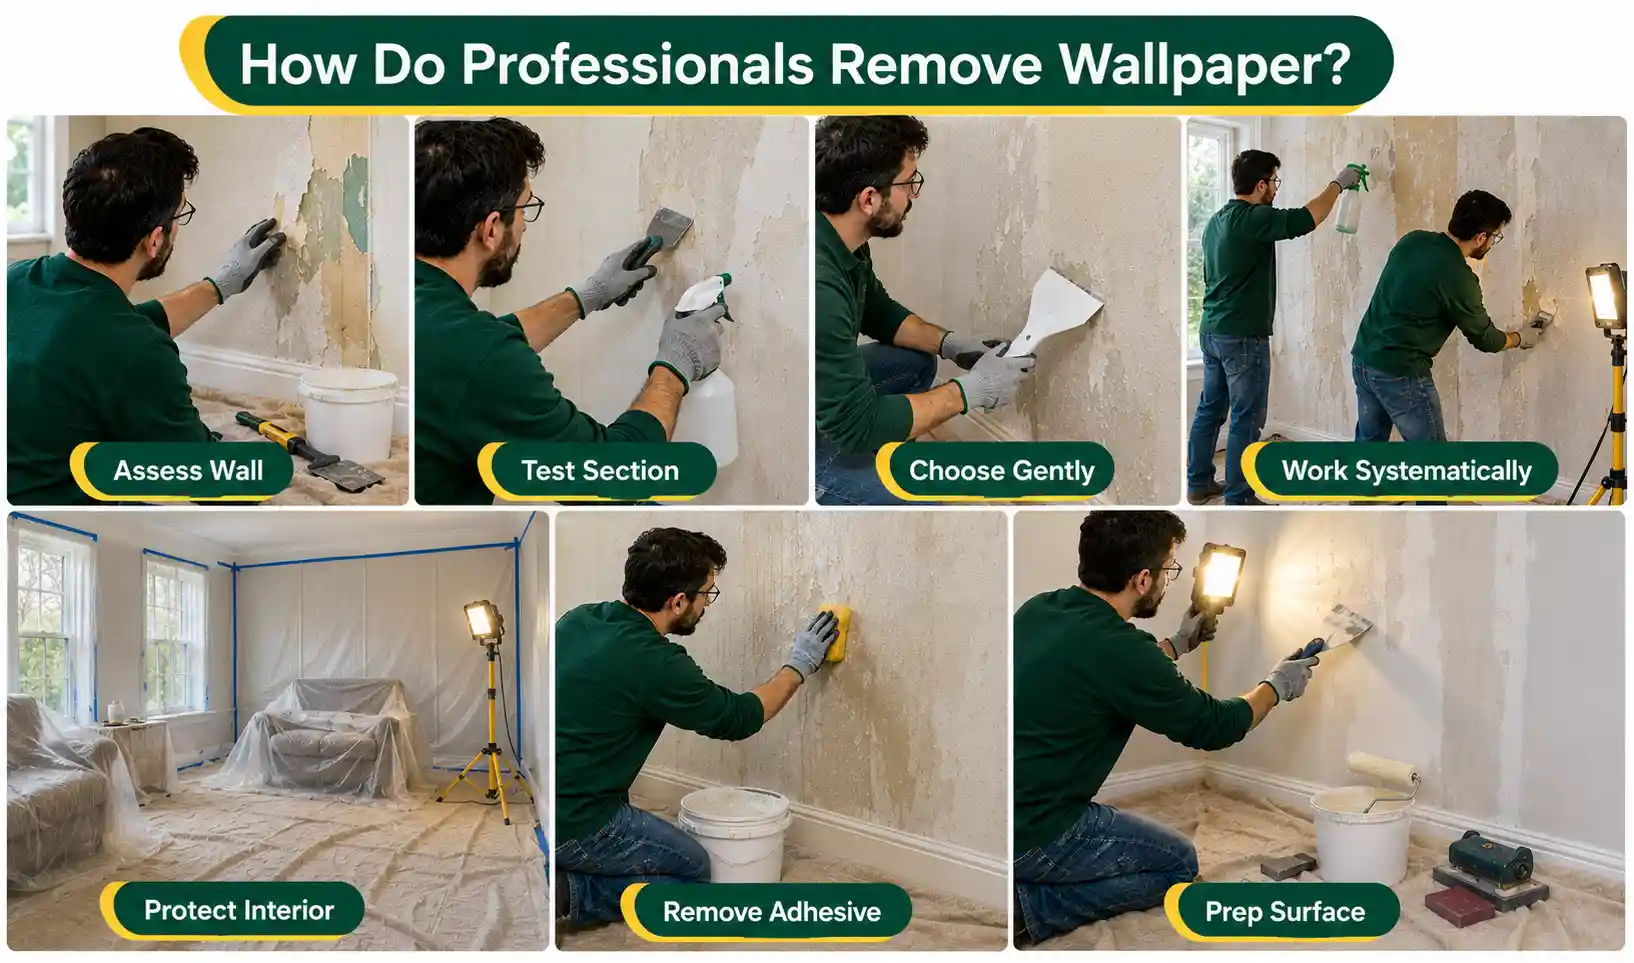
1. Identify the Construction First
A professional checks a few things before choosing the method to remove the wallpaper. These include whether the paper is strippable, whether it is coated, how many layers there are, and what the substrate is. Homeowners tend to start with whatever method they read about and adapt when it fails.
2. Test a Section
A test patch reveals both the method and the pace. That number sets the schedule for the job. It also determines whether steaming the whole house wallpaper is a good choice or whether the crew brings a second unit.
3. Do Not Select the Aggressive Method & Tool
A pro strips a room to a standard, and every gouge is repair time they absorb. That incentive naturally pushes toward gentler methods. Homeowners often reach for the most powerful option immediately, which is exactly backward.
5. Work Systematically
Professional work over one wall at a time, one section at a time, in a consistent direction. Then there is another person scraping and applying moisture. This way, splitting the two tasks between two people roughly doubles the speed. The soak time on one section overlaps with the scraping on the last.
6. Protect the Interior Before Starting
When you hire a professional, luxury floors, trim, fixtures, and doorways get covered first. Besides, they clean up all the mess before leaving your space. Their approach to work is that prevention is cheaper than remediation.
7. Treat Adhesive Removal as Its Own Stage
Professional wallpaper removal crews understand that glue removal from the wall is the main part of the process. They dedicate proper time for this purpose.
8. They Focus More on Inspecting and Preparing
A pro checks the wall in raking light, skims torn or uneven areas, sands, and primes with a sealing primer. This is the real difference in outcome. The stripping is not the skilled part of the job. Assessing what the wall needs afterward is.
The bigger reason a professional’s approach differs is accountability, not equipment. They are pricing a finished wall, so they optimize for a surface that takes paint cleanly the first time. A homeowner optimizes for getting the paper off today, and the consequences of that arrive at the priming stage.
Stubborn Wallpaper: What to Do When It Will Not Come Off
Not all wallpaper removals go strictly according to plan. Coated top sheets, brittle backing, and aged adhesives often require specific adjustments to your approach. If your wallpaper isn’t coming off cleanly, match your exact situation to the diagnostic fixes below to keep your project moving forward without damaging the wall.
- The wallpaper will not peel at all. The face is almost certainly coated. Score it, then soak or steam. If water is still beading after scoring, your scoring pattern is too sparse rather than too shallow.
- Only the top layer comes off. Normal for two-layer paper. The fibrous backing left behind is porous and comes off much more easily than the face did. Soak it and lift it with a wide scraper.
- Backing paper keeps tearing into small pieces. Not wet enough. Soak it a second time and wait until it looks pulpy. A wider blade also helps, because a 4-inch scraper catches more of the sheet than a 2-inch putty knife.
- Adhesive remains after the paper is gone. Wash with hot soapy water or a vinegar solution, then rinse. If the wall still feels tacky after two washes, use a dedicated adhesive remover or a gel stripper, then rinse thoroughly.
- There are multiple wallpaper layers. Steam is the reliable answer. Work through one layer at a time rather than trying to lift everything at once, and re-steam between layers, since each one seals moisture away from the layer below.
- The wallpaper has been painted over. The paint has waterproofed the paper, so surface moisture does nothing. Score aggressively across the whole area, then steam. Expect this to be the slowest version of the job, and expect wall repair afterward. In a small room with a solid plaster substrate, skim coating over the paper is sometimes the more sensible decision.
- Vinyl wallpaper resists water. Vinyl is designed to shed moisture. Peel the vinyl face off dry first, which usually works, then treat the paper backing underneath as a normal soak-and-scrape job.
- The wall is coming off with the paper. Stop. This is unprimed drywall bonded to the paste. Reduce moisture, switch to a plastic scraper held nearly flat, and accept that the wall will need skim coating. Continuing to fight it just enlarges the repair.
- Old wallpaper breaks into tiny pieces. Brittle paper from decades ago tends to shatter. Extend your soak time considerably, work smaller sections, and switch to steam if water alone is not penetrating. This is genuinely slow work, and the piece size will not improve much.
Removing Wallpaper From Different Wall Surfaces
The wall behind the paper matters more than the paper itself. So you must know about the wall type before removing the old wall coverings.
1. Drywall
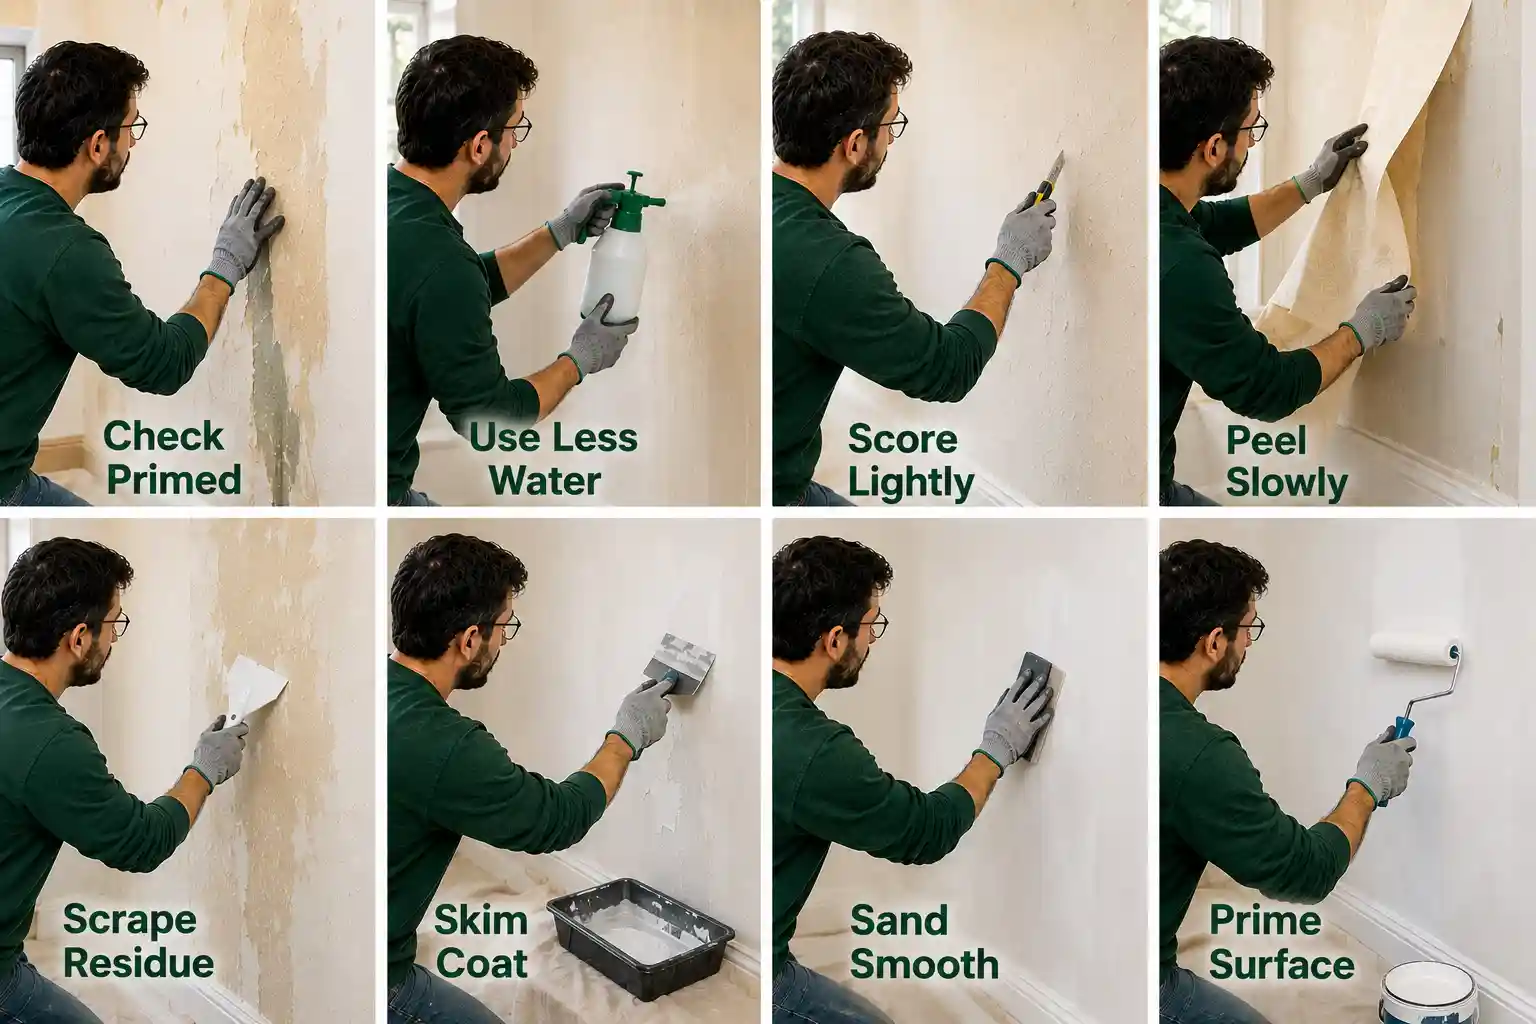
Drywall is a difficult case. Its face is paper, so it absorbs whatever you spray and tears under the same tool pressure that removes wallpaper.
The critical question is whether the drywall was primed before the paper went up. Primed drywall gives you a sealed barrier and behaves well. Unprimed drywall bonds directly to the wallpaper paste, and the two layers often refuse to separate cleanly.
For the drywall, use less water. Apply water more often and switch to a plastic scraper. Accept from the start that some skim coating is likely, and budget an afternoon for it. Follow the steps below for safe removal:
- Check if the drywall was primed.
- Use less water to soften the adhesive.
- Score the wallpaper lightly if needed.
- Peel the wallpaper slowly and carefully.
- Use a plastic scraper to remove residue.
- Skim coat any damaged areas.
- Sand the wall smooth after drying.
- Prime the repaired surface before painting
2. Painted Walls
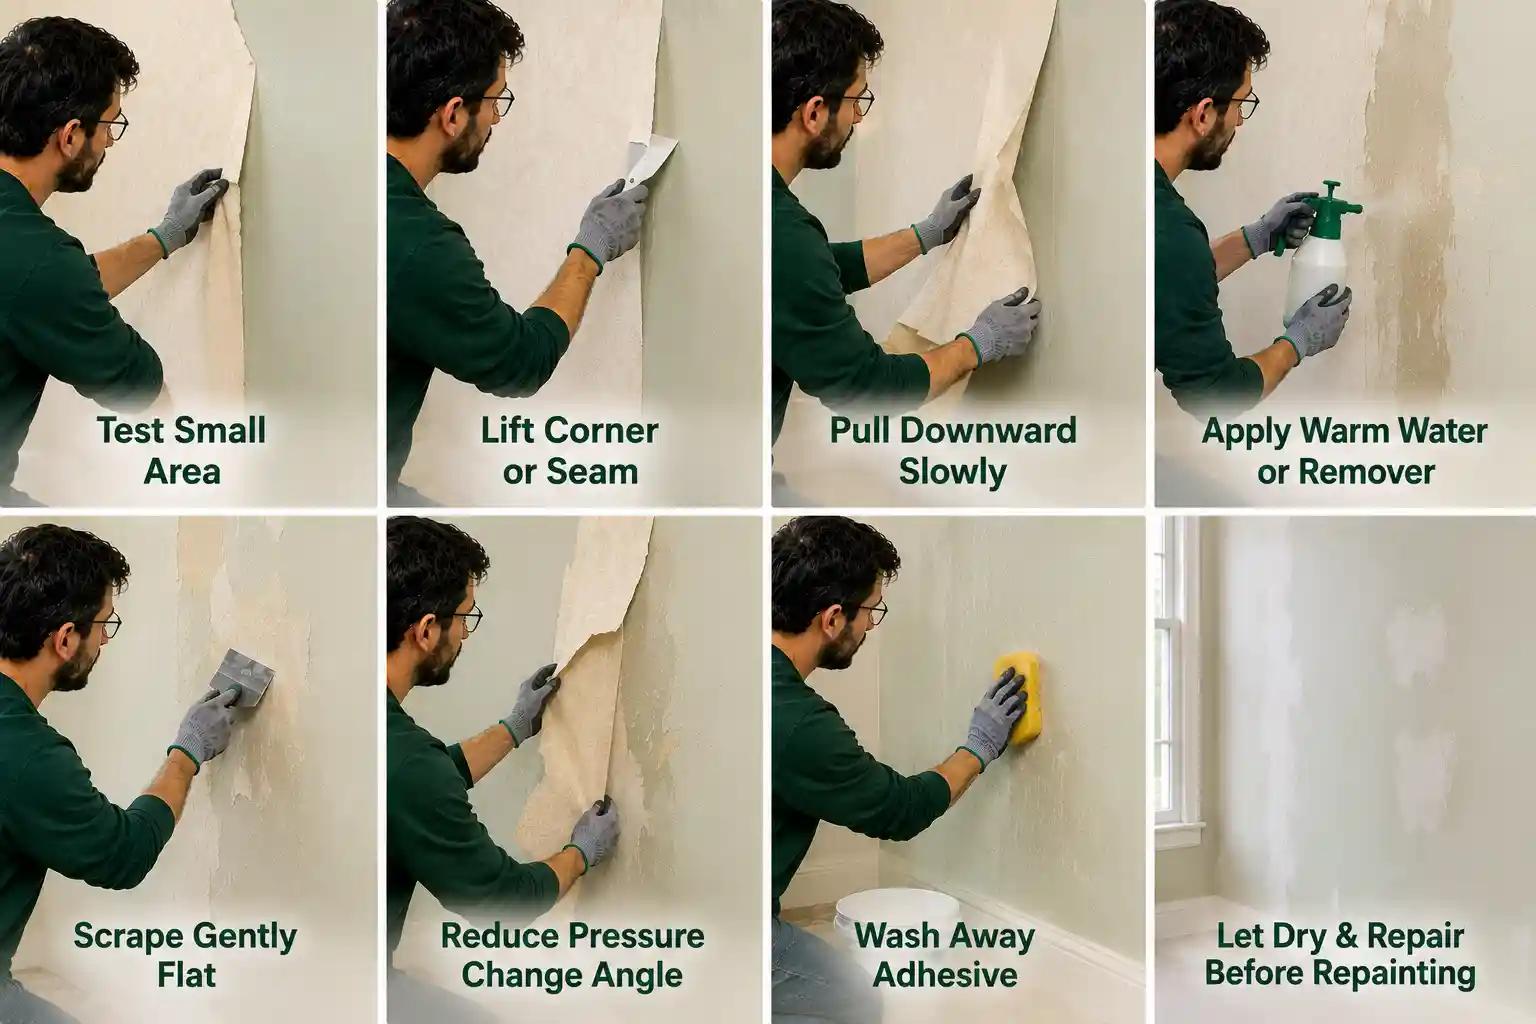
Wallpaper installed over paint usually comes off more easily. This is because the paint acts as a release layer between paste and wall. The trade-off is that the paint can come off with it. Latex paint in poor condition, or paint applied over an unprimed surface, lifts in sheets. Test in a corner and watch the paint line, not the paper.
If the paint starts lifting, reduce your scraper angle and pull the paper downward against itself rather than away from the wall. Follow the steps below for removing wallpaper from a painted wall:
- Test a small area to see whether the wallpaper separates cleanly from the painted surface.
- Lift a corner or seam with a plastic putty knife.
- Pull the wallpaper slowly downward, keeping it close to the wall.
- Apply warm water or wallpaper remover to areas that resist peeling.
- Scrape gently, holding the tool nearly flat against the wall.
- If the paint starts lifting, reduce pressure and change the pulling angle.
- Wash away remaining adhesive with warm water and a sponge.
- Let the wall dry completely and repair any damaged paint before repainting.
3. Plaster
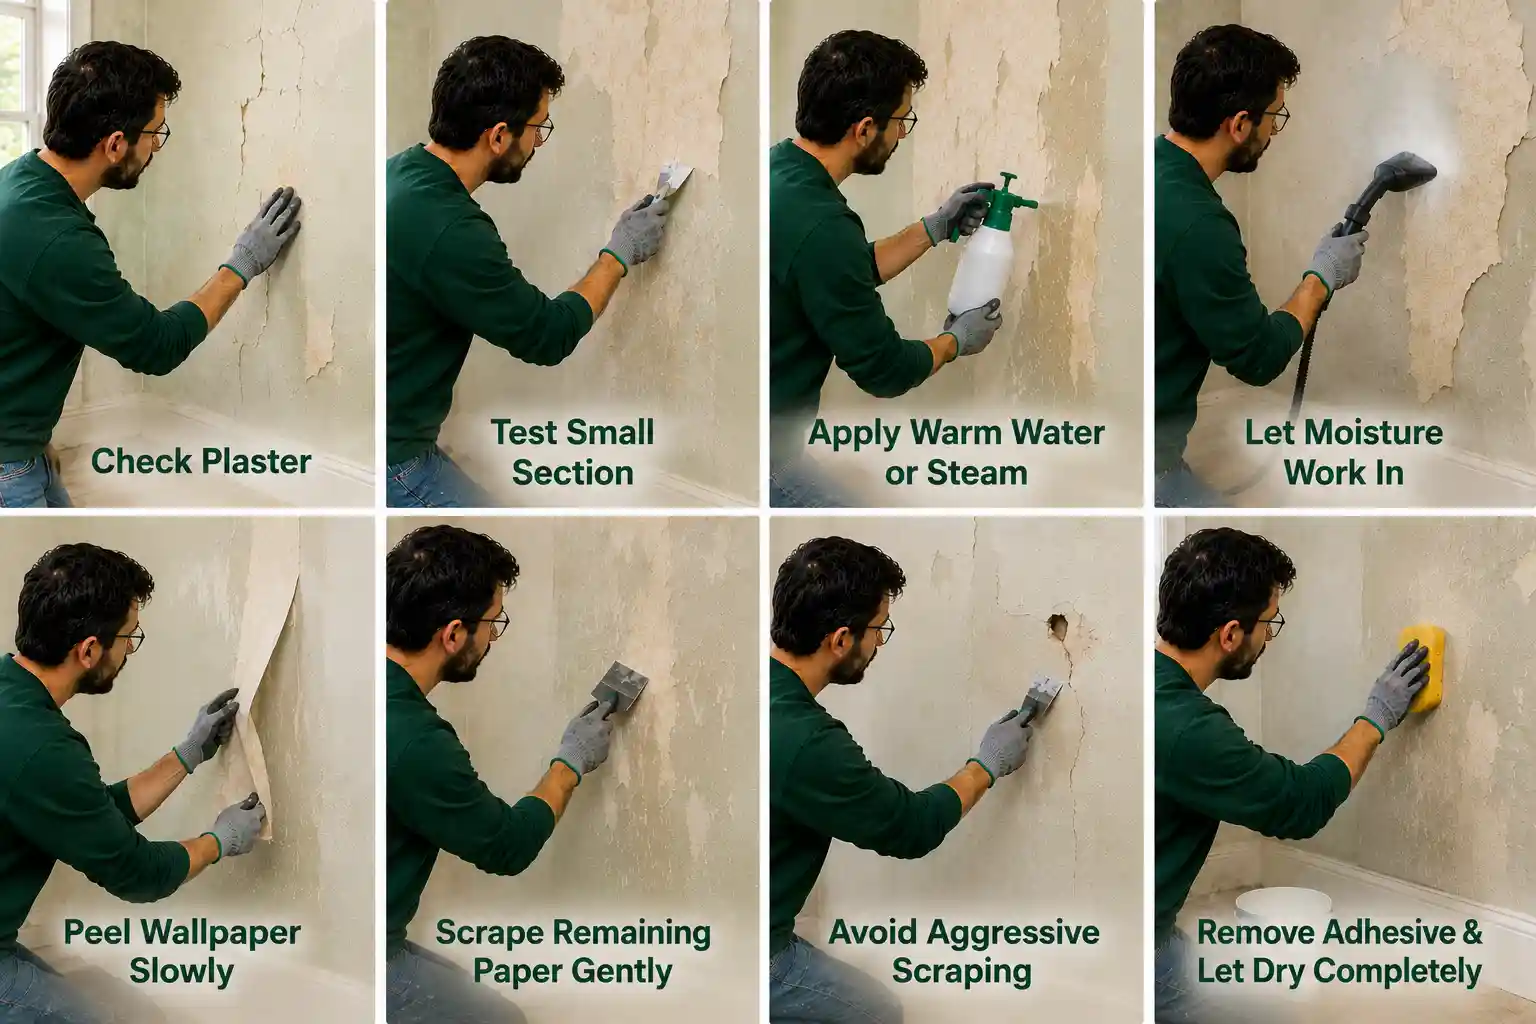
Plaster is a forgiving surface. It handles more water, more steam, and firmer scraping than drywall. Older plaster does have weak points. Check for hairline cracks and areas that sound hollow when tapped, and go easy over them, since a loose plaster key can let go under scraper pressure.
- Check the plaster for hairline cracks, loose areas, or hollow spots.
- Test a small section to see how the wallpaper and plaster respond.
- Apply warm water, wallpaper remover, or steam to loosen the adhesive.
- Let the moisture work into the wallpaper before scraping.
- Peel the wallpaper slowly from a seam or corner.
- Scrape remaining paper gently, using firmer pressure only on sound areas.
- Avoid aggressive scraping over cracked or hollow plaster.
- Remove any leftover adhesive and let the plaster dry completely.
4. How to Remove Wallpaper From Tile
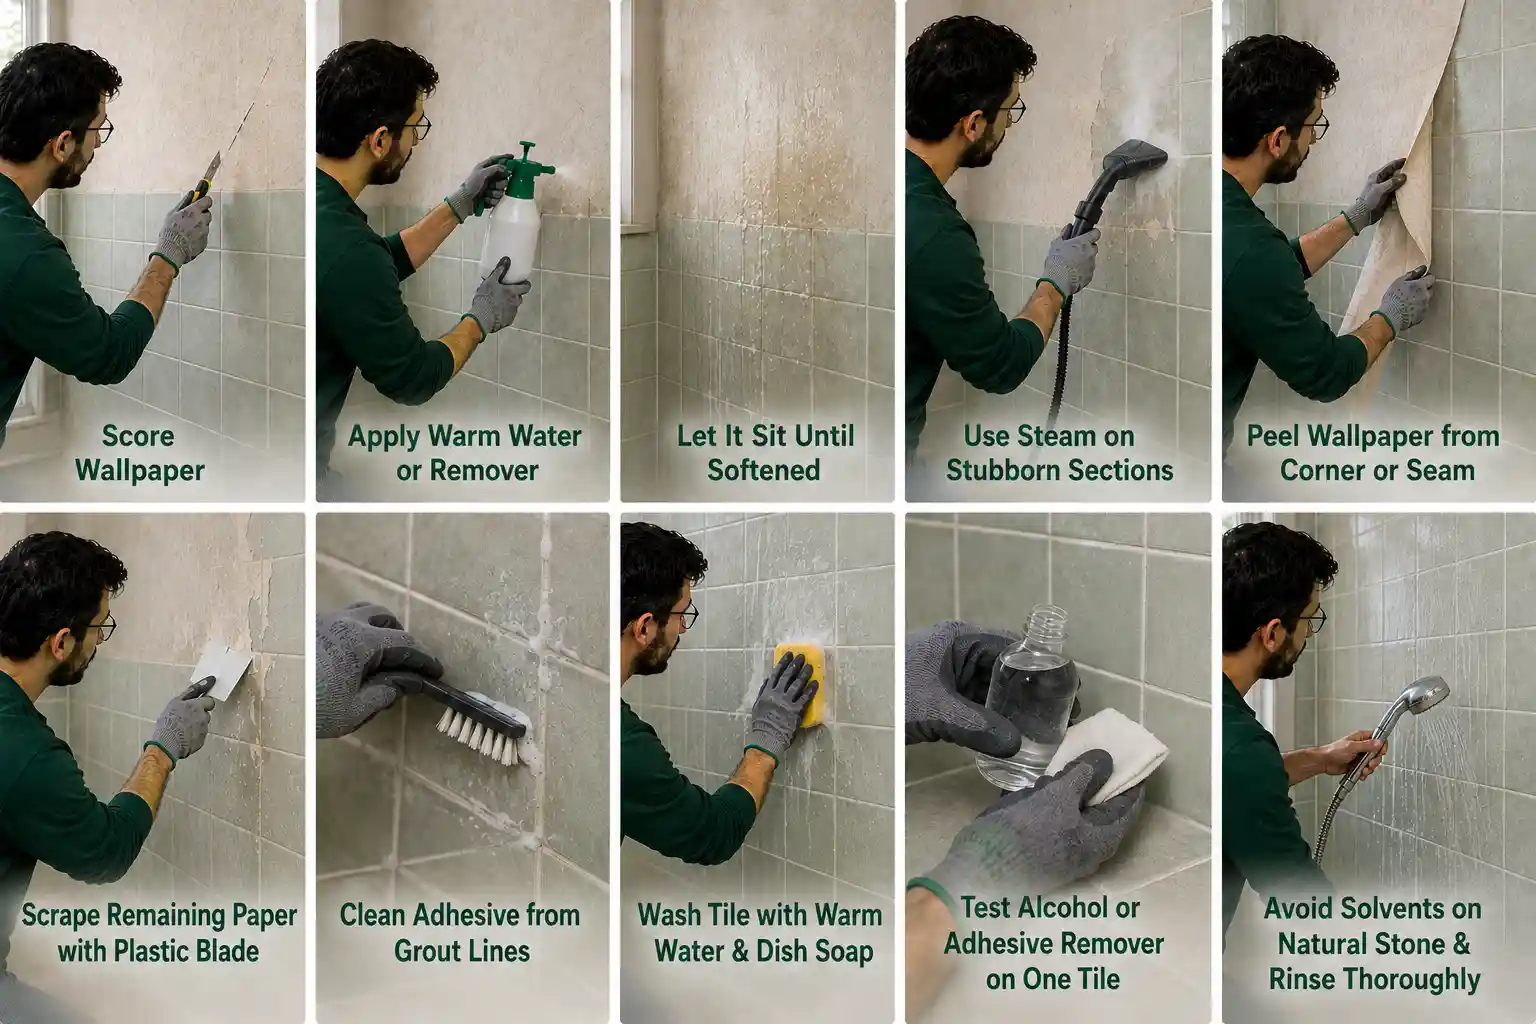
The tile is non-porous, so moisture will not damage the tile itself. This allows you to use more water or steam than you would on drywall. However, glazed tile can scratch easily, so the scraping method matters.
- Score the wallpaper to help moisture penetrate the surface.
- Apply warm water or wallpaper remover generously.
- Let it sit until the wallpaper and adhesive soften.
- Use steam on stubborn sections if needed.
- Peel the softened wallpaper from a corner or seam.
- Scrape remaining paper with a plastic blade held nearly flat.
- Clean adhesive from grout lines with a soapy soak and stiff nylon brush.
- Wash the tile with warm water and dish soap to remove residue.
- For stubborn film, test rubbing alcohol or adhesive remover on one tile first.
- Avoid solvents on natural stone and rinse the surface thoroughly.
Common Errors That Make Wallpaper Removal Harder
For a successful wallpaper removal process, you need to follow every step very carefully. Generally, people make mistakes that ultimately damage the wall.
- Scraping too aggressively. Gouges in drywall mean filling, sanding, and priming. Ten minutes saved during stripping becomes an hour of patching plus drying time.
- Skipping the test patch. You commit to the wrong method for the whole room and only find out on the third wall.
- Not scoring coated paper. Water sits on the surface, evaporates, and does nothing. People conclude that soaking does not work when the problem was never the method.
- Scoring too deeply, or scoring paper that did not need it. Each perforation becomes a small hole in the wall surface. Enough of them and you have a wall that needs skimming.
- Applying too much water at once. Water running down the wall soaks the baseboard and the drywall’s lower edge. Repeated light applications beat one flood.
- Leaving adhesive behind. Paint over old paste, and it stays slightly soft underneath. The paint film bubbles, peels at the edges, or dries with a visible sheen difference across the wall.
- Over-steaming one spot. The drywall core softens, and the facing separates. That patch has to be cut out and replaced, which is a much bigger job than the stripping was.
- Ignoring outlets and switches. Water reaching a live receptacle is a shock and fire risk. Kill the circuit and tape the openings.
- Painting before the wall is dry. Trapped moisture causes blistering and adhesion failure weeks later, when the room is fully back together.
- Prime with standard wall primer. Ordinary primers do not seal residual paste. A sealing or problem-surface primer does, and it is the difference between a finish that holds and one that bubbles.
Final Words
Stripping wallpaper isn’t just a home renovation chore. It’s the ultimate reset button for your living space. While the process demands patience. The real secret to a flawless transformation lies in working with your wall surface, not against it. Give your softening solution time to dissolve ancient paste. Do not force a dry scraper into delicate drywall, and treat wall prep as the true foundation of great interior design.
Frequently Asked Questions
Dry peeling, when the paper allows it. Lift a corner and pull. If that fails, hot water with dish soap on porous paper is the next easiest, and steam is the most effective for anything difficult. Test before assuming you need the hardest method.
Sometimes. It depends on the paint’s condition and whether the wall was primed before papering. Sound paint on a primed surface often survives. Test a hidden section first, and pull slowly at a shallow angle rather than straight out from the wall.
Soak porous, uncoated paper on a sound wall. Steam multiple layers, painted-over paper, thick vinyl, or anything that resists soaking. Steam is more powerful and carries more risk to drywall, so start with water where water is likely to work.
Follow the product label, which is usually somewhere in the range of fifteen to twenty minutes. Watch the wall rather than the timer. The paper should look darkened and feel soft. Older paste routinely needs a second application.
Soak it thoroughly and wait. Backing paper is porous, so it absorbs water readily and turns to pulp you can lift with a wide scraper in long sweeps. If it shreds into small pieces, it needs more water and more time.
Wash with hot water and a few drops of dish soap, or a 1:1 white vinegar and hot water mix for heavier residue. Rinse with clean water afterward. Check by running a dry hand over the dried wall, then prime with a sealing primer before painting.
Yes. A 1:1 mix of white vinegar and hot water helps break down older paste, and it works on residual adhesive as well as on the paper itself. It is mild, cheap, and low-odor, but it is not stronger than a commercial stripper on heavy adhesive.
Yes, though it takes the most care of any surface. Whether the drywall was primed before papering makes the biggest difference. Use a plastic scraper, apply less water more frequently, and plan for some skim coating.
Yes. Tile is non-porous, so score the paper, soak it generously, and give it longer than you would on drywall. Use a plastic scraper held nearly flat, because metal scratches glazed tile permanently. Adhesive in grout lines usually needs a nylon brush.
Add moisture and time before adding force. Check whether the paper needs scoring, whether your soak time is long enough, and whether steam would penetrate better. If the wall surface starts coming off with the paper, stop and reassess rather than pushing through.
No. Wash off all adhesive, let the wall dry for at least twenty-four hours, repair any damage, and prime with a sealing primer. Painting over damp walls or residual paste causes bubbling and peeling, usually weeks later.
Removal gives the better and more durable result in almost every case. Painting over wallpaper leaves visible seams, and moisture in the paint can loosen the paste and cause bubbling. Painting over is a defensible short-term choice only when removal would destroy fragile plaster, and even then, sealing and skim coating first is what makes it work.


