
Can You Put Wallpaper on Textured Walls? Wall Prep & Installation Guide
Yes, you can put wallpaper on textured walls, but the wall decides how well it goes. A light orange peel finish in good condition can often take wallpaper with modest preparation. Knockdown and sand textures rarely do. Texture depth matters most, followed by whether the surface is sound, sealed or porous, and what kind of wallpaper you plan to hang. Texture affects two separate things: how much of the wall the adhesive can actually touch, and how flat the finished surface looks. Preparation is what fixes both. This blog by Floor Land explains how to identify your texture type, how to test the wall yourself, which papers cope better with an imperfect surface, and how to prepare a textured wall properly so the result lasts.
Wall Prep Checklist: What Your Surface Needs Before Papering
| Wall condition | Direct wallpaper application | Preparation usually needed | Main concern |
| Very light orange peel, sound and painted | Sometimes possible | Clean, spot-fill, knock down high points, prime | Texture still readable in raking light |
| Moderate orange peel or light knockdown | Usually not recommended | Sand peaks, one or two skim coats, sand, prime | Patchy adhesive contact and visible bumps |
| Knockdown, sand, slap brush or skip trowel | No | Full skim coat to a smooth finish, sand, prime | Uneven surface, open seams, lifting edges |
| Popcorn or heavy stipple on a wall | No direct application | Texture removal or heavy skim coat, then prime. Test for asbestos in older homes first | Very little adhesive contact, crumbling surface |
| Rough or damaged plaster | No | Repair cracks, re-skim, seal, prime | Movement, hollow spots, ongoing cracking |
| Smooth, sound, primed wall | Yes | Clean, check porosity, wallcovering primer | Fewest variables, most predictable result |
How to Install Wallpaper on Textured Walls?
Installing wallpaper on a textured wall requires more preparation than applying it to a smooth surface. Raised patterns, bumps, grooves, and uneven areas can affect adhesion and may show through the wallpaper. The right preparation depends on the severity of the texture, so inspect and level the wall before installation.
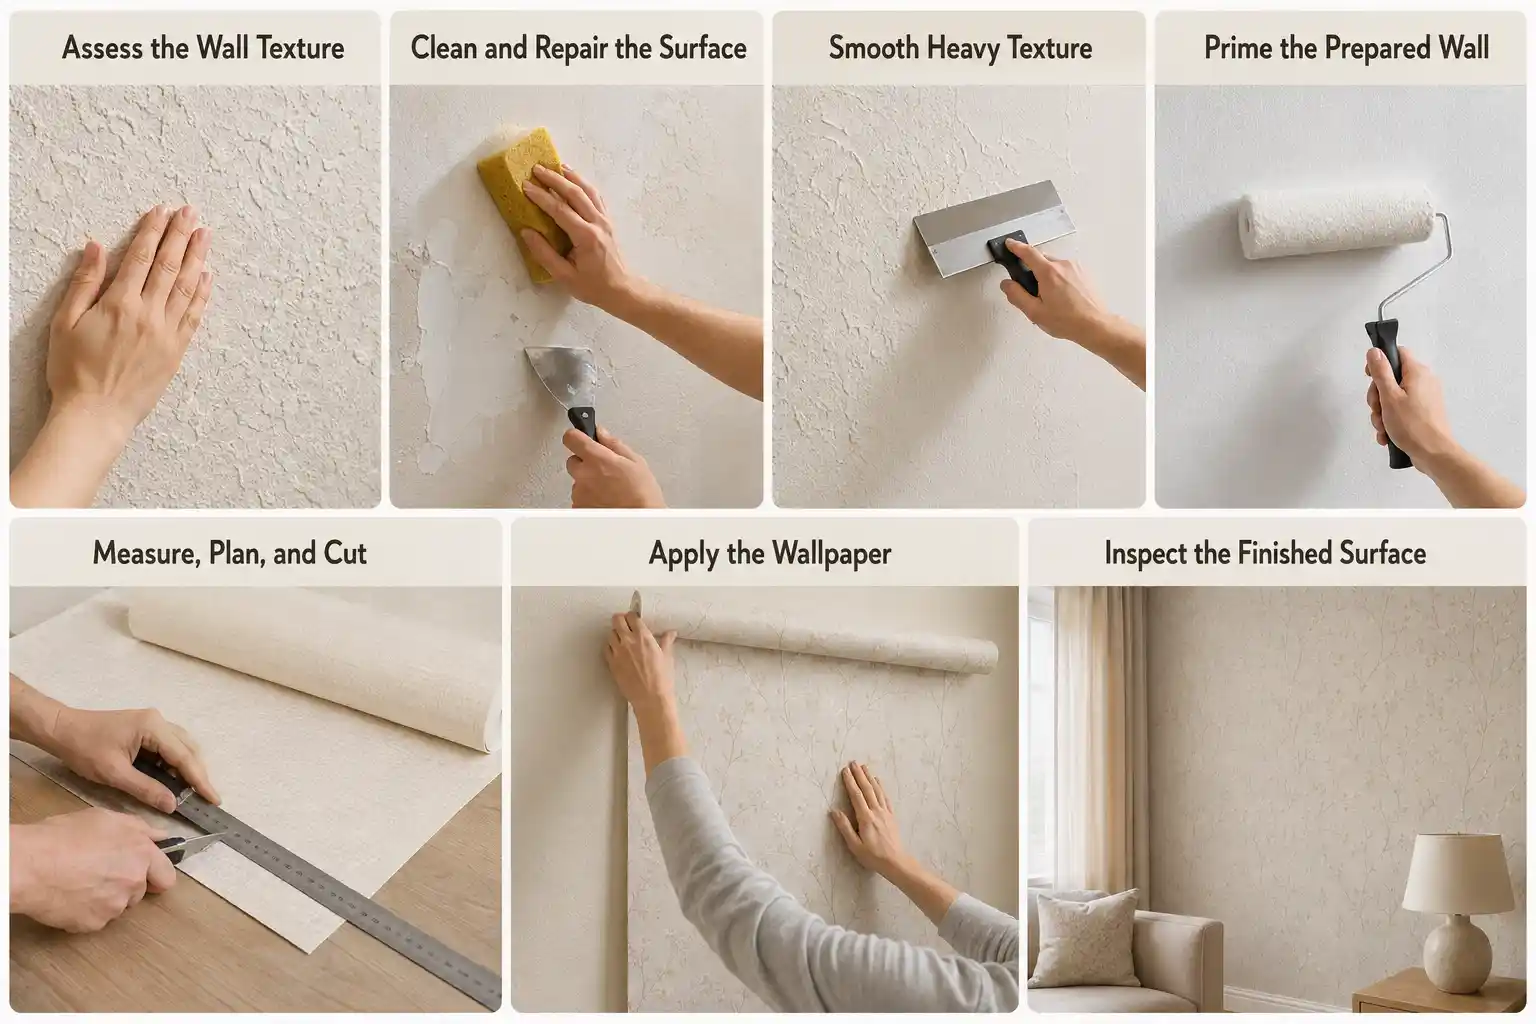
1. Assess the Wall Texture
Run your hand across the wall and look for bumps, grooves, cracks, loose paint, or damaged areas. Light orange-peel or stippled texture may only require minor smoothing, while deep or heavy texture should generally be flattened before wallpapering.
2. Clean and Repair the Surface
Remove dust, grease, loose paint, and other debris using a suitable wall cleaner. Fill cracks, holes, and damaged areas with an appropriate wall filler, then allow the repairs to dry completely. Sand raised patches so they do not create visible bumps beneath the wallpaper.
3. Smooth Heavy Texture
For prominent ridges and deep grooves, use medium-grit sandpaper to reduce the highest areas. If sanding alone cannot create a reasonably flat surface, apply a thin skim coat or suitable joint compound. Work in manageable sections rather than applying one unnecessarily thick layer.
Once completely dry, sand the surface until it feels even. Shine a light across the wall to reveal remaining ridges or depressions, then remove all sanding dust.
4. Prime the Prepared Wall
Apply a wallpaper-compatible primer over the prepared surface. This seals porous skim-coated areas and provides a more consistent base for the adhesive. Let the primer dry fully according to the manufacturer’s instructions.
5. Measure, Plan, and Cut the Wallpaper
Measure the wall height and width, then determine where each strip will be positioned. Establish a straight vertical reference line rather than relying on the corner of the wall, which may not be perfectly square.
Cut the wallpaper into manageable lengths, leaving some extra material for trimming. If the wallpaper has a repeating pattern, check the pattern match before cutting the remaining strips.
6. Apply the Wallpaper
Follow the wallpaper manufacturer’s instructions for the recommended adhesive and application method. Position the first strip carefully against your reference line, then smooth it from the center outward with a wallpaper smoothing tool.
Avoid excessive pressure or stretching, particularly with delicate wallpaper. Continue with the remaining strips while carefully matching the pattern and keeping the seams aligned.
7. Inspect the Finished Surface
Check the installed wallpaper from different angles for bubbles, visible texture, lifted seams, or areas with weak adhesion. Address problems while the adhesive is still workable, following the manufacturer’s instructions.
Important: Deep texture, damaged plaster, moisture problems, or multiple old wallpaper layers may require professional wall preparation before installation. Wallpaper should not be relied on to conceal significant wall defects.
Choose the Best Wallpaper For a Textured Wall
There is no single best wallpaper for textured walls, but some characteristics clearly cope better than others. Here’s what each option can and cannot do.
1. Peel-and-Stick Wallpaper
Peel-and-stick wallpaper relies on pressure-sensitive adhesive that struggles on textured surfaces. Bridging valleys while gripping only surface peaks results in weak holding power, prominent bumps, and curling edges.
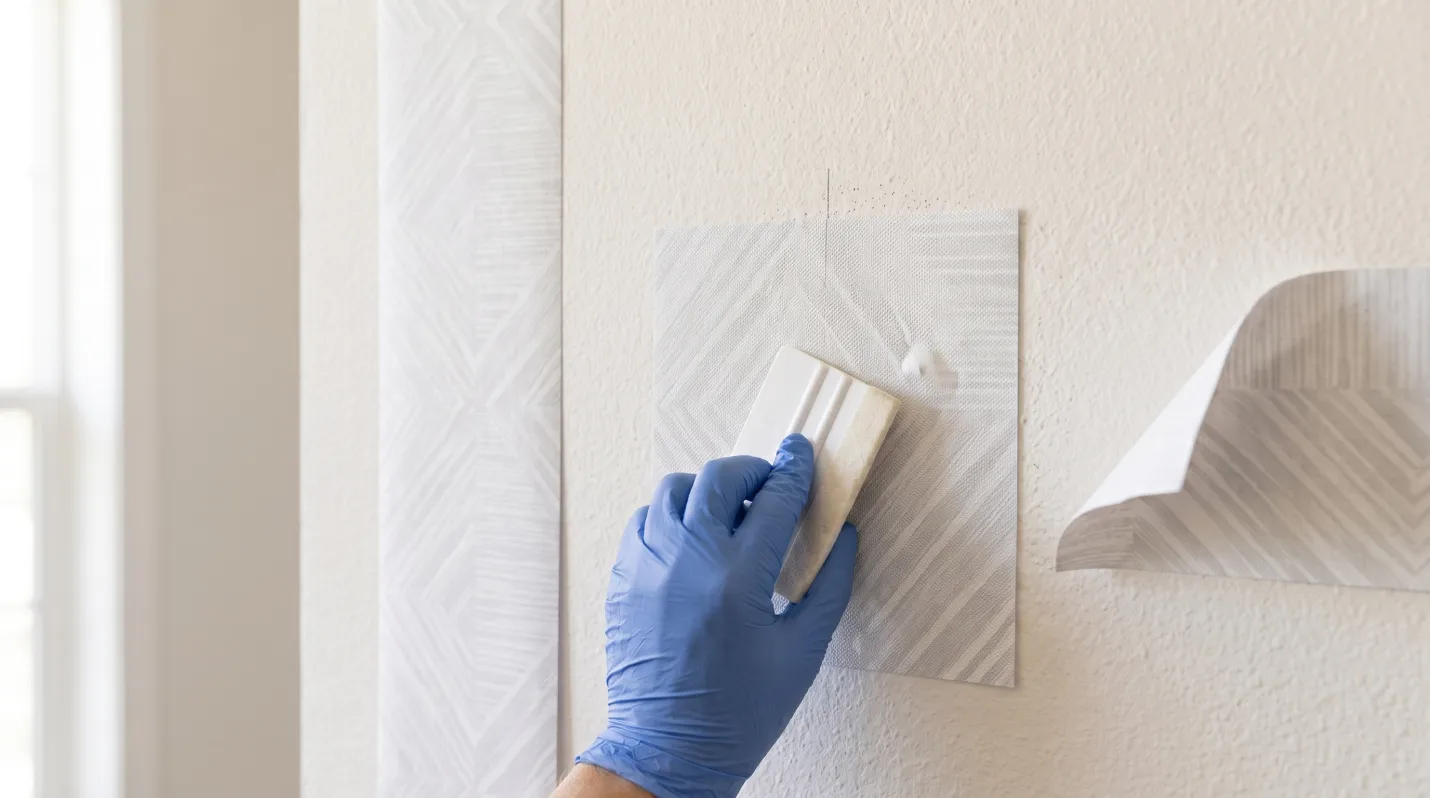
Paint type and maturity also heavily dictate adhesion. The glue bonds best to fully cured eggshell, satin, or semi-gloss finishes. Conversely, avoid flat, powdery matte paints or fresh latex paint, which requires two to four weeks to cure completely before application.
While heavy, dark, matte-finish paper can stick to light orange peel textures, testing remains mandatory. Always press a hand-width sample onto your roughest wall section and wait seven days. If the corners do not lift, your surface is ready for wallpaper.
2. Vinyl Wallpaper
Solid vinyl and vinyl-coated papers are heavier and more opaque than most alternatives, so they hide minor surface variation better than thin paper. They are also more durable and easier to wipe down. But vinyl does not levitate over texture. It conforms to whatever it is stuck to, and a deep knockdown pattern will still read through it.
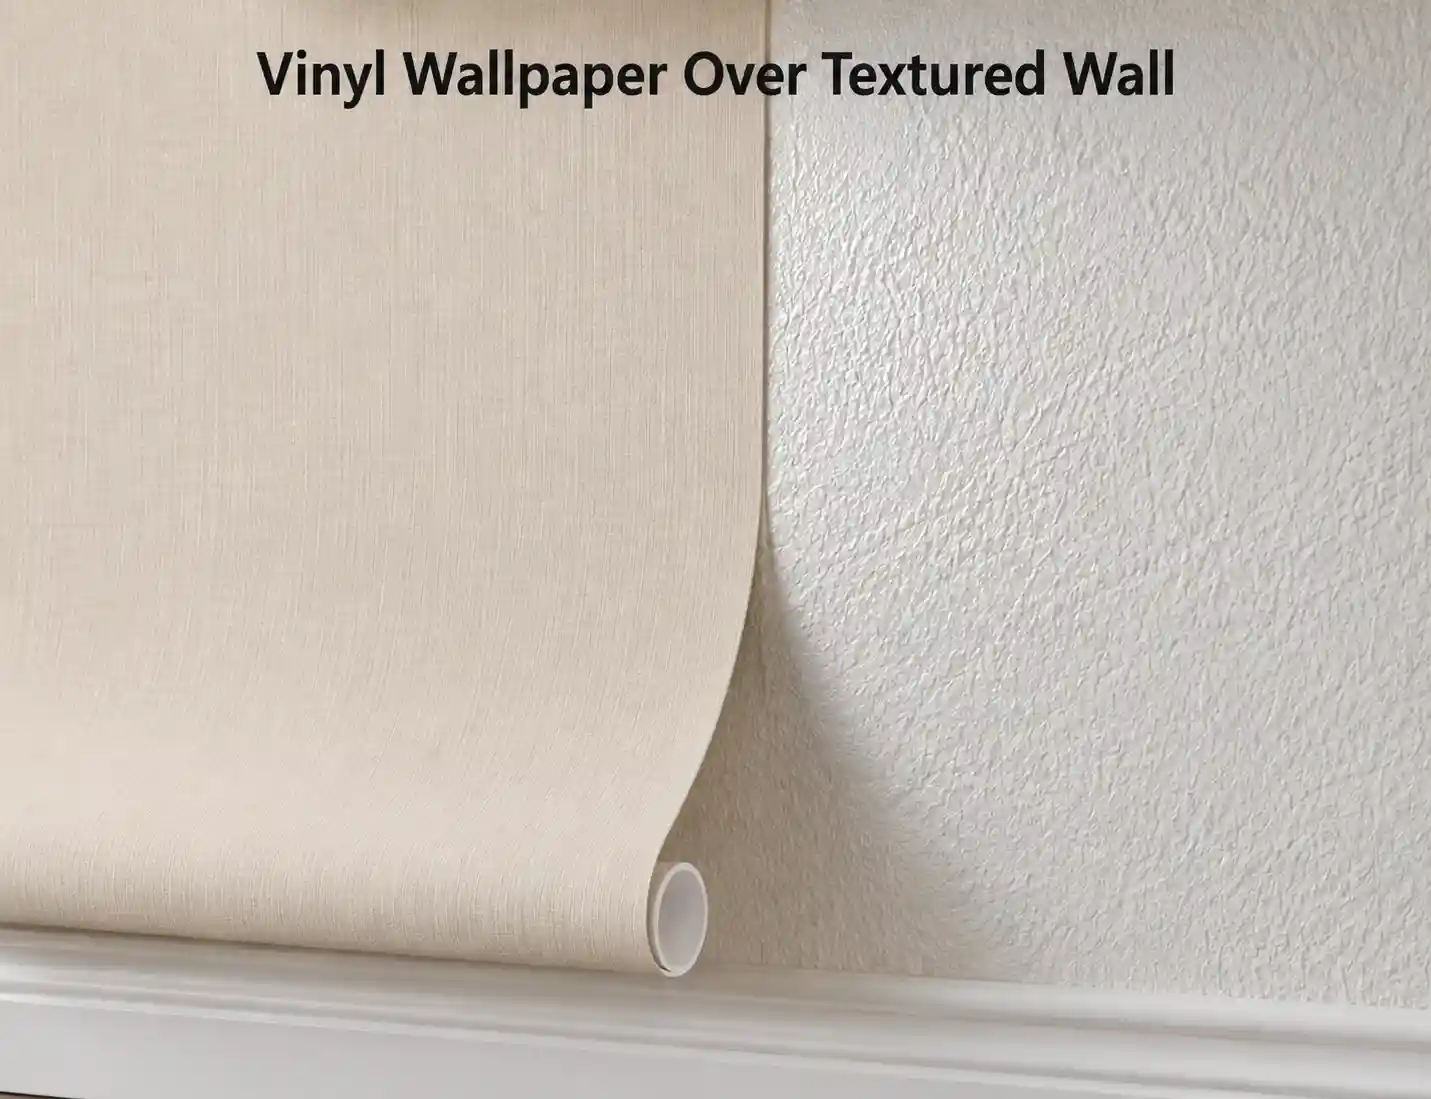
Vinyl is also an effective vapor barrier, which matters on exterior walls and in bathrooms. Use it on prepared walls in dry rooms, and be cautious about sealing moisture into a wall that already has an air gap behind every peak.
3. Thick Wallpaper
Thickness helps, within limits, and this is where a lot of online advice oversells. Extra thickness and a stiffer substrate raise the threshold at which a small imperfection becomes visible. What thickness does not do is fill a low spot. A heavier paper bridges rather than conforms, and bridging creates unsupported areas that dent easily and can eventually delaminate.
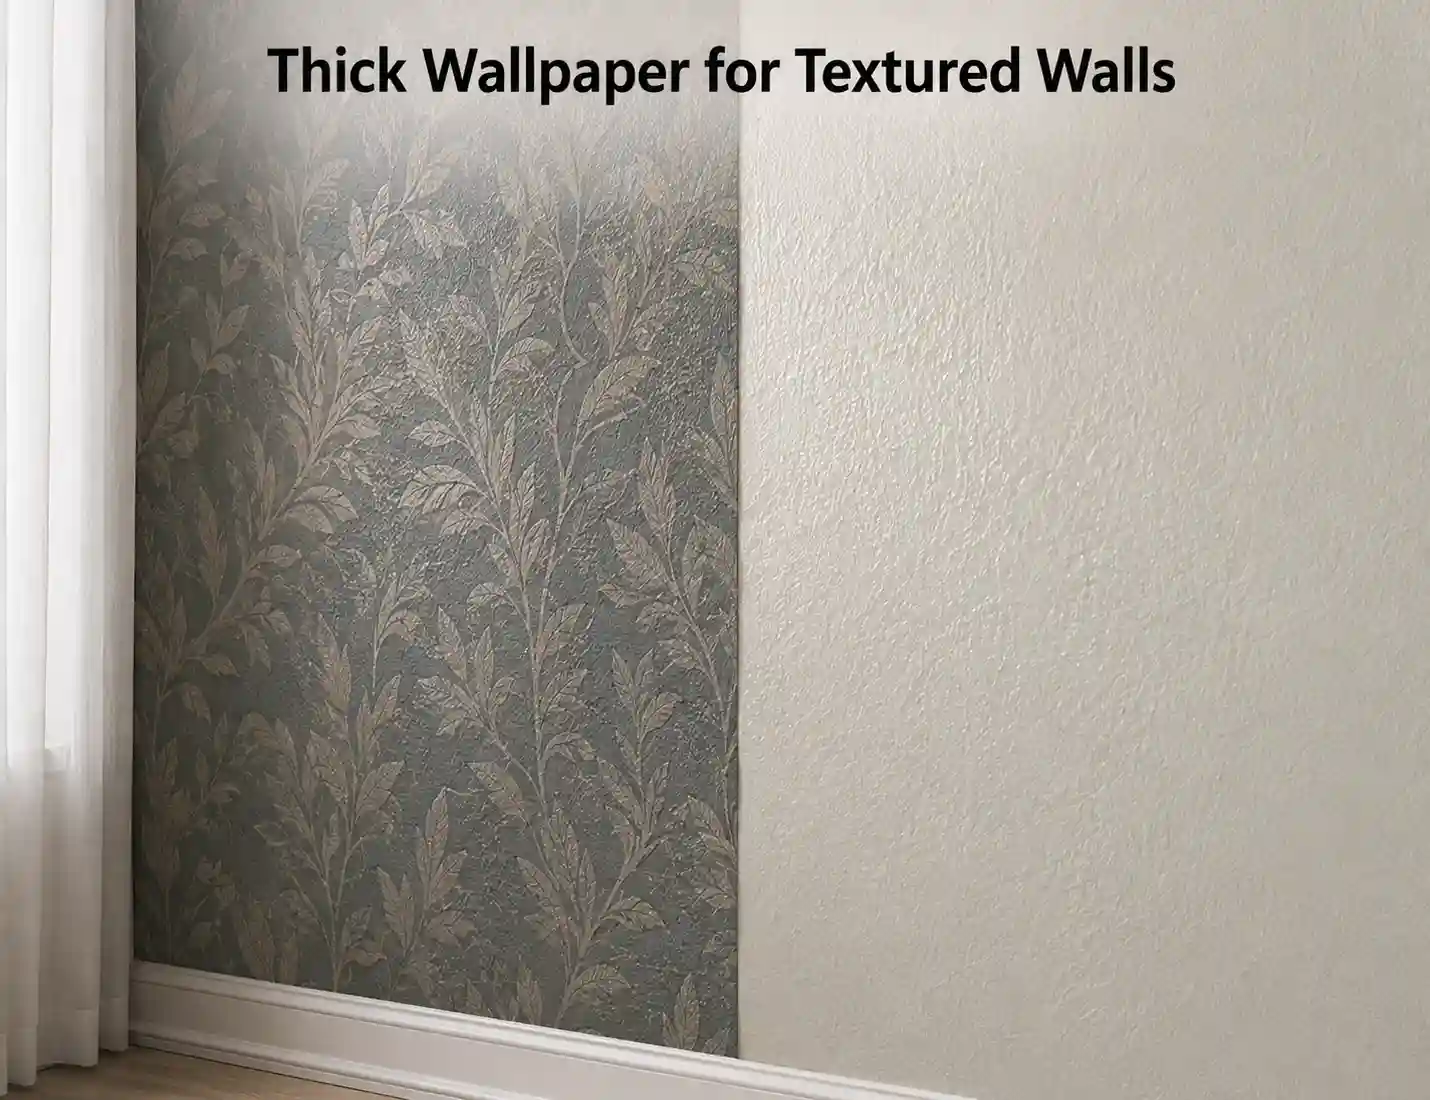
Choosing a thick wallpaper is a reasonable way to manage a very light texture. It is not a substitute for preparing a moderately or heavily textured wall, and no wallpaper thickness will make a knockdown finish disappear. Pattern and color do more work than most people expect. Busy patterns, mid-to-dark tones, high contrast, and matte finishes all disguise residual texture. Plain pale colors, subtle tonal designs, and anything with a sheen do the opposite.
4. Paste-The-Wall and Non-Woven Wallpaper
For a prepared but not perfect wall, non-woven paste-the-wall paper is usually the most forgiving choice. The substrate is dimensionally stable, so it does not expand and shrink the way traditional paper does, which keeps seams tighter.
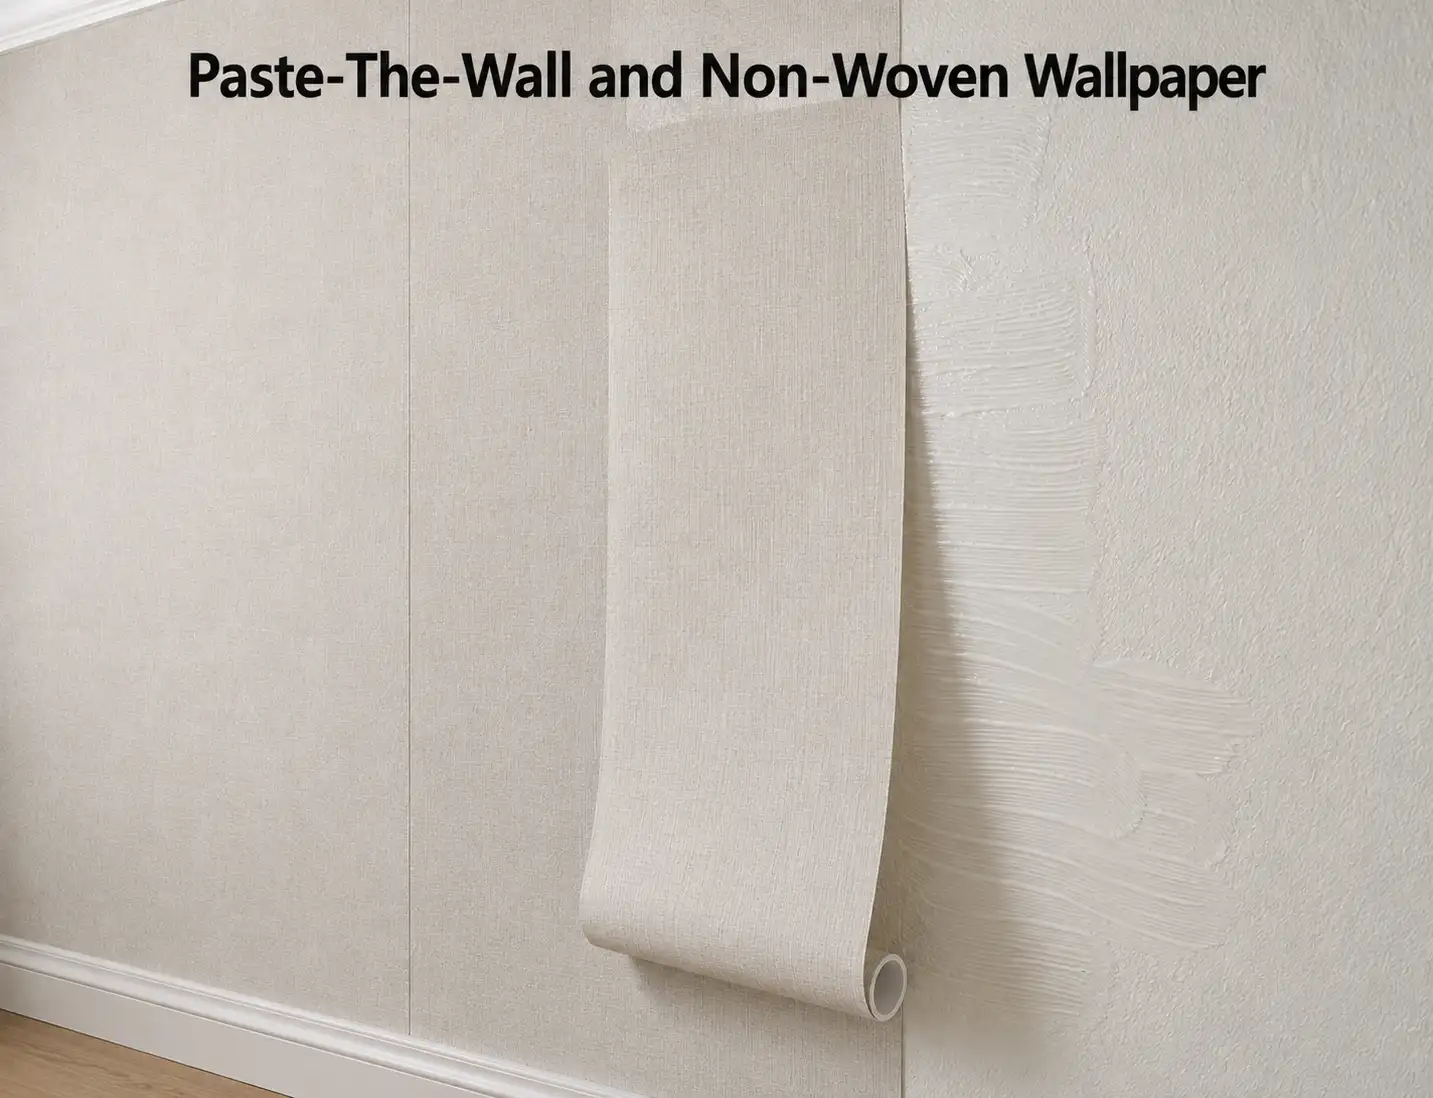
You paste the wall rather than the paper, so the adhesive fills shallow low spots rather than sitting only on the back of the paper. It is also breathable and generally strips off dry in full sheets later. If you are working over a lightly textured wall that has been primed properly, this is where I would start.
5. Wallpaper Liner
Lining paper is a genuinely useful and underused option. It is a heavy blank paper hung first, cross-lined horizontally so its seams never coincide with the wallpaper seams above it, giving a consistent, uniform-porosity surface for the finish paper.
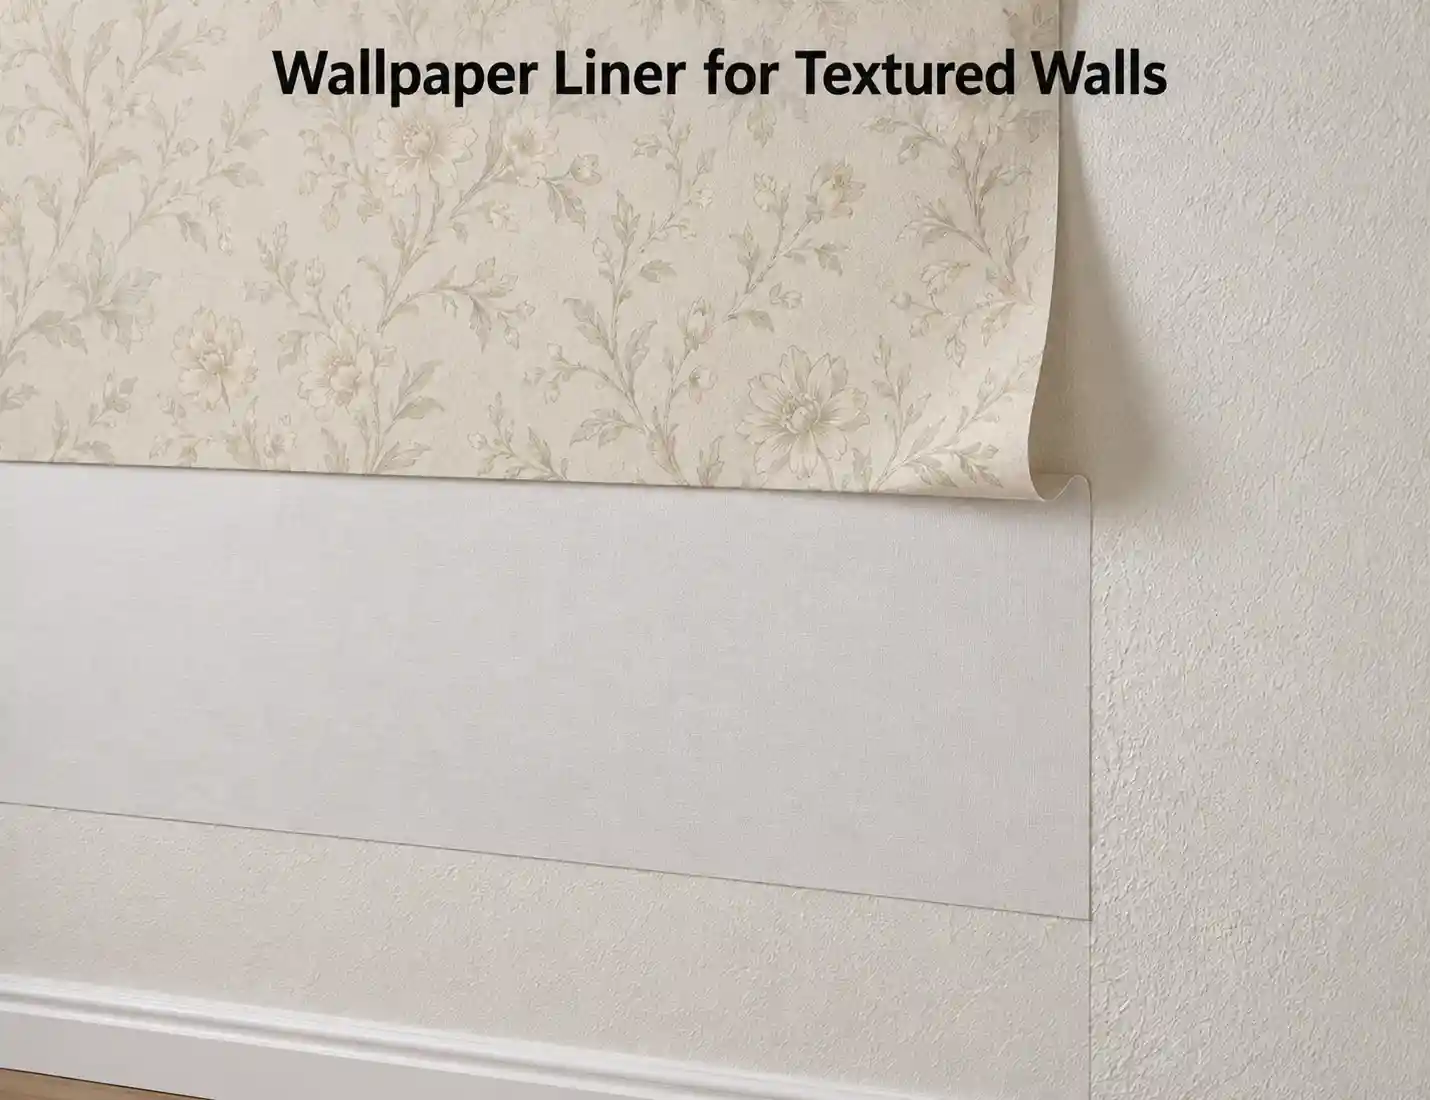
Be realistic about what it fixes. Liner evens out porosity, hides fine cracks and shallow irregularity, and gives paste a predictable surface. Grades run roughly from 800 up to 2000, with 1000 to 1200 suiting sound walls with minor imperfections and 1400 upwards used on rougher surfaces. It will not flatten a knockdown or popcorn texture.
Install over deep texture, and a liner simply becomes a slightly smoother version of the same bumpy wall; on peaks, it can tear during hanging. Liner is also a wet, pasted, two-stage job that is no easier to remove than wallpaper. So it is not a renter-friendly shortcut despite how it is sometimes presented. Use it to improve a decent wall, not to rescue a bad one.
The Real Factors Behind Wallpapering Textured Walls
Custom wallpaper does not need a perfect wall. It needs a consistent one. Every problem people run into on textured walls traces back to one of six variables.
- Texture depth. This is the single biggest factor. A finish you can barely feel with a fingertip behaves very differently from one that catches your fingernail. Roughly speaking, textures shallower than about a millimeter are workable with the right paper. Anything deeper starts costing you adhesion and finish quality at the same time.
- Whether the surface is sealed or porous. Bare joint compound, fresh skim coat, and chalky flat paint all drink moisture out of wallpaper paste. It pulls the paste off the paper before it can bond. Glossy paint has the opposite problem: nothing soaks in and nothing grips. Both are fixable with the right primer, but you have to know which one you are dealing with.
- Condition of the wall. Loose paint, flaking texture, filled holes that were never sanded, hairline cracks, and damp patches will all show up again through wallpaper, usually within weeks. Wallpaper does not stabilize a failing surface. It hides it briefly, then fails with it. Ultimately, you need to remove the wallpaper.
- Type of wallpaper. A heavy non-woven vinyl and a thin, pale peel-and-stick behave nothing alike on the same wall. Weight, opacity, stiffness, and adhesive system all change the outcome.
- Adhesive or installation method. Wet paste has a real advantage on slightly imperfect walls, because it stays workable, flows into shallow low spots, and bonds as it dries. Pressure-sensitive adhesive on peel-and-stick only bonds where it physically touches the wall.
- How smooth the finished result needs to look. A dark, busy pattern on a wall lit from the side by a lamp is forgiving. A pale linen-look paper on a wall that gets low morning sun across it is not. Decide this before you decide anything else, because it changes how much preparation is worth doing.
The drywall industry already codifies this. The Gypsum Association’s GA-214 standard lists a Level 4 finish as the baseline for wallcoverings and calls for Level 5, a skim coat over the entire surface. Textured walls sit well below Level 4. That gap is the work in front of you.
Types of Textured Walls and How Each One Behaves
Treating all texture as one category is where most advice goes wrong. These surfaces differ in depth, sound, and application, and each changes the preparation.
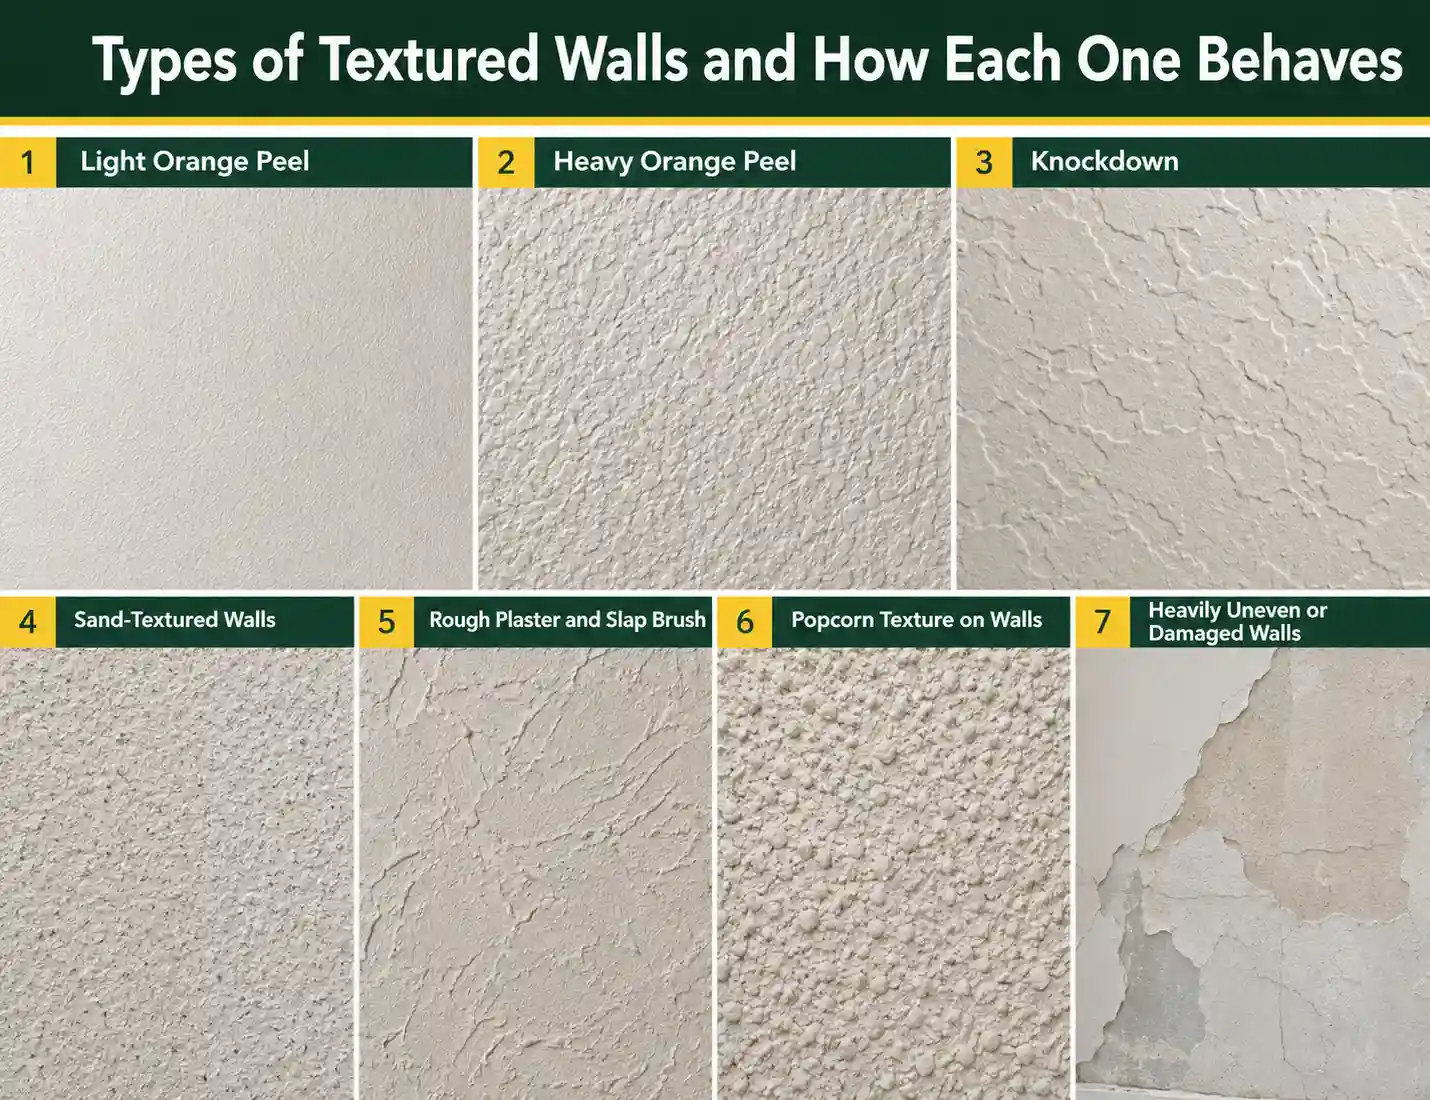
1. Light Orange Peel
Sprayed and left to settle into a fine dimpled pattern, usually well under a millimeter deep. This is the most brick wallpaper-friendly texture. A cleaned, spot-filled, and primed light orange peel wall will take a heavier paste-the-wall paper reasonably well. You will still see a faint stipple in strong side light, and a thin or pale paper will show it clearly.
2. Heavy Orange Peel
Follow the same technique, but use more material, larger droplets, and sharper peaks. The peaks are the problem. They hold the paper off the valleys, so a fair amount of the wall never touches the adhesive. Knocking the high points down with a pole sander and a single skim coat usually brings this into workable range.
3. Knockdown
In this situation, you need to spray heavily, then flatten with a blade so the texture forms wide, flat plateaus with distinct edges and shadow lines between them. Those edges are the issue. They telegraph as hard lines rather than soft mottling, which reads as damage rather than as texture once paper is over it. Sanding alone will not resolve knockdown, because the low areas are genuinely low. It needs filling.
4. Sand-Textured Walls
Sand-textured walls are created using paint or joint compound loaded with gritty aggregate. Two separate problems here. The surface is abrasive enough to scuff and mark wallpaper during smoothing, and the grit tends to be loosely bound, so particles come away and end up trapped under the paper as bumps. Sand texture almost always needs skimming, not sanding.
5. Rough Plaster and Slap Brush
Deep, irregular, often with genuine peaks and troughs of several millimeters. These are decorative finishes in their own right and were never meant to be covered. Getting them flat means multiple skim coats. On older lime or lath-and-plaster walls, check for movement and hollow sections first, because filling over a wall that is coming away from its backing wastes the work.
6. Popcorn Texture on Walls
Popcorn is a ceiling product that sometimes ends up on walls. It is a thick, friable, acoustic-style texture full of voids. It is the worst candidate on this list, and it deserves its own discussion further down.
7. Heavily Uneven or Damaged Walls
Bowed sections, old repairs, patched plumbing chases, blown plaster. Texture is often there specifically to disguise this. If that is your wall, the texture is a symptom. Deal with the substrate first, then decide about wallpaper.
How To Assess Your Textured Wall for Wallpapering
You can answer most of these questions yourself before spending anything.
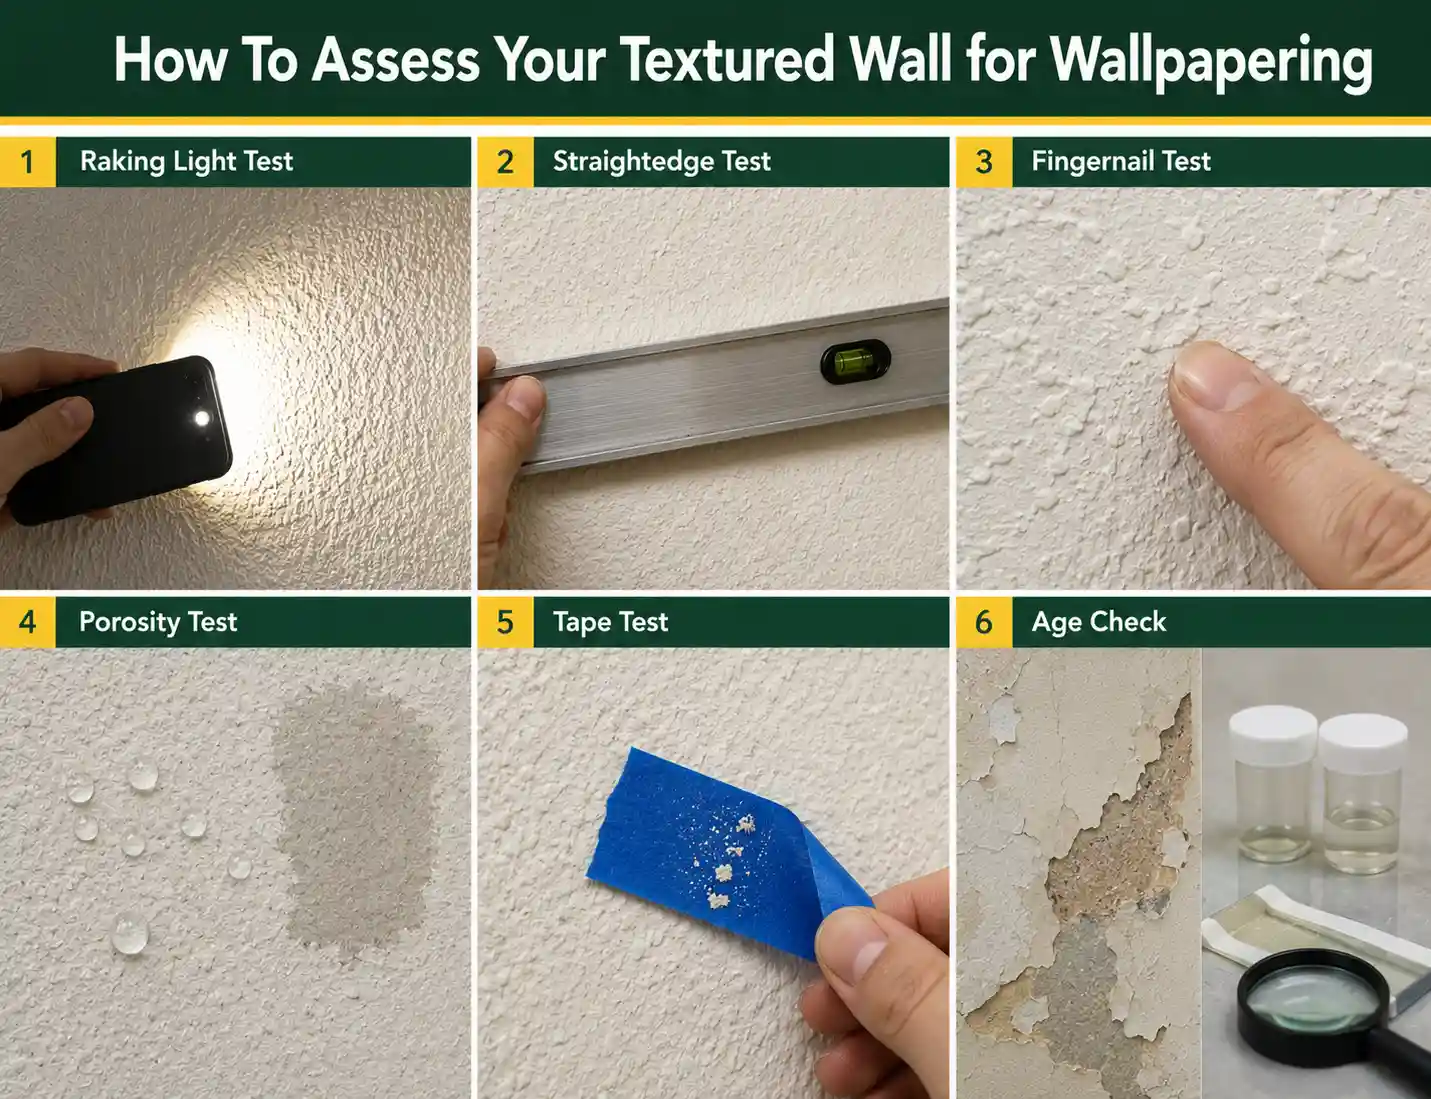
1. Raking Light Test
Turn off the room lights, hold a work light or phone flashlight flat against the wall, and shine it along the surface. Everything you can see in that light will be visible through a light or thin wallpaper. This is the most useful five seconds of the whole assessment.
2. Straightedge Test
Hold a metal ruler or a level flat against the wall in several places and look for daylight underneath. Gaps of a millimeter or less over a short span are manageable. Larger gaps mean filling, not sanding.
3. Fingernail Test
Drag a fingernail across the texture. If it snags and stops on the peaks, the texture is deep enough to interfere with adhesive contact.
4. Porosity Test
Flick a little clean water onto the wall in a couple of places. If it soaks straight in and darkens the surface, the wall is porous and will pull moisture from the paste. If it beads and sits, the surface is sealed or glossy and needs a bonding-type primer. Different results in different spots mean uneven porosity, which causes patchy adhesion and bubbling.
5. Tape Test
Press a strip of painter’s tape firmly onto the texture, then pull it off sharply. Flakes of paint or texture on the tape mean the existing coating is not sound. Nothing you install on it will be sound either.
6. Age Check
In homes built before the early 1980s, textured coatings and patching compounds may contain asbestos, and paint applied before 1978 may contain lead. Do not sand or scrape either until a lab has tested it.
What Actually Goes Wrong When You Wallpaper Over Texture
These are the failures that show up while covering the textured walls. Understanding them tells you which shortcuts are survivable and which are not.
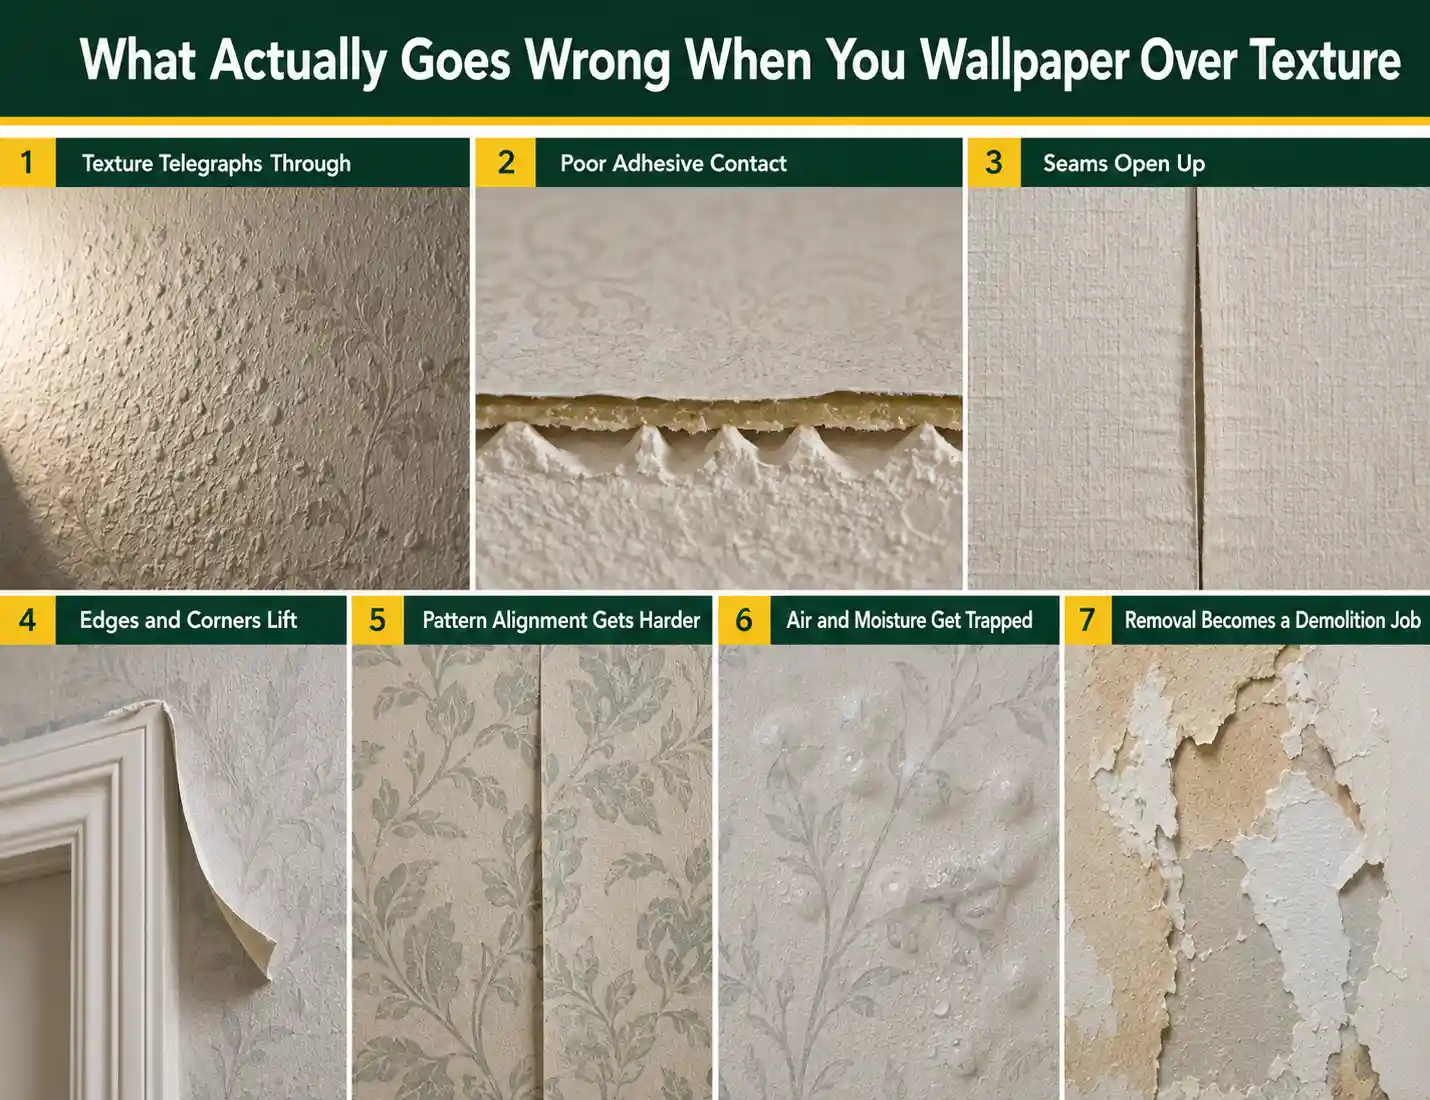
- Texture telegraphs through. Wallpaper conforms to whatever is underneath. Under side lighting, a shallow stipple reads as a subtle grain and a knockdown pattern reads as blotches. Color matters as much as thickness. Pale, low-sheen papers show the most.
- The adhesive only touches part of the wall. On a moderately textured wall, meaningful contact might be half the surface or less. Wet paste partly compensates because it flows and fills. Pressure-sensitive adhesive does not. Peel strength is roughly proportional to real contact area, so a paper that would hold indefinitely on a flat wall can be marginal on a textured one.
- Seams open up. A wallpaper edge needs to sit flat to butt cleanly against the next drop. On texture, the edges rock on high points. Paper also shrinks slightly as paste dries, and if the edge is not fully bonded, that shrinkage pulls the seam open instead of pulling it tight. Seams are always the first thing to fail on a poorly prepared wall.
- Edges and corners lift. Peel forces concentrate at edges. Around door casings, at internal corners, above baseboards, and at switch cutouts, there is less bonded area to resist them. Lifting almost always starts here rather than in the middle of a drop.
- Pattern alignment gets harder. On a rough surface, the paper cannot slide freely into position. Small papers with a tight repeat suffer most, because you lose the ability to nudge a drop a few millimeters without dragging it over the texture.
- Air and moisture get trapped. Texture creates many small voids. In a bathroom or any humid room, sealing damp air under a vinyl face invites mold behind the paper. Non-woven and breathable papers handle this better than solid vinyl.
- Removal becomes a demolition job. This is the consequence nobody plans for. If wallpaper is installed on unprimed compound or straight onto texture, the adhesive bonds to the loose surface rather than to a sealed film. Removing the wallpaper glue and wallpaper then takes the texture, the compound, and often the drywall face with it. A proper wallcovering primer is as much about protecting the wall for the next person as it is about this installation.
Can You Put Wallpaper on Popcorn Walls?
Not directly, and this isn’t a judgment call. Popcorn texture is a thick, porous, deliberately friable coating. It is full of air voids, and it is weakly bound by design. Three things go wrong at once. Adhesive contact drops to the tips of the nodules, which is a tiny fraction of the wall area. The texture itself is not strong enough to hold the weight of a papered surface, so the failure plane ends up inside the texture rather than at the adhesive. And the profile is deep and irregular enough that any paper hung over it looks lumpy immediately, not eventually.
Preparation means removal or complete burial. Unpainted popcorn can usually be softened with water and scraped off, which is messy but straightforward. Painted popcorn resists water and generally has to be sanded and skimmed, or covered with a substantial skim coat build-up. Either way, you finish with sanding, dust removal, and a sealing primer, and you should expect the wall to need two or three coats of compound before it reads flat under a raking light.
Before any of that, if the property dates from before the early 1980s, have the material tested. Textured coatings from that era can contain asbestos, and disturbing them is the specific thing that makes asbestos hazardous. Testing is inexpensive. Assume nothing based on how it looks.
When to Remove the Texture Instead of Working Around It
Removing texture is more work upfront and less work forever. It becomes the better option when several of these apply:
- The room gets strong side lighting from a window or wall lights.
- You want a pale, plain, or low-sheen paper.
- The texture is deeper than about a millimeter, or has hard edges.
- You expect to redecorate the same wall again within a few years.
- You are papering a whole room rather than one feature wall.
- The existing texture is flaking, chalky, or poorly bonded.
There is also a resale argument. A smooth, primed wall is a neutral surface that accepts paint or wallpaper later. A textured wall with wallpaper stuck to it is a problem you are passing on.
Working around the texture makes sense on a genuinely light finish, on a small feature wall, in a room with soft or frontal lighting, and when you have chosen a heavy, dark, patterned paper that suits the conditions.
When Professional Installation is The Better Call
Some of this work is straightforwardly DIY. Cleaning, spot-filling, sanding light texture, priming and hanging non-woven paper on a prepared feature wall are all reasonable weekend jobs for a careful person.
Bring in a professional when the job involves skim coating a whole room to a genuinely flat finish, which takes real practice and where an amateur result often looks worse than the texture did. Also call one for anything involving suspected asbestos or lead, for walls with structural cracking or damp, for ceilings, for expensive or hand-printed papers where a mistake is costly, and for large-repeat patterns on out-of-square walls. A good installer will also tell you honestly if your wall is not worth papering, which is information worth paying for on its own.
Final Words
The right wallpaper installation starts with the wall, not the wallpaper. A lightly textured, stable surface can often be prepared successfully, while deep, loose, or damaged texture needs more extensive correction first. Skipping that preparation can lead to visible bumps, weak adhesion, open seams, and difficult removal later. Your choice of wallpaper also matters: heavier non-woven or vinyl options can hide minor imperfections better, but they cannot compensate for deep texture or an unstable substrate.
Before committing to the full wall, test the surface, prepare it properly, and check the result under the room’s actual lighting. If the texture is deep, the wall has moisture or structural issues, or the paper is expensive, professional assessment can prevent a costly installation mistake.
Frequently Asked Questions
Sometimes, on a very light texture that is clean, sound, and correctly primed. On anything you can feel clearly with a fingernail, direct application trades short-term convenience for visible bumps, weak seams, and early lifting.
On a lightly textured, primed wall, a heavier non-woven paste-the-wall paper in a mid- to dark tone with a matte finish and a busy pattern gives you the best odds. There is no product that performs well on an unprepared, heavily textured wall.
It can stick to light texture on cured eggshell or satin paint, and it often fails on matte paint, deep texture, or fresh paint. Always run a week-long sample test in the worst spot on the wall before buying the full quantity.
Yes, on prepared walls. Vinyl is heavier and more opaque, so it disguises minor variation, but it still conforms to what is underneath. Be careful using solid vinyl in bathrooms or on external walls, because it restricts moisture movement.
Knock down the high points with a pole sander, apply thin skim coats of joint compound with a wide knife, alternating direction between coats, sand up to a 220 grit finish under a raking light, remove all dust, then seal with a wallcovering primer.
It reduces the visibility of shallow texture. It does not remove it. Whatever you can see when you shine a light along the bare wall is broadly what you will see through the paper, softened but still there.
If the texture is deeper than roughly a millimeter, or has hard edges like knockdown, yes. Below that, sanding the peaks and priming is often enough. The raking light test is the honest way to decide.
Yes, provided the paint is sound and fully cured. Check adhesion with a tape test, degloss any sheen, and use a primer suited to the paint’s porosity. Painted texture cannot be soaked off, so if it needs to go, it has to be sanded and skimmed.


