How Do You Fix Scratched Wood Floors?
Wooden floors are widely used in residential and commercial spaces worldwide. These floors add warmth and natural elegance to any place. But the scratches over them make the floor look uninviting and rough. Many people think that fixing the scratched wood floors is a very challenging task. But in reality, it is not as difficult as it looks, if you do it the right way. By using the right tools and materials, you can easily restore the shine to your scratched wooden flooring.
We have many years of experience working with both solid and engineered wood. Whether the floor has scratches or scuffs, we know the best way to deal with them. In this guide, you will learn the best way to easily treat scratched wooden floors.
Let’s restore your floor.
First, Identify How Deep the Scratch Is
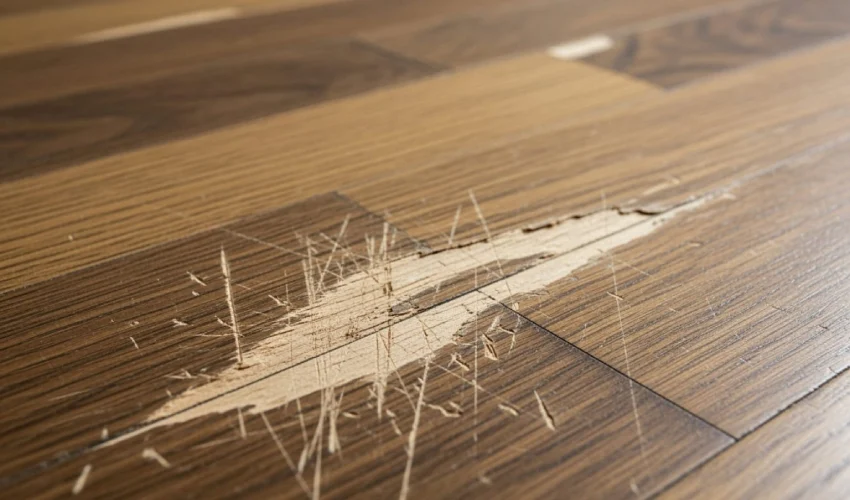
Before you reach for any product, look closely at the scratch. The repair depends entirely on its depth. Run your fingernail across the mark to test it.
There are three common types:
- Surface Scratches. These sit in the protective finish only. They look like faint white or grey lines. Your nail glides over them without catching. This is the most common type, and the easiest to fix.
- Moderate Scratches. These break through the finish and lightly mark the wood beneath. Your nail catches slightly.
- Deep Scratches and Gouges. These cut into the bare wood. Your nail drops into the groove. These need filling, not just blending.
Knowing the depth saves you time and money. A light scratch never needs a heavy repair. Now let’s look at each fix.
How Do You Fix Scratched Wood Floors Without Sanding?

This is the question we hear most. The answer is reassuring. You can repair the large majority of scratches without sanding at all.
Sanding removes a layer of wood. It is messy, slow, and best left for full refinishing jobs. For everyday marks, gentler methods work beautifully. Here are the most reliable ways to fix scratched wood floors without sanding.
1. Use a Hardwood Floor Scratch Repair Kit
A hardwood floor scratch repair kit is the simplest place to start. These kits are affordable and made for exactly this job. Most include color-matched wax sticks, blending pencils, and a small buffing cloth.
Here is how to use one:
- Clean the area first. Dust and grit will ruin the repair. Wipe with a soft, slightly damp cloth, then dry it fully.
- Choose the wax or pencil that matches your floor tone. Most kits offer several shades you can blend.
- Fill the scratch by rubbing the wax along its length. Press firmly so the wax settles into the groove.
- Buff the area with the cloth using small circular motions. Buff until the repair blends into the surrounding finish.
The scratch should soften or disappear. If it still shows, repeat the steps once more. A good kit handles both light and moderate scratches with ease.
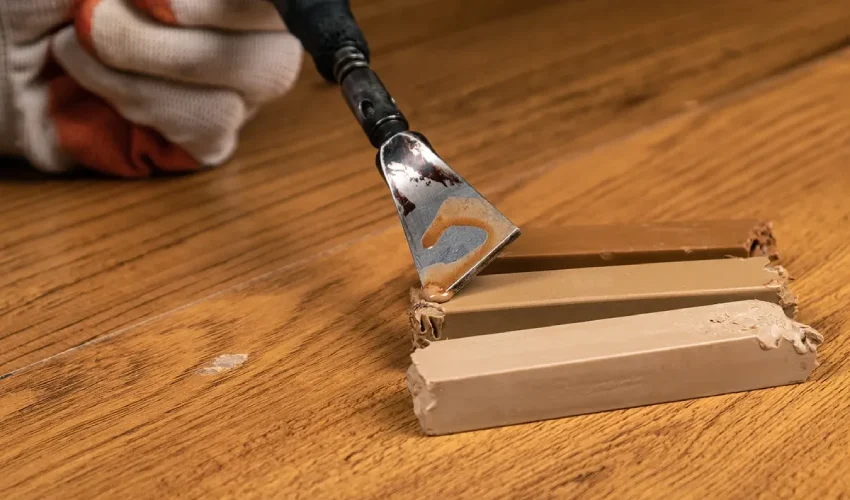
2. Apply Wood Floor Scratch Repair Wax
If you only have one or two marks, a stick of wood floor scratch repair wax is all you need. This is the same idea as a full kit, just simpler. The wax fills the scratch and restores the sheen in one motion.
Warm the wax slightly with your hands first. It will spread more smoothly. Then rub it into the scratch, wipe away the excess, and buff. Wax works best on finished floors with light to moderate damage. It is quick, clean, and very forgiving.
3. Try the Best Wood Floor Scratch Remover Products
Some products are designed only to remove or hide scratches, not to fill them. These scratch removers blend the mark into the finish and reduce that pale, eye-catching line.
The best wood floor scratch remover for your home depends on your finish. As a rule:
- For glossy and standard polyurethane finishes, choose an oil-based balm or stick remover.
- For matte or oiled floors, choose a remover made for natural and low-sheen finishes.
Always test any product in a hidden spot first, such as inside a closet. This confirms the color and sheen match before you treat a visible area.
4. The Vinegar Method for Light Scratches
Do you want to prefer a natural fix? Many homeowners ask about treating scratches on hardwood floors with vinegar, and there is a simple home remedy that works on light marks.
Mix equal parts apple cider vinegar and olive oil. Dip a soft cloth into the blend. Rub it gently into the scratch, following the direction of the wood grain. The oil fills and softens the line, while the vinegar helps clean the exposed surface. Leave it for a few hours, then buff with a dry cloth.
A quick word of caution. Use this method only as a spot treatment on light scratches. Never clean your whole floor with vinegar. Over time, acidic cleaners can dull a wood finish. For routine cleaning, stick to a proper hardwood floor cleaner.
How to Fix Deep Scratches on a Wood Floor?
Deep scratches need more than a quick buff. The groove reaches bare wood, so it must be filled. The encouraging part is that you can still repair deep-scratched damage to a wood floor without sanding the room.
Here is how to repair a deeply scratched wood floor, step by step:
- Clean the groove. Wipe the scratch and the area around it. Make sure no dust sits inside the cut. Let it dry fully.
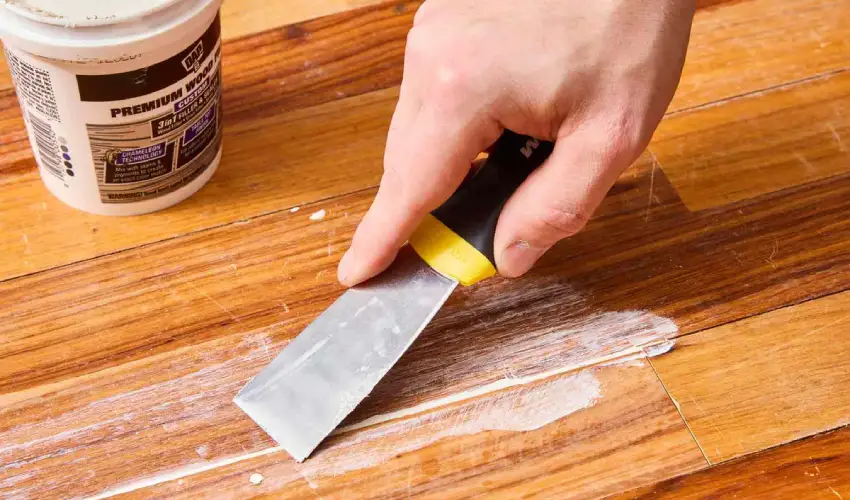
- Apply wood filler. Choose a filler that matches your floor color. Press it into the scratch with a putty knife. Smooth it level with the surface and remove any excess.
- Let it cure. Follow the drying time on the product. Most fillers set within a few hours.
- Blend the color. If the filled line looks too light or too dark, use a blending pencil or stain marker to match it to the surrounding boards.
- Seal the repair. Brush a thin coat of clear finish over the spot. This protects the filler and restores the sheen. Feather the edges so it blends in.
This approach fixes deep marks while leaving the rest of your floor untouched. Sanding only becomes necessary when scratches cover a wide area or the finish is peeling across many boards. In that case, a full sand-and-refinish is the right long-term choice.
How to Fix Scratches in Hardwood Floors From a Dog
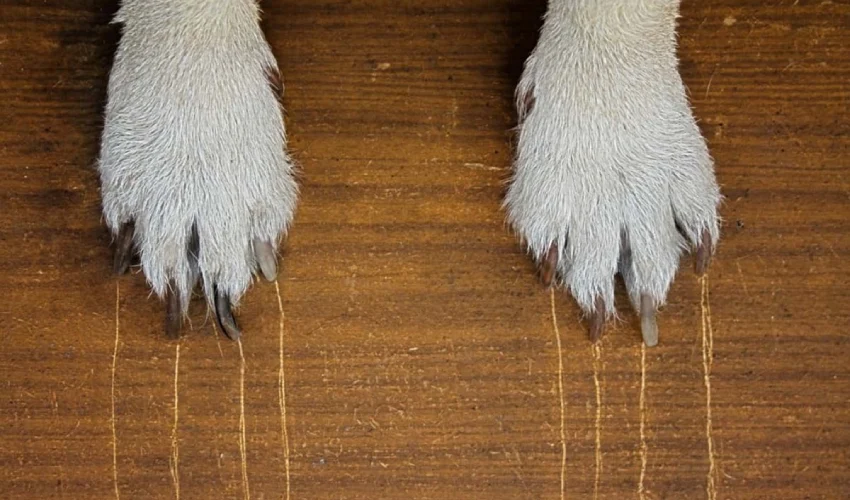
Pets bring joy, but they also bring claws. If you are wondering how to fix scratches in hardwood floors from a dog, the method depends, once again, on depth.
Dog scratches are usually light and clustered. They often appear near doors, beds, and favorite play spots. Treat them like surface marks. A repair kit, a wax stick, or a scratch remover will blend most of them in minutes. Work across the whole patch, not just one line, so the area looks even.
For deeper claw marks, fill them as described above.
Prevention helps just as much as repair. Keep your dog’s nails trimmed. Place soft rugs in high-traffic zones. Wipe up grit often, since dirt under paws acts like sandpaper. These small habits protect your floor between touch-ups.
How to Prevent Future Scratches
Repairing scratches is satisfying. Preventing them is even better. A few simple steps keep your floors looking new for years:
- Stick felt pads under all furniture legs, and replace them when they wear out.
- Place doormats at entrances to catch grit before it reaches the wood.
- Sweep or vacuum regularly, since loose dirt is the main cause of fine scratches.
- Avoid dragging furniture. Lift it instead.
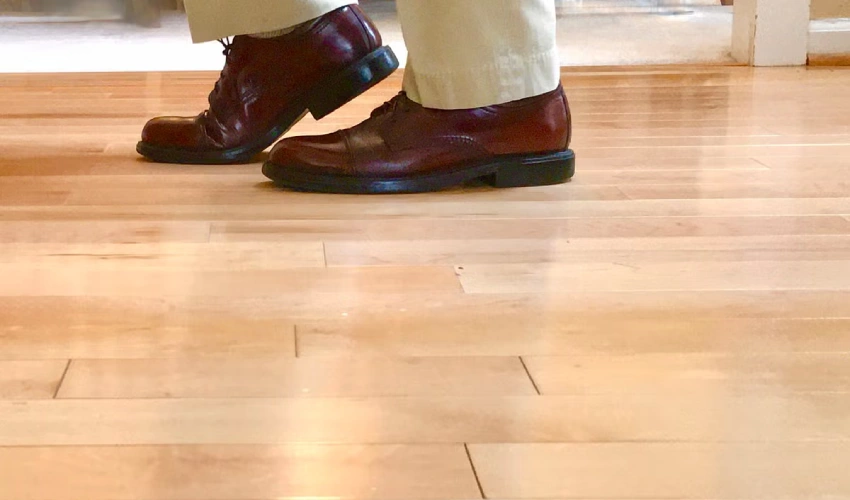
- Trim pet nails and keep heavy shoes off the floor.
Good habits cost almost nothing. They save you hours of repair work later.
When to Call a Professional
Some damage is beyond a home fix. Call a flooring professional like Floor Land if you see any of the following:
- Scratches and gouges across a large part of the room.
- A finish that is flaking or worn away.
- Bare wood that has turned grey or absorbed water.
A specialist can recoat or refinish your floor and bring back its original depth. This costs far less than replacing the whole floor, and it gives you a fresh, even surface to maintain
Related Floor Problem: What If Your Wood Floor Also Squeaks?
Many homeowners notice scratches and squeaks at the same time, especially on older wooden floors. While scratches affect the surface appearance, squeaks usually come from movement between floorboards, loose fasteners, or gaps in the subfloor beneath.
A minor squeak is rarely a structural concern, but persistent noise can become frustrating over time. Simple solutions may include securing loose boards, adding screws from below, or reducing seasonal movement caused by humidity changes. The exact repair depends on the source of the noise.
If your floor makes creaking sounds when you walk on it, we have created a detailed guide that explains the causes and solutions. Read our complete article on How to Fix Squeaky Floors to learn the most effective repair methods and when professional help may be required.
Final Thoughts
A scratched wood floor is rarely the disaster it first appears to be. With the right method, most marks fade in minutes. Light scratches respond to wax, repair kits, and gentle home remedies. More serious damage simply needs to be filled and sealed. Sanding remains as a last resort for major wear. Match the fix to the depth, work patiently, and your floor will look cared for once again. A little maintenance now protects an investment that should last for decades.
Frequently Asked Questions
Yes. Most scratches can be repaired without sanding. Surface marks respond to wax sticks, repair kits, and scratch removers. Even deep scratches can be filled and sealed without sanding the room.
For light scratches, yes. A blend of olive oil and apple cider vinegar can soften the mark. Use it only as a spot treatment, never as an everyday cleaner.
A color-matched wood filler, finished with a blending pencil and a clear sealer, is the most reliable fix for deep scratches and gouges.
Treat them as surface marks. A repair kit or wax stick blends most claw scratches quickly. Keep nails trimmed to prevent new ones.
