
How to Apply Peel and Stick Wallpaper: Tips, Tricks & Mistakes

To apply peel and stick wallpaper, prepare and repair the wall, measure it, plan where each panel lands, and mark a plumb line just inside the roll width. Then install the first panel against that line. Peel the backing in sections rather than all at once. Smooth each section from the center outward before you release more. Match the pattern on the next panel, trim at the ceiling and baseboard with a fresh blade, then press the seams.
In this blog post by Floor Land, we will explain how to apply peel and stick wallpaper in detail. You’ll also learn what tools you need and what mistakes to avoid.
Always Check the Wall Before You Start
Run your hand across the wall. That single pass tells you most of what you need to know. Grit, ridges, flaking edges, and slick patches all show up under your palm before they show up in a photograph.
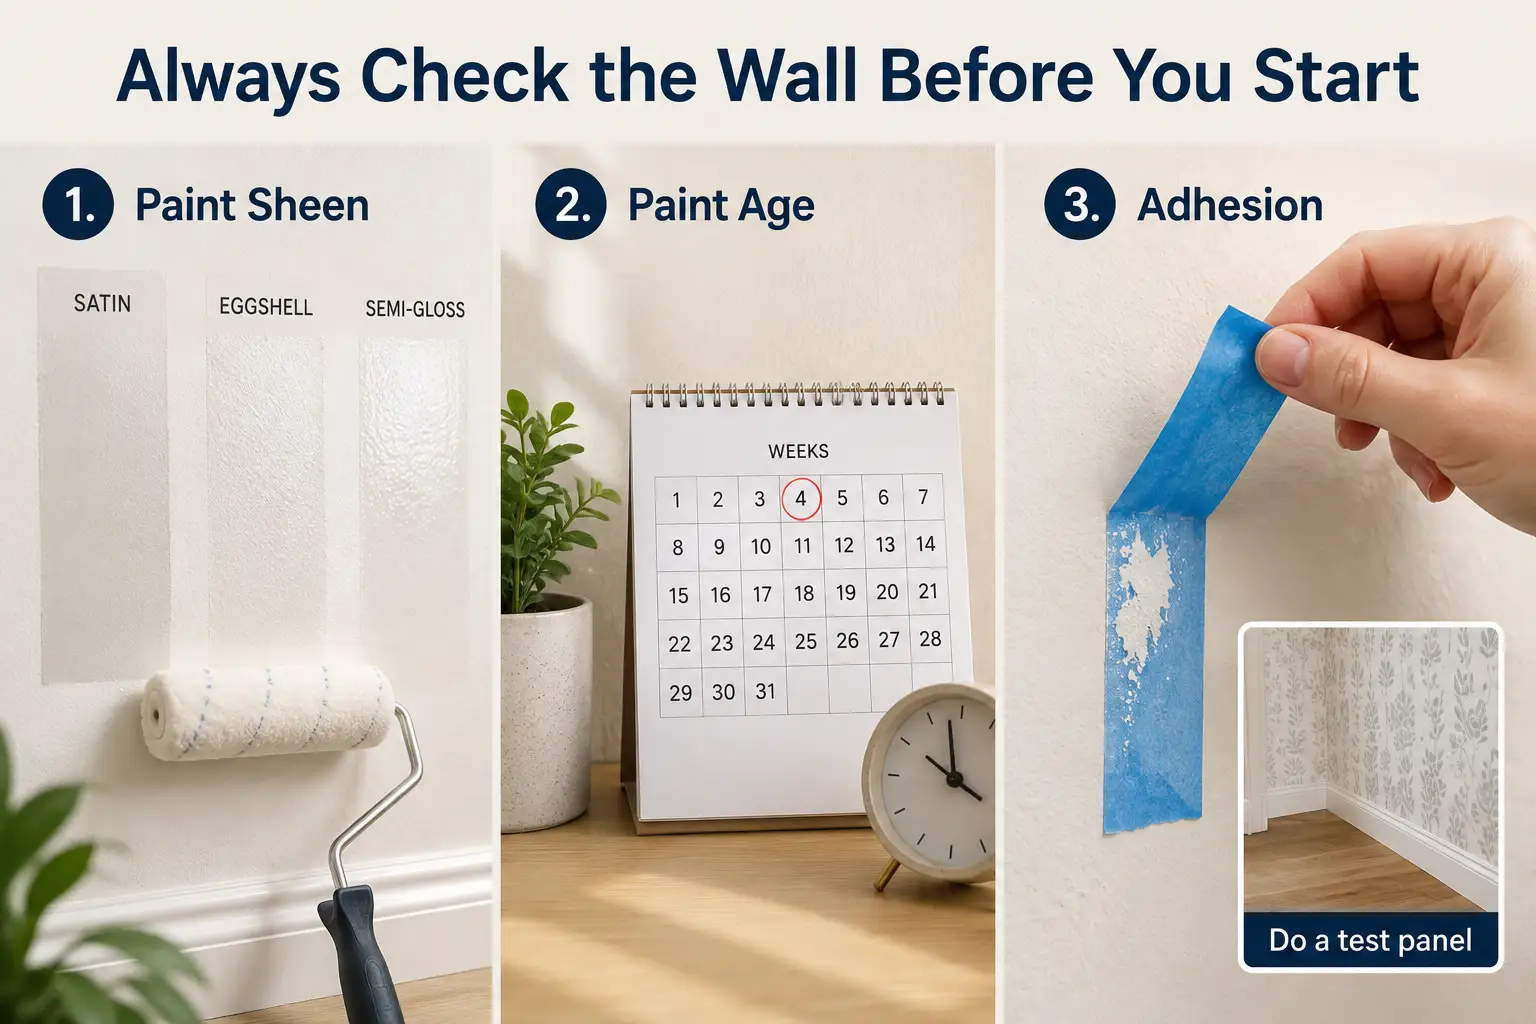
Then check three things specifically.
1. Paint Sheen
Adhesive bonds best to satin, eggshell, or semi-gloss latex paint in sound condition. Flat and matte paints are chalky by design, and that chalky layer can release from the wall with the wallpaper still stuck to it. If your wall is flat paint and you want the paper to stay put, plan on repainting in eggshell first.
2. Paint Age
Fresh paint keeps off-gassing and hardening for weeks after it feels dry. Most manufacturers ask for a cure window before wallpapering. This can commonly be around four weeks, though it varies by product and paint. Check your specific instructions and follow the longer of the two.
3. Adhesion
Press a strip of painter’s tape firmly onto an inconspicuous spot, leave it a minute, then pull it off. If paint comes away with the tape, the existing finish is not sound enough to hang wallpaper on. Do a test panel if you’re unsure. Install one full-height panel in a low-visibility spot and leave it a week or two. That’s cheaper than discovering a problem across an entire wall.
How to Prepare the Wall for Peel and Stick Wallpaper
Peel and stick performs best on surfaces that are smooth, clean, dry, dust-free, and structurally sound. So make sure to prepare the wall before applying best-quality wallpaper.
Repair your wall first.Fill nail holes, cracks, and dents with spackle. Scrape and feather any flaking or bubbling paint back to a firm edge. Sand repairs flush, then prime the patched areas so they don’t absorb differently from the rest of the wall. For the walls with the pre-installed wall coverings, carefully remove the wallpaper glue.
Secondly, sand and dust the wall. Knock down roller stipple, drips, and rough spots with a fine sanding sponge. Then remove the dust completely. Sanding dust is the single most common reason a well-prepped wall still fails. It acts like a release layer between adhesive and paint. Vacuum the wall, then wipe with a barely damp cloth.
Kitchens, hallways near light switches, and anywhere hands touch will have invisible oil. A 1:1 mix of isopropyl alcohol and water on a lint-free cloth cuts it without leaving residue. Avoid household sprays with waxes, oils, or “shine” additives. Let the wall dry to the touch before applying the wallpaper. A wall that feels dry can still hold moisture in the paint film, and trapped moisture pushes the adhesive off from behind.
Let the rolls acclimate. Leave the rolls in the room, unopened, for about 24 hours. Vinyl expands and contracts with temperature, and material hung cold can shrink slightly and open the seams later.
What You Need to Apply Peel and Stick Wallpaper
You can treat this as your peel and stick wallpaper kit. Buy or borrow the essentials before you open the first roll.
| Tool | Why You Need It |
| Tape measure | Measure wall height and width, and plan panel placement |
| Level (24 inch or longer) or laser level | Establish a true vertical starting line |
| Plastic smoothing tool or felt-edged squeegee | Press the vinyl down and drive out trapped air |
| Utility or craft knife with spare blades | Make clean cuts at the ceiling, baseboard, and outlets |
| Metal straightedge or wide taping knife | Guide the blade so cuts stay straight |
| Pencil | Mark the plumb line and reference points |
| Clean lint-free cloth | Wipe dust off the wall and fingerprints off the panel |
| Step ladder | Reach the ceiling line without stretching the panel |
| Scissors | Rough-cut panels to length before hanging |
How to Install Peel and Stick Wallpaper
This is the core sequence. It’s written for a standard vertical installation on a flat wall, and it’s the right approach for beginners installing peel and stick wallpaper over a plain or textured wall (very light).
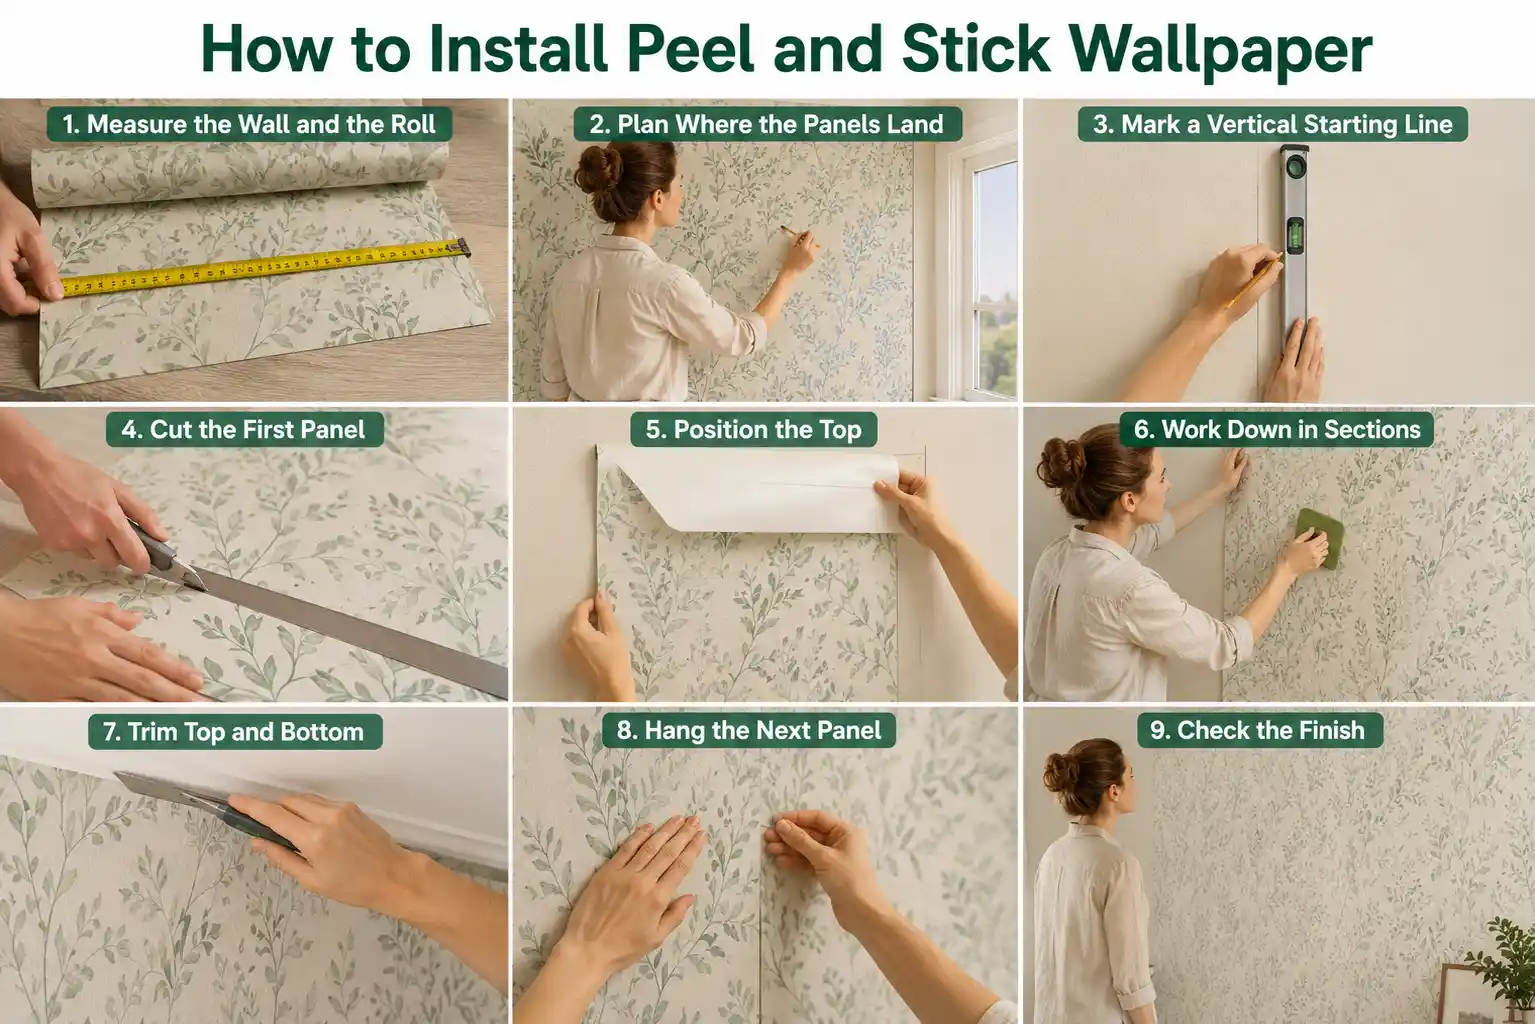
1. Measure the Wall and the Roll
Measure wall height at three points: left, center, and right. Rooms settle, and the tallest measurement is the one that matters when you cut. Measure the wall width, then divide by the usable width of your roll to work out how many panels you need. Add one extra panel to the total. Pattern matching consumes material, and running short mid-wall is a real problem if the dye lot sells out.
2. Plan Where the Panels Land
Before you cut anything, work out where each seam will fall. Two placements cause trouble: a seam landing right at the edge of a window or door casing, and a sliver of a panel less than three inches wide at the end of a wall. Both are hard to hang and obvious once done. Shift your starting point a few inches to move the seams somewhere friendlier.
Also decide which wall the eye hits first when someone enters the room. Start there. The final panel almost always ends with a pattern mismatch where it meets the first one, so put that seam in the least visible corner.
3. Mark a Vertical Starting Line
Measure out from the corner by the roll’s usable width minus about half an inch. Mark that point near the ceiling. Hold your level vertically at the mark and draw a light pencil line the full height of the wall.
This is the step beginners skip, and it’s the one that decides whether the whole wall looks right. Wall corners are rarely plumb. Drywall corners lean, older houses settle, and a corner that looks vertical can be off by half an inch over eight feet.
If you use the corner as your guide, that error transfers into every panel and compounds across the wall. By panel four, your pattern is visibly tilted, and you can’t fix it without starting over. A level line ignores the corner’s error and gives every following panel a true reference. The half-inch overlap into the corner is deliberate. It gives you material to wrap and trim.
4. Cut the First Panel
Unroll the paper on a clean, flat surface. Cut the first panel to your tallest wall measurement plus two to three inches. Split that excess between the top and bottom for trimming.
Check the pattern before cutting the second panel. Most designs have a repeat, and the next panel has to start where the previous one leaves off. Lay the two side by side, slide the second until the pattern lines up, and cut there. Cutting all your panels to identical lengths without checking the repeat is how people end up with an unusable pile of half-panels.
Number the backs in pencil as you cut. Panels look identical on the roll and are not interchangeable.
5. Position the Top
Peel back only 12 to 18 inches of the backing at the top. Fold the released liner back on itself so it doesn’t flop onto the adhesive.
Bring the panel to the wall and line its edge up with your pencil line, letting an inch or two run past the ceiling. Touch only the top few inches down at first, at the top corner. If it’s off, lift and reset. At this stage, the panel is barely committed. Once the top edge sits true against the line, press it down firmly across the width. Get the top right before anything else. Everything below follows the top.
6. Work Down in Sections
Smooth the released section with your tool, working from the vertical center of the panel outward toward each edge. Use overlapping strokes and moderate, even pressure.
Then peel the next 12 to 18 inches of backing and repeat. Keep the un-adhered portion of the panel slightly away from the wall as you go, so it lands where you place it rather than grabbing at random.
Never pull down on the panel to make it reach. Vinyl stretches. A stretched panel looks fine while you’re holding it and then relaxes over the next few hours, opening the seam and distorting the pattern. If a panel is drifting off the line, lift it back to the last good section and re-lay it rather than tugging it into place.
7. Trim Top and Bottom
Once the panel is fully down, trim the overhang. Press a metal straightedge or a wide taping knife firmly into the corner where the wall meets the ceiling. Then draw a fresh blade along it in one continuous pass.
Two habits make the difference here. Change blades often after every few cuts on a long wall. A dull blade drags and tears vinyl rather than slicing it, and torn edges lift. And cut in one motion where you can. Stopping and restarting leaves a visible step in the edge.
Trim the same way at the baseboard. If you have crown molding or chair rail, work the straightedge tight into the profile so the cut sits in the shadow line.
8. Hang the Next Panel
Set the next panel to butt against the first edge to edge, not overlapping. Start by matching the pattern near eye level, around five feet up, since that’s where anyone will look. Get the pattern right there first, then work up and down from that point.
Butted seams are the standard. Some manufacturers permit a very slight overlap, around a sixteenth of an inch, to allow for material movement in rooms with temperature swings. Check your instructions; on some vinyls, an overlapped edge won’t stick to itself and will curl.
Repeat down the wall, keeping each panel true to the previous seam rather than re-measuring from the corner each time.
9. Check the Finish
Walk the wall about an hour after you finish. Look along the surface from an angle with a light source to one side. Raking light shows lifted seams and bubbles that a straight-on view hides completely.
Press down any seam edge that has crept up. Re-smooth anything that looks loose. Fixing it now, while the adhesive is still building its bond, takes seconds.
How to Apply Peel and Stick Wallpaper Without Bubbles
Bubbles come from three sources, and each has a different fix.
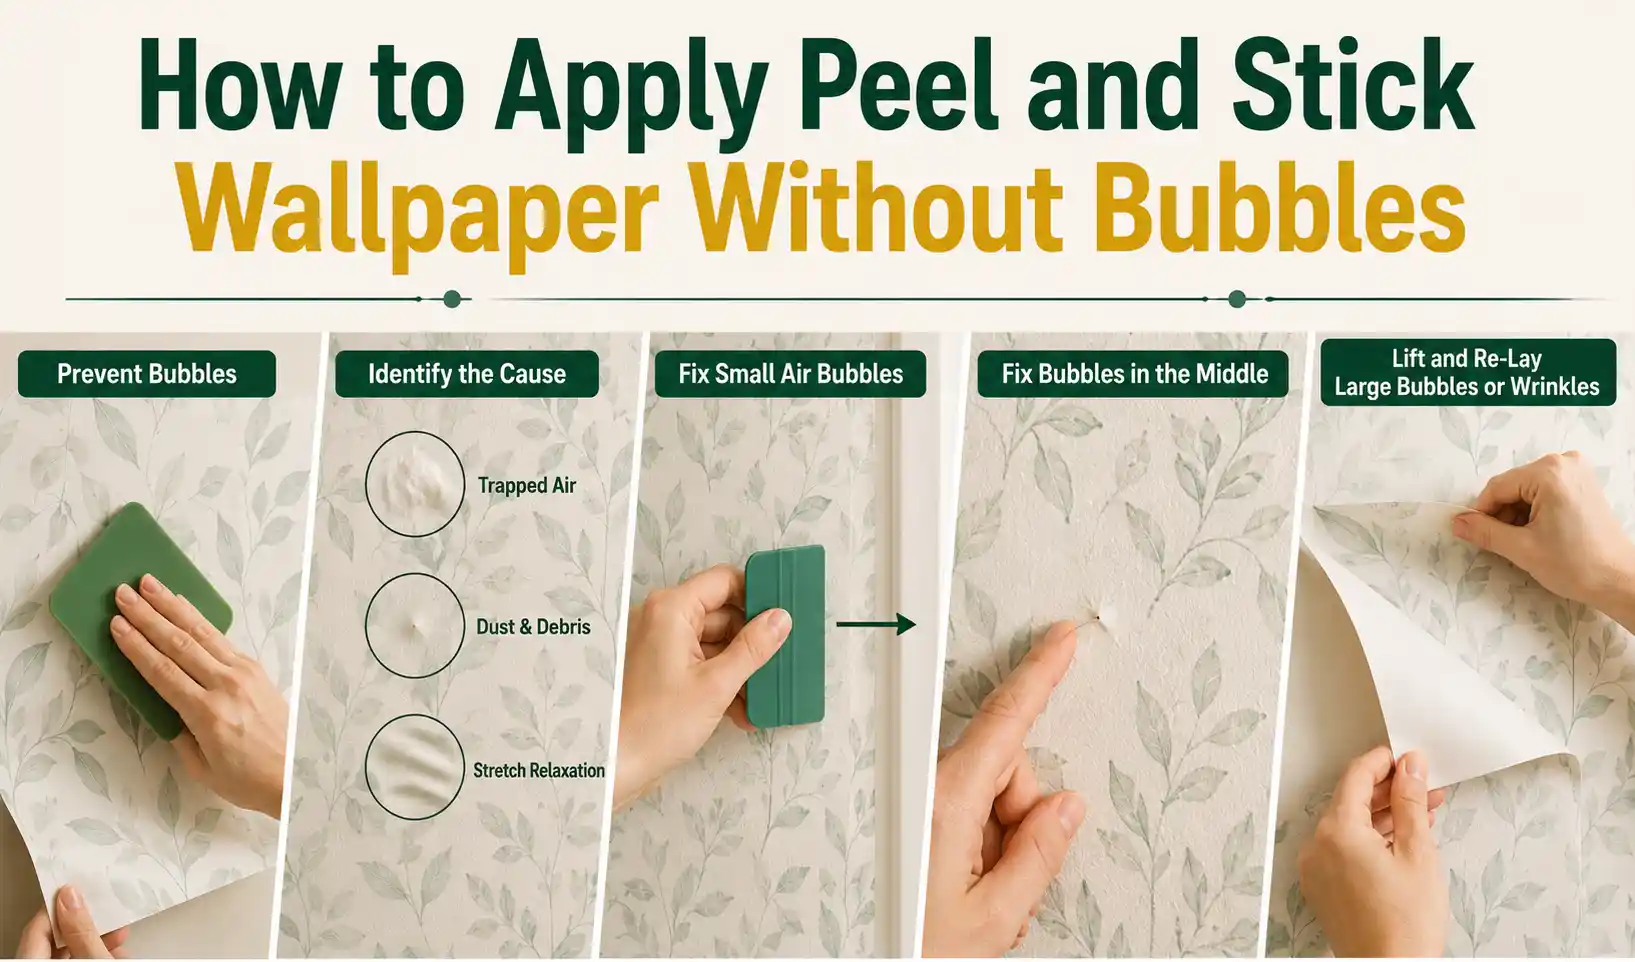
Trapped air happens when you press the panel down over an area before pushing the air out ahead of it. Prevent it by smoothing from the middle of the panel outward and by keeping the unstuck portion off the wall until you’re ready to smooth it.
Dust and debris create small hard lumps you can feel with a fingernail. These aren’t air, and smoothing won’t remove them. You have to lift the panel, wipe the spot, and re-lay it.
Stretch relaxation shows up as a soft ripple hours after installation, usually near a seam. It comes from pulling the panel during application, and it’s the hardest to fix. The prevention is simply not pulling.
What to Do When a Bubble Appears
First, figure out which of the three you’re dealing with, because the fixes differ.
- For a small air bubble within a few inches of an edge, hold the smoothing tool flat and push the air toward the nearest open edge. The ceiling line or the panel’s outer edge works best here. Push away from seams, not toward them. Air forced into a seam will lift it, and a lifted seam is far more visible than the bubble was.
- For a bubble in the middle of a panel with nowhere to go, pierce it with a pin at its lowest point and press the air out through the hole with your thumb, then smooth over it. The pinhole disappears.
- For anything larger than a coin, or a wrinkle rather than a bubble, lift instead. Peel the panel back slowly and only as far as the problem, parallel to the wall, not out from it. Then re-lay that section. Peeling back a section is normal, and the adhesive handles it fine.
What the adhesive does not handle well is repeated full removal. Every complete lift picks up a little dust and loses a little tack. After two or three full removals, a panel will noticeably underperform, especially at the edges. If you’ve fought a panel twice, cut a new one.
How to Align Wallpaper Panels Correctly
Wallpaper alignment is one of the most important concerns. A sixteenth of an inch of drift per panel is invisible on panel two and obvious by panel six.

Check the seam at eye level first, then run your eye up and down. If the pattern matches at five feet but drifts apart near the ceiling, the panel is slightly out of plumb. In this situation, lift the top third and reset it rather than trying to nudge the bottom.
If a gap opens between two panels, don’t stretch the vinyl to close it. Lift the newer panel back past the gap and re-lay it a hair closer. Stretching closes the gap now and reopens it later.
Small overlaps at a seam can sometimes be double-cut: lay a straightedge over the overlap, cut through both layers with a fresh blade, remove the two waste strips, and press the edges together for a perfect butt joint. This works well on drywall and badly on plaster or any surface where the blade could bite. Practice it on scrap first.
How to Install Peel and Stick Wallpaper in a Corner
Corners are where most beginner installations come apart, because people treat them as a continuation of the flat wall.
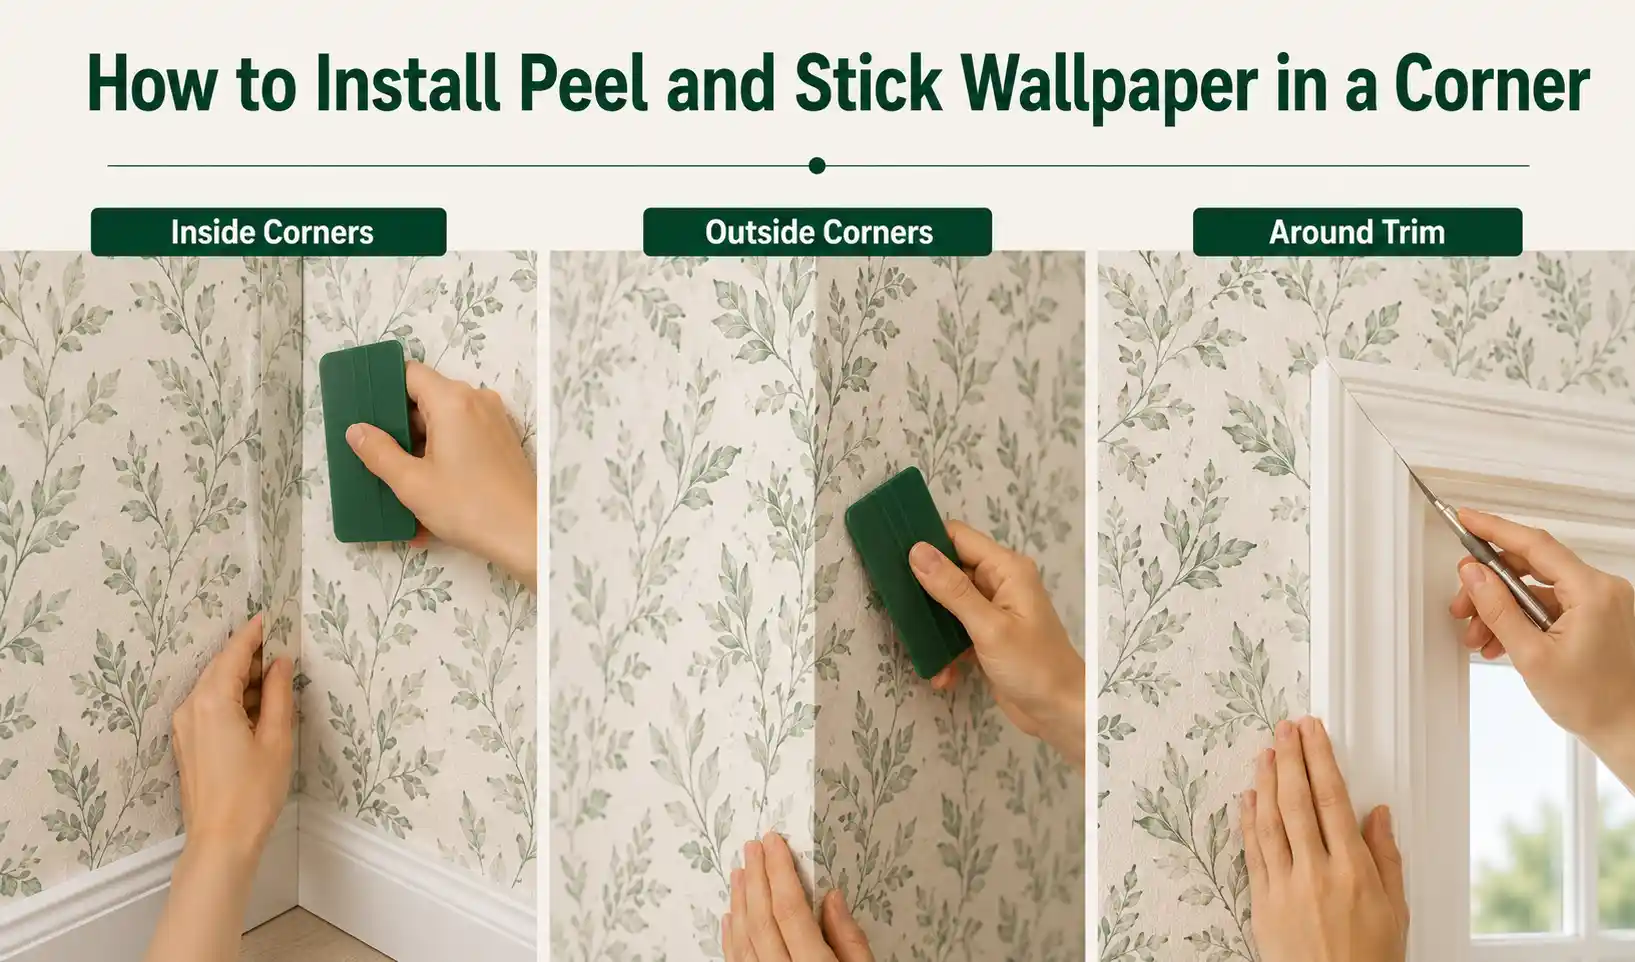
Inside Corners
Don’t carry a full panel around an inside corner. Corners are almost never square or plumb, and a wrapped panel will fight the wall and pull away within days.
Instead, cut the panel so it wraps only about a half inch onto the next wall. Smooth it firmly into the corner, using the edge of your smoothing tool to seat it right down into the crease.
Then start fresh on the new wall. Mark a new plumb line on that wall and hang the next panel against it, overlapping the half-inch wrap. The overlap hides the corner’s irregularity, and the new plumb line keeps the second wall true. A tiny pattern mismatch in the corner is nearly invisible; a whole wall running downhill is not.
If the wrapped edge wants to buckle in the corner, make small relief cuts. Short snips into the excess, perpendicular to the corner after every few inches. Each cut lets the material lie flat instead of bunching. Keep them short and only in the part that will be covered by the next panel.
Outside Corners
Outside corners take the opposite approach. Wrap the panel around the corner by two to three inches onto the next wall so the corner itself has no seam. A seam sitting exactly on an outside corner is the first thing to catch a sleeve or a vacuum and start peeling.
Smooth the vinyl around the corner in stages, pressing it tight to the edge before letting the material settle on the far side. If the corner is out of plumb, the wrapped edge won’t be vertical on the second wall. Snap a fresh plumb line for the next panel and let the wrap hide the difference.
Around Trim
At window casings, door frames, and baseboards, let the panel run over the trim, then cut. Press the vinyl into the joint where trim meets wall with the corner of your smoothing tool to form a crisp crease. That crease is your cutting guide. Run the blade along the crease with the straightedge backing it.
At the top corners of a door or window, make a diagonal relief cut into the excess before trimming the sides. Without it, the material bunches at the corner and tears when you cut.
How to Cut Around Outlets and Switches
When cutting peel and stick wallpaper around outlets and switches, always prioritize safety.
- Turn off the power at the breaker for that circuit. Confirm it’s off with a non-contact voltage tester at the outlet.
- Remove the cover plates. Set the screws somewhere you’ll find them.
- Hang the panel straight over the opening. Don’t try to cut a hole in advance. Smooth the panel normally, pressing gently over the box so the opening’s outline shows through.
- Cut the opening. Feel for the corners of the box through the vinyl. With a fresh blade, cut an X from corner to corner across the opening, then trim each triangular flap back to the edge of the box. Cutting slightly inside the box opening is better than slightly outside. The cover plate hides a small undercut, but not a gap.
- Smooth the edges down around the opening, then reinstall the cover plates and restore power.
For a neater result, cover the plates themselves. Cut a scrap of the wallpaper slightly larger than the plate. Apply it to the plate, matching the pattern to where it sits on the wall; wrap the edges around the back and trim the screw holes with a blade. The switch then reads as part of the wall. Never cut around a live outlet, and never push a blade into an electrical box.
How to Install Self Adhesive Wallpaper Horizontally
Horizontal installation makes sense in specific situations. A stripe or linear pattern that reads better on its side, a wide low wall such as behind a bed or below a chair rail, or a stair wall where vertical panels would be awkward to handle.
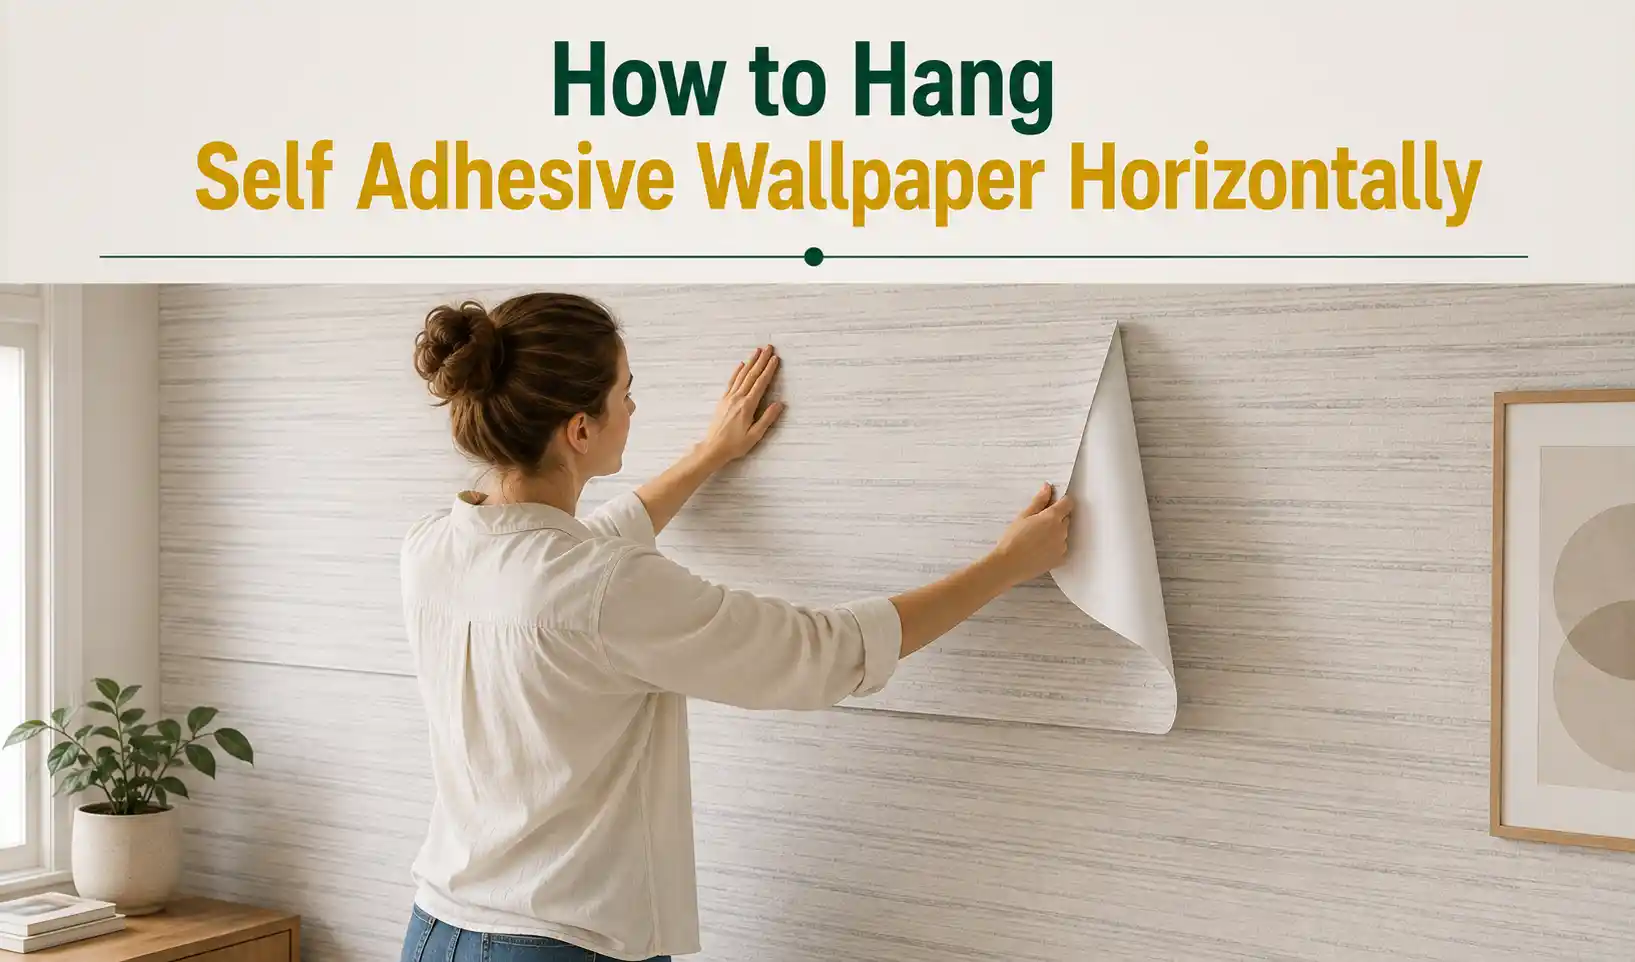
For a first project, vertical is easier, and it’s worth knowing why. Gravity works with you on a vertical panel. It installs straight down from a fixed top edge, so you have one alignment decision and the material’s weight helps hold the line. A horizontal panel has no such anchor. Its full weight pulls downward along the entire length of the edge you’re trying to keep level, so it drifts as you work.
If you’re going horizontal anyway:
- Snap a level line, not a measurement from the ceiling. Ceilings slope more than floors, and both slope more than you’d expect. Use a laser level or a chalk line checked with a spirit level, and run it the full width of the wall.
- Start at the top and work down. Each new panel then butts against a fixed, already-level edge.
- Use two people. A horizontal panel spanning eight or ten feet is genuinely difficult to control alone. One person holds and feeds while the other smooths.
- Support the loose end. Have your helper hold the un-adhered portion up and slightly away from the wall so it doesn’t fall and get caught.
- Peel in shorter sections. Twelve inches at a time, not more. The longer the released span, the more the weight drags.
- Watch the pattern direction. Turning a patterned paper sideways rotates the repeat. Lay two panels out on the floor in the rotated orientation and confirm the match before you cut a full wall’s worth.
Seam placement changes too. Horizontal seams sit at consistent heights across the room, so any misalignment reads as a continuous line rather than an isolated flaw. Take the extra minute at each seam.
Can You Install Peel and Stick Wallpaper in a Bathroom?
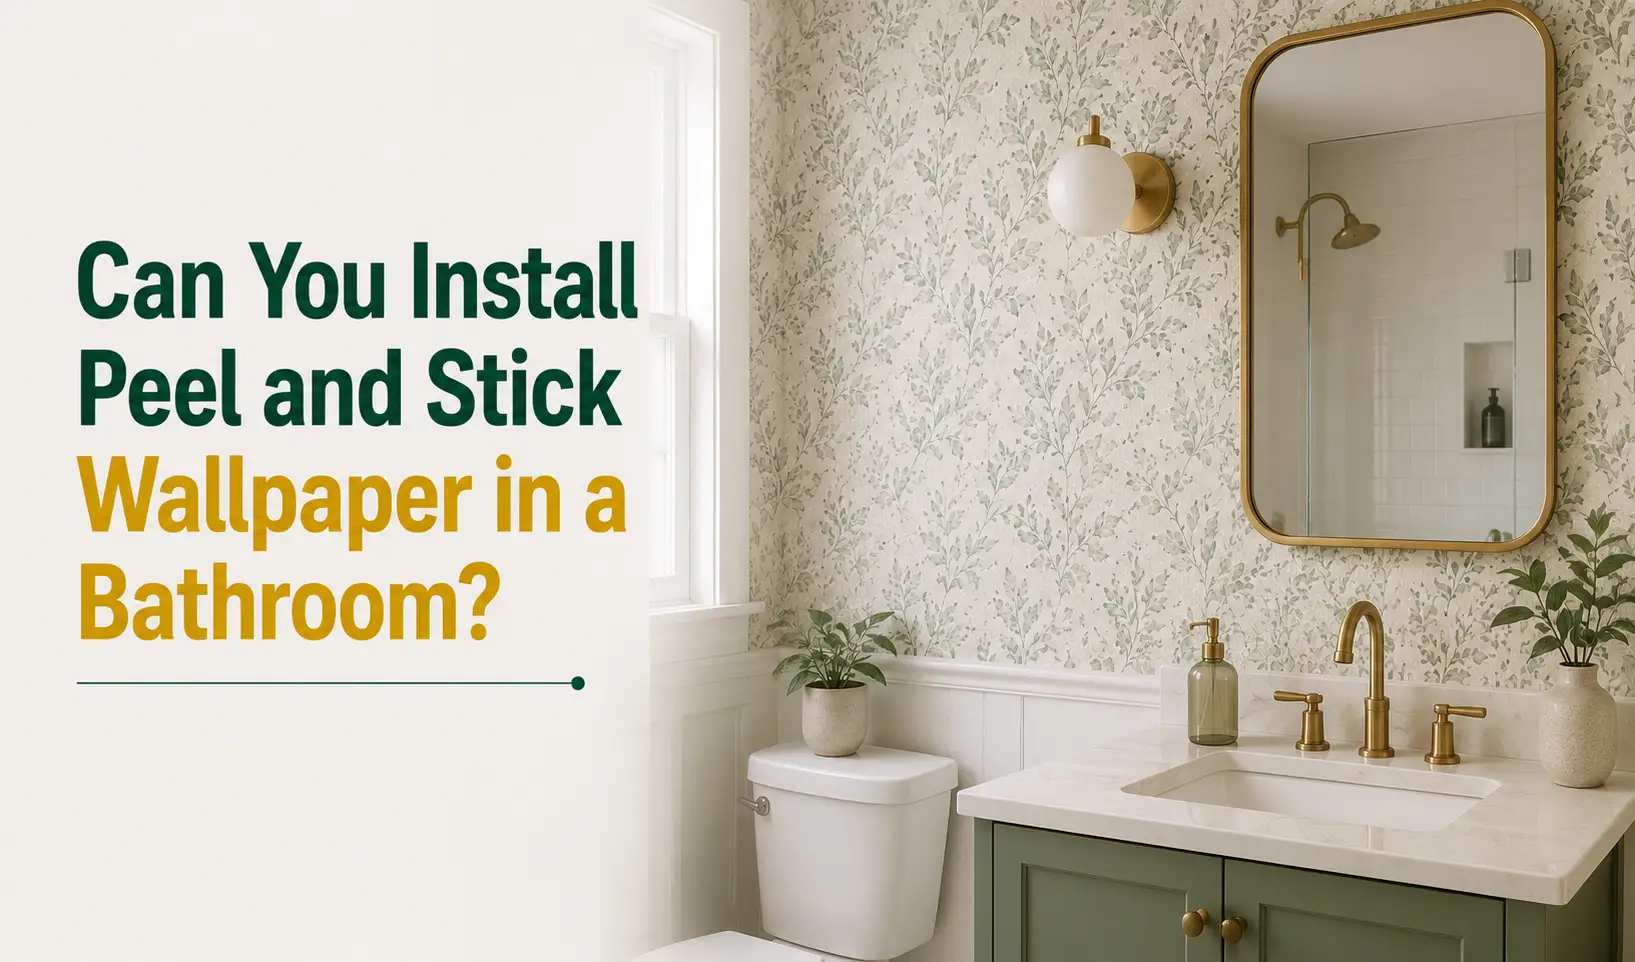
Often yes, but the answer depends on the specific bathroom and the specific product, and the two are not interchangeable. Learning how to install peel and stick wallpaper in bathroom conditions mostly comes down to deciding where it can and can’t go. Work through these:
- Product specification. Some vinyl peel and stick papers are rated for humid rooms; others aren’t. Non-woven and fabric-backed materials generally handle moisture less well than solid vinyl. The manufacturer’s guidance is the authority here. If it doesn’t say the product suits humid spaces, assume it doesn’t.
- Ventilation. This matters more than almost anything else. A bathroom with a working extractor fan that runs during and after showers is a different environment from one with a painted-shut window. Repeated cycles of steam and condensation soften adhesive over time and open seams. Good ventilation shortens the wet period and largely removes the problem.
- Direct water contact. This is the important distinction. A paper rated for humid areas is rated for humid air, not for water running down it. Shower surrounds, tub surrounds, the wall directly behind a sink faucet, and any splash zone are not suitable. Water reaches the seam, gets behind the adhesive and lifts it, and no amount of careful installation prevents that.
- Wall condition. Bathroom walls collect soap residue, hairspray, and body oils, often invisibly. Degrease thoroughly with the alcohol-and-water mix. Also check for any existing moisture problems like soft drywall, staining, mildew, and fix the cause before covering it. Wallpaper over a damp wall traps the moisture and makes things worse.
A practical approach is to use it on the vanity wall, the wall behind the toilet, the ceiling of a powder room, or a half bath with no shower. Keep it well away from direct spray.
Common Peel and Stick Wallpaper Mistakes
| Mistake | What Happens |
| Hanging over a dusty or greasy wall | Adhesive bonds to the contaminant, not the wall; edges lift within days |
| Installing over heavy texture | Contact is only on the high points; the paper peels back from the low ones |
| Skipping repairs and sanding | Every bump and dent telegraphs through, and patched areas absorb differently |
| Hanging on fresh paint | Uncured paint still off-gasses; the wallpaper can pull the paint film off with it |
| Using flat or matte paint as a base | Chalky surface releases from the wall under the adhesive |
| Using the corner as the alignment guide | The corner’s error multiplies across every panel |
| Peeling all the backing at once | The panel folds onto itself, and creases, and creases don’t come out |
| Pulling the panel to make it fit | Stretched vinyl relaxes later and opens seams |
| Pushing bubbles toward a seam | Air lifts the seam edge, which is more visible than the bubble was |
| Cutting with a dull blade | The blade tears the vinyl and leaves ragged edges that catch and lift |
| Cutting panels before checking the repeat | You end up with panels that can’t be matched to anything |
| Rushing corners and outlets | These take the longest and show the most; they’re the wrong place to save time |
| Repeatedly removing and re-sticking a panel | Tack drops with each cycle, especially at the edges |
Peel and Stick Wallpaper Tips and Tricks
A few things that make a visible difference and rarely appear in the instructions:
- Buy from one dye lot. Color varies slightly between production runs. Ordering a top-up roll later can leave you with a wall that doesn’t quite match.
- Keep a scrap of every roll. You’ll want it for patching, for covering outlet plates, and for testing a cut technique before you try it on the wall.
- Hang the busiest wall first while your technique is fresh, and your patience is intact.
- Work in a comfortable room temperature. Adhesive tacks poorly when cold and gets aggressive and unforgiving when hot.
- Keep your hands clean and dry. Fingerprints on the adhesive side reduce tack in exactly the spots you touched.
- Let the light tell you the truth. Check every panel with raking light from a lamp held to one side before you move on.
- Save the offcuts until the job is fully done. A long offcut from panel one is often exactly what you need for the short section above a door.
- Don’t hang wallpaper tired. The last panel of a long day is usually the one that gets redone.
Final Words
During the peel and stick wallpaper installation, preparation determines the outcome more than any technique on the wall. A smooth, clean, dry, cured surface and one properly plumb starting line will carry a first-time installer through the rest of the job. Work in sections, keep a sharp blade, don’t pull the material, and check your seams in raking light before you call it done.
Where your manufacturer’s instructions differ from anything here, follow theirs. Adhesives, backings, and cure requirements vary by product, and the people who made your wallpaper know how it behaves.
Frequently Asked Questions
Yes. It’s one of the most beginner-friendly wall treatments available, because it’s repositionable during application and needs no paste or water. The skill is in preparation and patience, not technique. Start with a small, flat, low-traffic wall. A powder room or an alcove before taking on a room with lots of windows and corners.
Usually one of three things. Dust on the wall creates small permanent lumps that won’t smooth out. Air gets trapped when you press the panel down before it has somewhere to escape. And stretching during application creates ripples that appear hours later. If bubbles keep returning in the same area after you’ve smoothed them, look at the wall behind them. A rough patch or an unprimed repair is the likely cause.
Light texture such as a fine orange peel sometimes works, depending on the product. Anything heavier like knockdown, skip trowel, or sand finishes will not hold reliably because the adhesive only touches the raised areas. Skim coating and sanding the wall smooth is the durable solution. Peel and stick wallpaper follows texture rather than hiding it, so texture also shows through visually.
Not right away. Paint keeps curing after it’s dry to the touch, and hanging wallpaper too early can pull the paint film off the wall when the adhesive grabs. Most manufacturers specify a waiting period of around four weeks, and paint brands publish their own cure times. Follow whichever is longer.
Lift the affected panel from the top, peeling slowly and parallel to the wall, and re-lay it against a proper reference. Either your plumb line or the edge of the previous panel. If the panel has already been lifted twice, replace it instead; the adhesive loses tack with each removal. For a crooked first panel, always start over, since every following panel inherits its angle.
Yes, within limits. Most products reposition well during installation and for a short period afterward, which is exactly why you peel the backing in sections. Lift slowly, parallel to the wall. Repositioning the same panel repeatedly reduces adhesion, particularly along the edges, so aim to get it right within two attempts.
On a properly prepared, fully cured, satin or eggshell painted wall, removal usually causes no damage. Problems come from the wall’s condition rather than the paper: flat paint, uncured paint, unprimed drywall, and previously patched areas are all more likely to lift. Pulling too quickly or at the wrong angle also raises the risk. Test in a hidden spot if you’re renting and need certainty.
It depends heavily on the product, the wall preparation, and the room conditions, and manufacturers vary in what they claim. A well-prepped wall in a dry, stable, well-ventilated room holds up far longer than a poorly prepped wall in a humid one. Rather than relying on a general figure, check the specific manufacturer’s guidance for the product you’re buying.


