
How to Refinish Wood Floors: Steps, Costs & Common Mistakes

To refinish wood floors, start by preparing the room. Then clean and inspect the floor. After that, sand away the old finish and surface damage. After sanding, repair any remaining cracks or gaps, remove all dust, and apply stain if you want to change the color. The last step is to coat the flooring with a suitable protective coating.
The exact process depends on the condition and type of your flooring. Lightly worn floors may only need a screen-and-recoat treatment, while deep scratches, stains, or heavily worn areas usually need full sanding. With the right tools and careful preparation, you can give old wood floors a smoother, cleaner, and more durable finish without replacing them. This blog by Floor Land shares secret tricks and techniques, along with some other useful information.
Tools and Materials You Need
| Stage | What you need |
| Preparation | Pry bar, hammer, nail set, painter’s tape, plastic sheeting, shop vacuum, wood cleaner, microfiber mop |
| Sanding | Drum or belt sander, edger, orbital sander, buffer with driver pad, abrasives across the grit range, hand scraper |
| Repair | Wood filler, putty knife, replacement boards, flooring nails or screws, wood glue |
| Staining | Stain, lambswool or foam applicators, lint-free rags, offcuts for testing |
| Finishing | Polyurethane or other finish, T-bar or floor coater, cut-in pad, painter’s pole, shoe covers |
| Safety | NIOSH-approved N95 or better respirator, sealed eye protection, hearing protection, knee pads, gloves, metal can with a tight lid for oily rags |
8-Step Process Required for Refinishing Wood Floors
Refinishing Wood Floors demands patience, precision, and a strict sequence of execution. You have to work with heavy machinery and apply industrial seals for this process. So make sure to follow trade-tested protocols that guarantee durable and high-end finishes. Below is the step-by-step procedure professionals use to strip away decades of wear and restore raw timber to its natural beauty.
1. Empty and Seal the Room
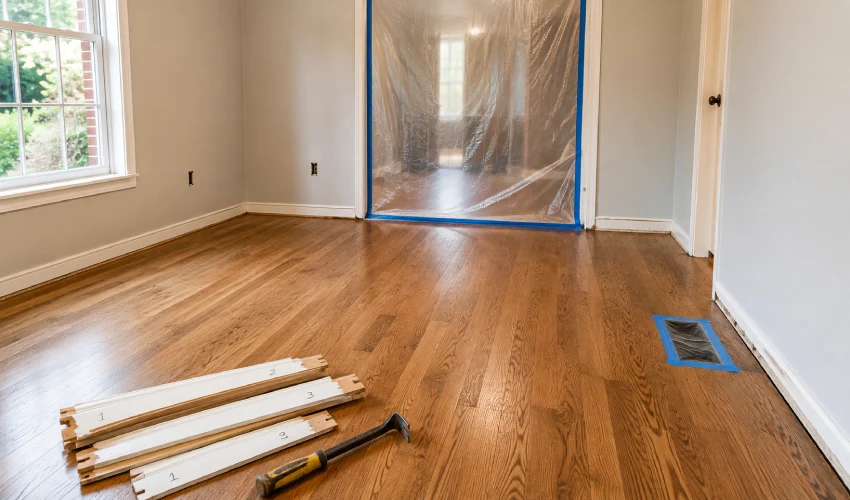
The very first step is to take out everything, including mats and window curtains. Remove the shoe molding with a pry bar and number each piece on the back so it returns to the same spot. Pull floor vents and cover the duct openings. Tape plastic over doorways and seal the gaps under closed doors.
2. Set Every Fastener and Make Repairs
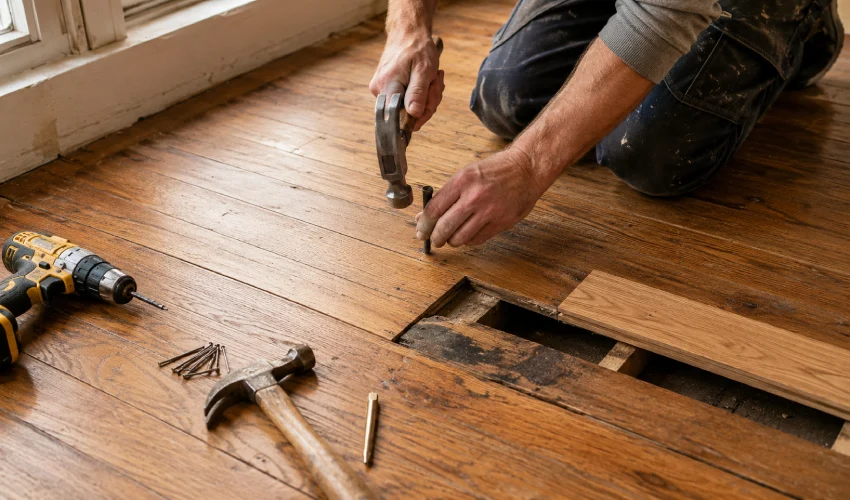
Hammer down or countersink any nail or screw head sitting proud of the surface. A single raised nail will shred a sanding belt and gouge the boards. Fix floor creaks now by driving finish nails into the joists at an angle. Replace boards that are rotted, split, or blackened by pet damage, and expect new wood to stain differently from century-old boards. Wait until after the first sanding pass to fill gaps and nail holes, because filler applied beforehand gets torn out.
3. Make the First Cut With the Big Sander
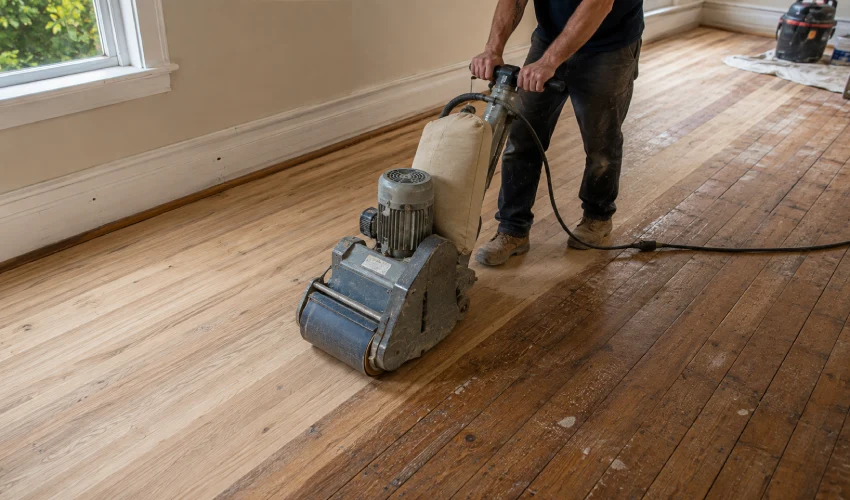
Practice on scrap plywood first. Drum sanders are efficient and unforgiving, and a machine left sitting in one spot for two seconds leaves a dish that later sanding will not hide.
Start along the longest wall, a few inches out from the baseboard. Get the machine moving before you lower the drum. Keep it moving through the pass, and lift the drum before you stop. Work with the grain, overlap each pass by a few inches, and stagger your start and stop points so you do not build a pattern into the floor. Vacuum between grits so coarse debris is not dragged into a finer pass.
4. Sand the Edges and Corners
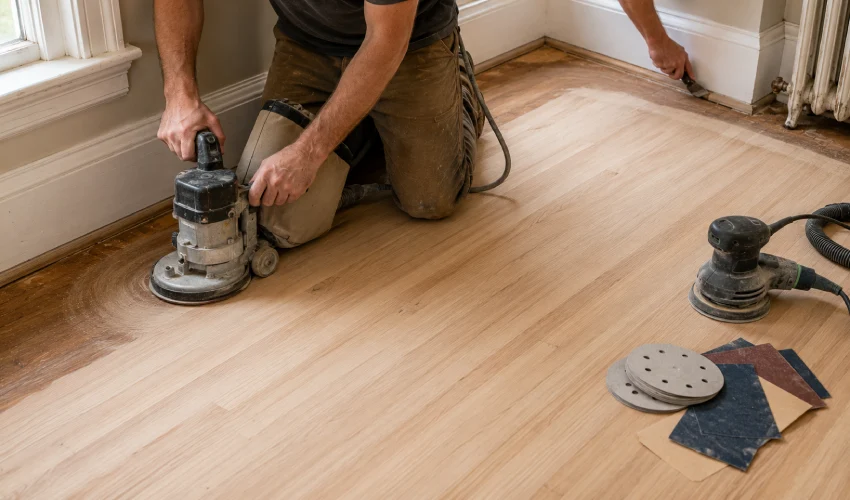
The big machine leaves a border it cannot reach. An edger handles most of it. Keep it moving in small arcs. Let the weight of the tool do the work, and match the grit you just used in the field. Corners, closets, and the space under radiators need a hand scraper.
Edgers cut in swirls and field sanders cut in straight lines. Blending those patterns separates a floor from one with a visible ring around the room. So feather the transition with an orbital sander.
5. Work Up Through the Grits
Use the coarsest grit the damage actually requires, then step up gradually. Skipping more than one grit size leaves scratches that only reveal themselves after the stain goes down.
| Stage | Typical grit range | Purpose | Equipment |
| Rough cut | 36 to 40 | Strip old finish, flatten cupping, cut out serious damage | Drum or belt sander, edger |
| Second cut | 50 to 60 | Erase the coarse scratch pattern | Drum or belt sander, edger |
| Fine cut | 80 to 100 | Refine the surface and prepare for stain | Drum sander, orbital sander |
| Blending | 100 to 120 | Even out scratch patterns between machines | Orbital or random orbital sander |
| Final abrasion | 120 or a screen | Open the grain evenly for finish | Buffer with screen or pad |
Softer species such as pine and fir need a gentler approach than oak. If the paper clogs or leaves finish behind, drop a grit.
6. Remove Every Trace of Dust
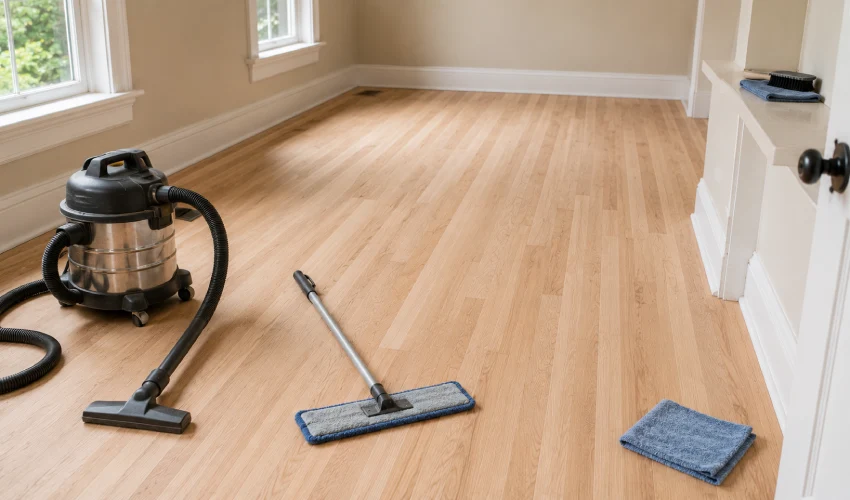
Vacuum with a clean filter, running once with the boards and once across them to pull dust out of the seams. Then vacuum the walls, sills, casings, and ceiling fan. Tack the floor with a dry microfiber mop and let the air settle before you open a can of anything. Dust suspended in the room will land in a wet coat and stay there.
7. Stain, if You Want Color
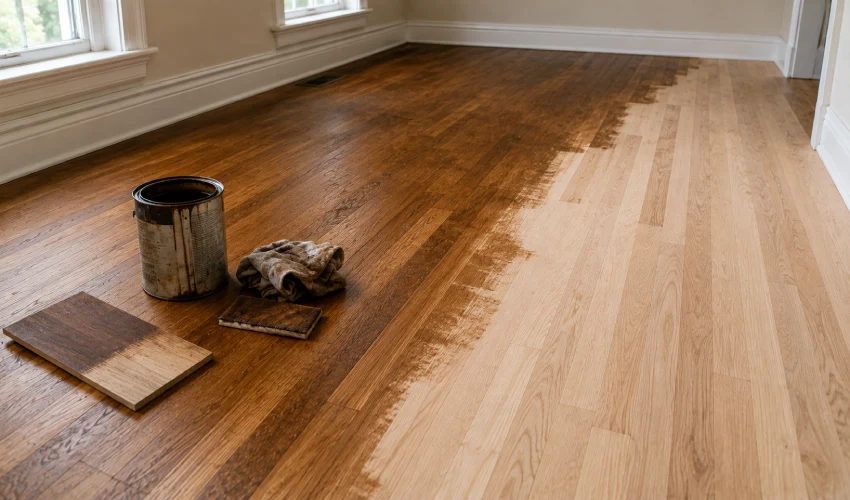
Staining is optional, and plenty of oak floors look better under a clear finish. If you do stain, test on an offcut first. Species, age, and grain all change how a color reads. Apply with a rag or applicator a few boards at a time, always with the grain, then wipe back the excess before it sets.
Pooled stain dries as dark blotches, and dense species such as maple blotch easily. Let the stain dry fully, using the manufacturer’s technical data sheet rather than a general rule.
8. Apply the Protective Finish
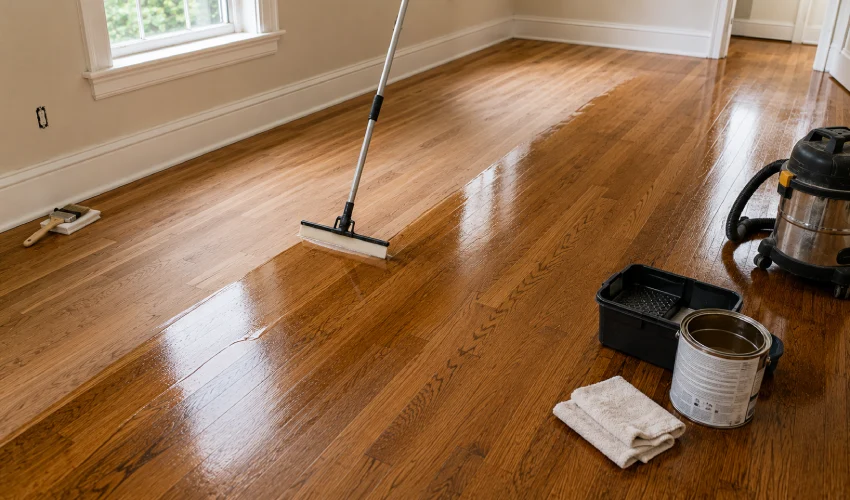
Water-based polyurethane dries fast, smells less, and stays clear. Oil-based costs less, dries slower, and ambers over time, which some people want. Penetrating hardwax oils sit in the wood and spot repair easily, though they need periodic reapplication. Acid-cured finishes are extremely durable and give off strong fumes.
Pour a narrow ribbon of finish along the starting wall. Cut in the perimeter with a brush or pad, then pull the finish across the floor with a T-bar, keeping a wet edge the whole way. Plan your exit before you start, because lap marks form wherever a dried edge meets fresh finish. Two coats is the practical minimum, and three is better in a kitchen or entry. Abrade lightly between coats if the manufacturer calls for it, then vacuum and tack again. Watch the recoat window, since some products need the next coat within a few hours and waiting too long means sanding again for adhesion.
Drying and curing are different things. Bona’s technical data sheets, as one example, put full cure at roughly seven days for several waterborne finishes, with furniture returning after about three days and area rugs held off until cure is complete. Oil-based products take longer. Follow the product instructions, because rugs and rubber-backed mats laid down early can permanently mark a finish that has not finished hardening.
How Long Refinishing Takes
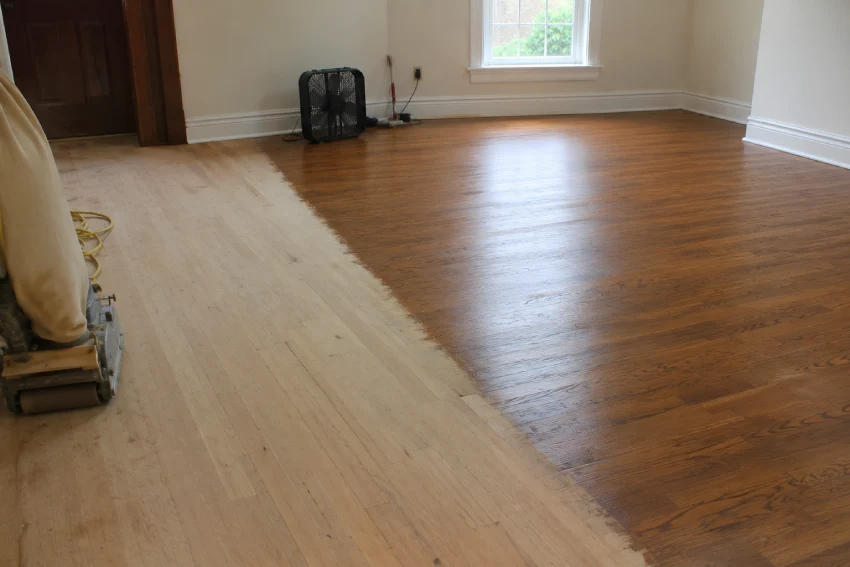
For a typical room, give yourself around three to five days to finish the whole job. Most of the sanding can usually be done in one long day, but you will need to allow time for each coat to dry properly before moving on to the next one. If you are refinishing the whole house, a professional crew may finish the main work in two to seven days, depending on the size and condition of the floors. You will still need to wait longer before putting rugs and heavy furniture back.
The weather can also affect the timing. Cold or humid conditions can make the finish take longer to dry. It is tempting to rush the next coat, but doing so can leave you with a poor finish and force you to sand the floor again.
How to Restore Wood Floors Without Sanding
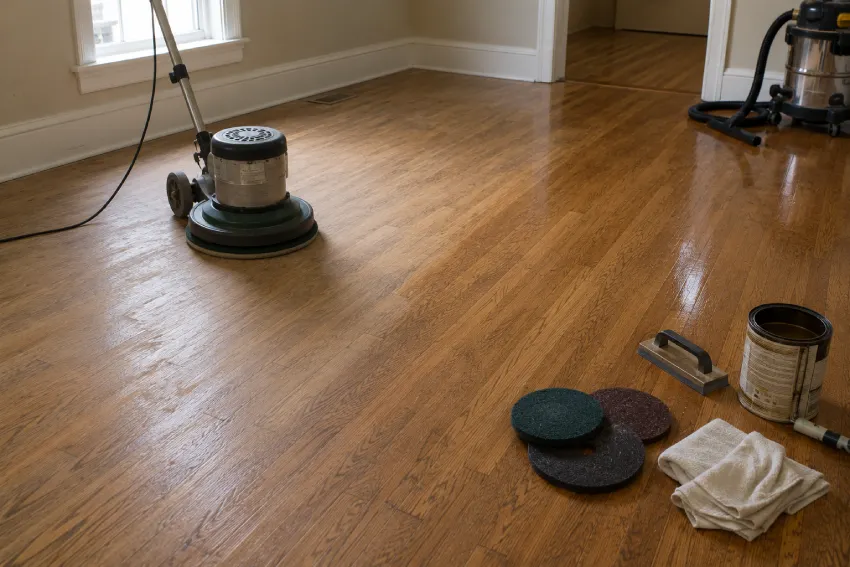
If the finish is worn but the wood underneath is untouched, a screen and recoat is the easiest way to refinish wood floors. This technique provides a durable result. A buffer fitted with an abrasive screen scuffs the existing topcoat just enough for a new coat to bond. You hand-sand the perimeter, clean thoroughly, and apply fresh finish. Most rooms take a day at a fraction of the cost of a full refinish, and repeating it every few years can spare a floor from ever being sanded to bare wood.
There are a few things screening simply cannot fix. It will not get rid of scratches that have gone into the wood, change the color of your floor, or remove water stains and gray, damaged boards. And if some areas are already down to bare wood, putting a new coat over them will not make everything blend in. Those spots can still look different from the rest of the floor, especially when the light hits them.
Two cautions matter. Wax, oil soap, or acrylic polish left on the floor will cause the new coat to fail. So clean the hardwood floors properly and test adhesion in a small area first. A wood floor refinishing kit that promises to restore your floor without sanding is really more of a maintenance product than a true refinish. It can bring back some shine when the floor is still in good condition, but it will not repair a badly worn surface. You also need to clean and prepare the floor properly first. If dirt, wax, or old residue is left behind, the new coating may not stick properly and can start peeling.
What It Costs to Sand and Refinish Wood Floors
These figures for professional wood floor refinishing reflect the United States market in 2026 and vary by region and floor condition, so get local quotes before budgeting.
| Refinishing Option | Typical Cost |
| Professional refinishing | $3–$8/sq. ft. |
| Whole-project refinishing | $1,100–$2,700 |
| Dustless refinishing | Higher end of range |
| Buffing & recoating | $1–$2.50/sq. ft. |
| Floor sander rental | $40–$69/day |
| Floor sander weekly rental | $160–$268/week |
| DIY refinishing | High hundreds + materials |
How to Tell If Your Wood Floors Need Refinishing
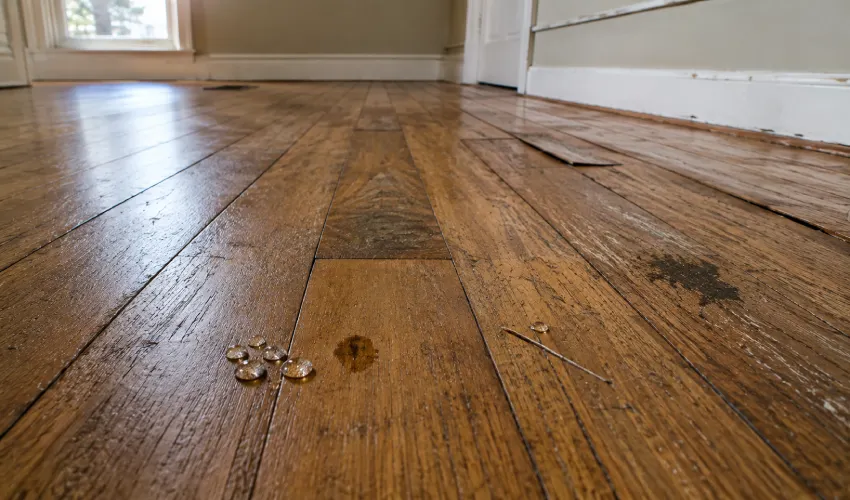
Start with a water test in a busy walkway. Put a few drops of water on the floor and watch. Beading water means the finish is still working and you do not need to sand. Water that soaks in and darkens the wood means the finish has worn through.
Then look across the floor at a low angle in strong light. Gray or blackened boards mean moisture has reached the wood, and black pet stains often penetrate too deep for sanding to remove. Cupped boards, where the plank edges sit higher than the centers, point to a moisture problem below the floor. Sand a cupped floor before you find that source, and it will cup again, or crown once it dries.
Scratches that catch your fingernail have gone into the wood. Scratches you can only see have not. That test separates a full sand from a recoat more reliably than anything else.
Can Every Wood Floor Be Refinished?
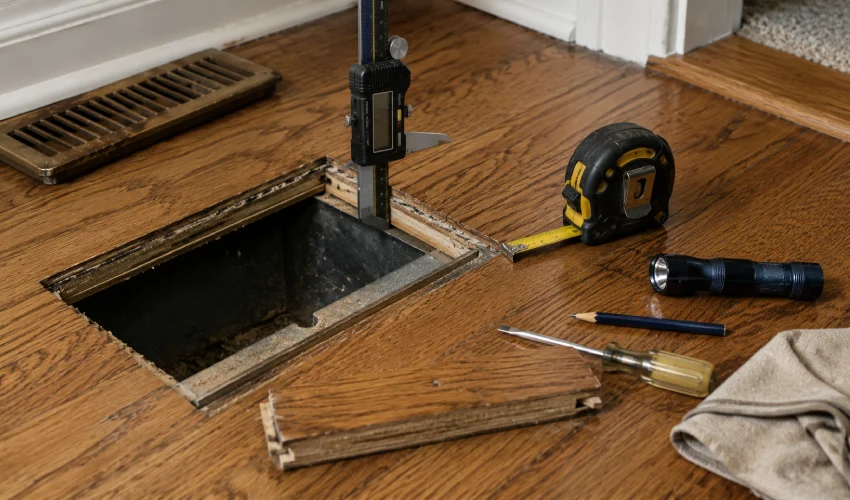
No. What matters is the wear layer. In simple words, the refinishing of a floor depends on the thickness of solid wood above the tongue and groove that you can safely remove. The National Wood Flooring Association sets a clear threshold in its sand and finish guidelines: if the remaining wear layer is thinner than 3/32 of an inch, roughly 2.5 mm, the floor should not be sanded. A normal pass removes less than 1/32 of an inch in skilled hands, so the margin on a thin floor disappears fast.
- Solid Wood typically has a quarter inch or more of usable wood and tolerates several refinishing cycles.
- Engineered wood depends entirely on its veneer. It can range from about 1 mm to 6 mm. Thin veneers can only be recoated, while thicker ones may handle a sanding or two. NWFA runs an Engineered Wood Flooring Refinishable Program precisely because homeowners cannot tell by looking.
- Prefinished floors with factory aluminum oxide coatings are harder than site-finished floors. Their beveled edges show as unsanded grooves once the machines come through.
- Hand-scraped and wire-brushed floors lose the texture you paid for the moment you flatten them.
Check your own floor by lifting a floor vent or looking at a plank end where the flooring meets wall-to-wall carpets. Then measure the wood above the tongue. If you are close to the tongue, stop and get an opinion before you stand into the joinery.
Older homes need one more check. If the house predates 1978, trim and painted surfaces may contain lead-based paint. The EPA recommends hiring a lead-safe certified contractor for renovation work in those homes, since sanding painted surfaces creates hazardous lead dust. The federal Renovation, Repair and Painting Rule generally does not bind a homeowner working on their own residence, but the health risk applies regardless of who holds the sander.
Safety Guidance Worth Following While Refinishing the Wood Floors
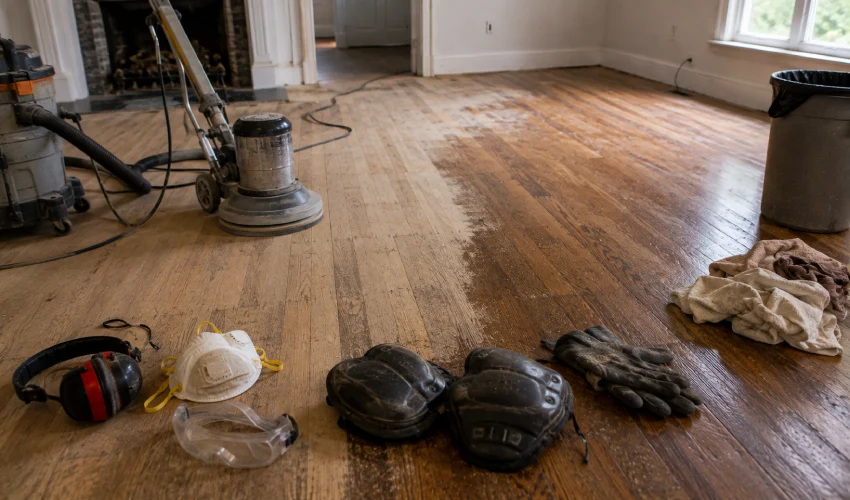
Wood dust is a recognized health hazard rather than a nuisance. The International Agency for Research on Cancer classifies it as a Group 1 human carcinogen. OSHA links high exposure to wood species such as oak and beech with nasal cancer among woodworkers. A NIOSH health hazard evaluation of a wood floor refinishing company recommended NIOSH-approved N95 particulate respirators during sanding and buffing. Wear one, and wear it correctly.
- Add sealed eye protection, since edgers throw grit sideways, along with hearing protection and knee pads. Ventilate the space, keep dust contained to the work area, and empty the sander bag frequently and outside, because sanding dust is combustible.
- Rags soaked with oil-based stain or finish can ignite on their own as the oil cures and gives off heat. NFPA safety materials attribute roughly 1,700 home fires a year to spontaneous combustion and chemical reactions. Never leave those rags in a pile. Spread them flat outside to dry or seal them in a metal container with a tight lid, then dispose of them according to local rules.
- Keep children and pets off the floor until the finish has cured, not just until it feels dry, and read the label and safety data sheet for every product you use.
Some Common Mistakes That Damage the Refinished Floors
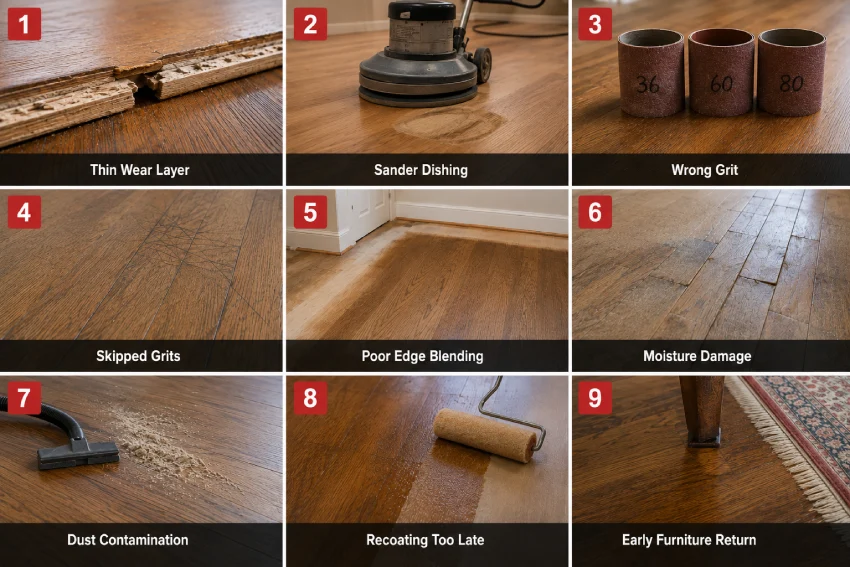
Refinishing wood floors leaves little room for error. A small slip with a sander or rushing the drying time can ruin raw wood or cost you hundreds in extra repairs. Avoid these common mistakes to keep your project on track and protect your investment.
- Sanding a floor with no wear layer left. Cut into the tongue, and the board is finished.
- Letting the drum sander sit still. Even a brief pause carves depression.
- Starting too coarse. A 36-grit belt on a floor that needed 60 removes years of life for nothing.
- Skipping grits. The scratches survive under the stain and appear once the finish goes on.
- Ignoring the edge blend. A halo of differently sanded wood around the room is the classic amateur tell.
- Sanding over moisture damage. Fix the source or the cupping returns.
- Rushing dust removal. Dust trapped in the finish is permanent.
- Coating outside the recoat window. The layers do not bond and the finish peels.
- Moving furniture back before cure. Dents and rug marks in a finish that almost made it.
Refinishing, Recoating, and Spot Repair Are Not the Same Job
A polyurethane finish is meant to take the daily wear and tear so the stain and wood underneath stay protected. So, if the finish looks worn, that does not always mean the wood itself is damaged. If you see scuffs or scratches but the finish still covers the wood, you mainly have a finish problem. But if you can see bare wood, the damage has gone deeper, and the repair will need more work.
You may also come across the term “wood floor resurfacing vs refinishing.” These terms can be confusing because “resurfacing” is not a specific technical process. The important thing is how much of the old finish you need to remove and how deeply you need to sand the floor.
| Full Refinish | Screen and Recoat | Spot Repair | Deep Clean | |
| Best for | Bare patches, deep scratches, stains, color change | Dull or lightly scuffed finish, no bare wood | One damaged board or small gouged area | Grime, haze, residue buildup |
| Surface condition | Finish failed, wood exposed | Finish thin but intact | Damage confined to a small zone | Finish sound, surface dirty |
| Sanding required | Aggressive machine sanding to bare wood | Light abrasion of the topcoat only | Localized sanding or board replacement | None |
| Wood removed | A measurable amount, often under 1/32 inch | Essentially none | Only in the repaired area | None |
| Typical scope | Several days, room or whole house | About a day for most rooms | A few hours | An hour or two |
When to DIY and When to Hire a Professional
Doing it yourself makes sense on a small, simple, solid wood floor in reasonable condition. It is a good option especially when the job is a screen and recoat and the stakes are low. Such as a spare bedroom or a rental you are already renovating.
Call a professional when the floor is engineered or prefinished. Secondly, when the wear layer is marginal, when you have parquet or an inlaid border. DIY is not suitable when boards are cupped or water damaged, or when the floor anchors the main living space of a home you care about. Pros carry multiple machines, dust containment, and the muscle memory that keeps a drum sander from leaving a mark.
How to Keep a Refinished Floor Looking Good
Follow the below-mentioned maintenance tips for keeping your refinished floors looking pristine for a longer duration.
- Put felt pads under furniture and walk-off mats at the doors, since grit tracked in from outside does most of the scratching.
- Sweep or vacuum often, clean with a product the finish manufacturer approves, and skip oil soaps, steam mops, and vinegar solutions, all of which can dull or damage a modern finish. The best habit of all is recoating before the finish wears through, which can keep a solid wood floor going for decades on a single sanding.
Final Thoughts
Knowing how to refinish wood floors starts with an honest assessment rather than a rental reservation. Test the finish, measure the wood you have left to work with, and match the job to the damage. A worn topcoat needs a recoat. Damaged wood needs a full sand, a careful grit progression, obsessive dust removal, and patience while the finish cures. When the wear layer is marginal, or the floor is engineered, prefinished, or water damaged, an experienced refinisher protects an asset that is expensive to replace.
Frequently Asked Questions
Yes, if the floor is solid wood with enough wear layer left and you practice with the equipment first. Rent the machines, test on scrap, and start with a small room. Skip the DIY route if the floor is engineered with a thin veneer, badly cupped, or prefinished with beveled edges, because those situations punish inexperience.
Do not let the drum sander pause while the drum is down, do not skip grits, and do not sand before identifying the source of any moisture damage. Do not apply finish over dust or outside the recoat window. Never leave oil-soaked rags in a pile, and never move furniture back before the finish has cured.
Use a screen and recoat. A buffer with an abrasive screen scuffs the existing topcoat so the new finish will bond, and the perimeter gets hand-sanded. It works only when the finish is continuous with no bare wood, and only after wax or polish residue has been cleaned off. It restores protection and sheen, but cannot change color or remove scratches in the wood.
A screen and recoat in one room can be. A full sand-to-bare-wood refinish cannot, because stains and each coat need drying time, and more than two topcoats in a day risks adhesion problems. Even fast-drying waterborne systems need days to cure before rugs and heavy furniture return.
It depends on the remaining wear layer, not the age of the floor. NWFA guidance says a floor with less than 3/32 of an inch, about 2.5 mm, should not be sanded at all. Solid hardwood usually allows several cycles, while engineered floors with thin veneers may allow one or none. Measure at a vent opening before committing.
Water-based dries faster, smells less, stays clear, and suits households that cannot vacate for long. Oil-based costs less per gallon, warms the wood with an amber tone, and takes longer between coats. Both are durable when applied properly. The choice comes down to color preference, ventilation, and how quickly you need the room back.


