
How To Clean Laminate Flooring? Detailed Guide
Laminate flooring is like wood, but it’s not. The surface is a printed image that is encased in a hard resin finish, and the underlying material is compressed fiberboard that disdains standing water. This is the only fact that will determine the whole way to clean laminate flooring without doing any harm.
This guide provides you with the exact methods, moisture thresholds, and products to help keep laminate looking new for years. No guesswork. What works and the subtle things that ruin floors.
Quick Summary: How to Clean Laminate Floors
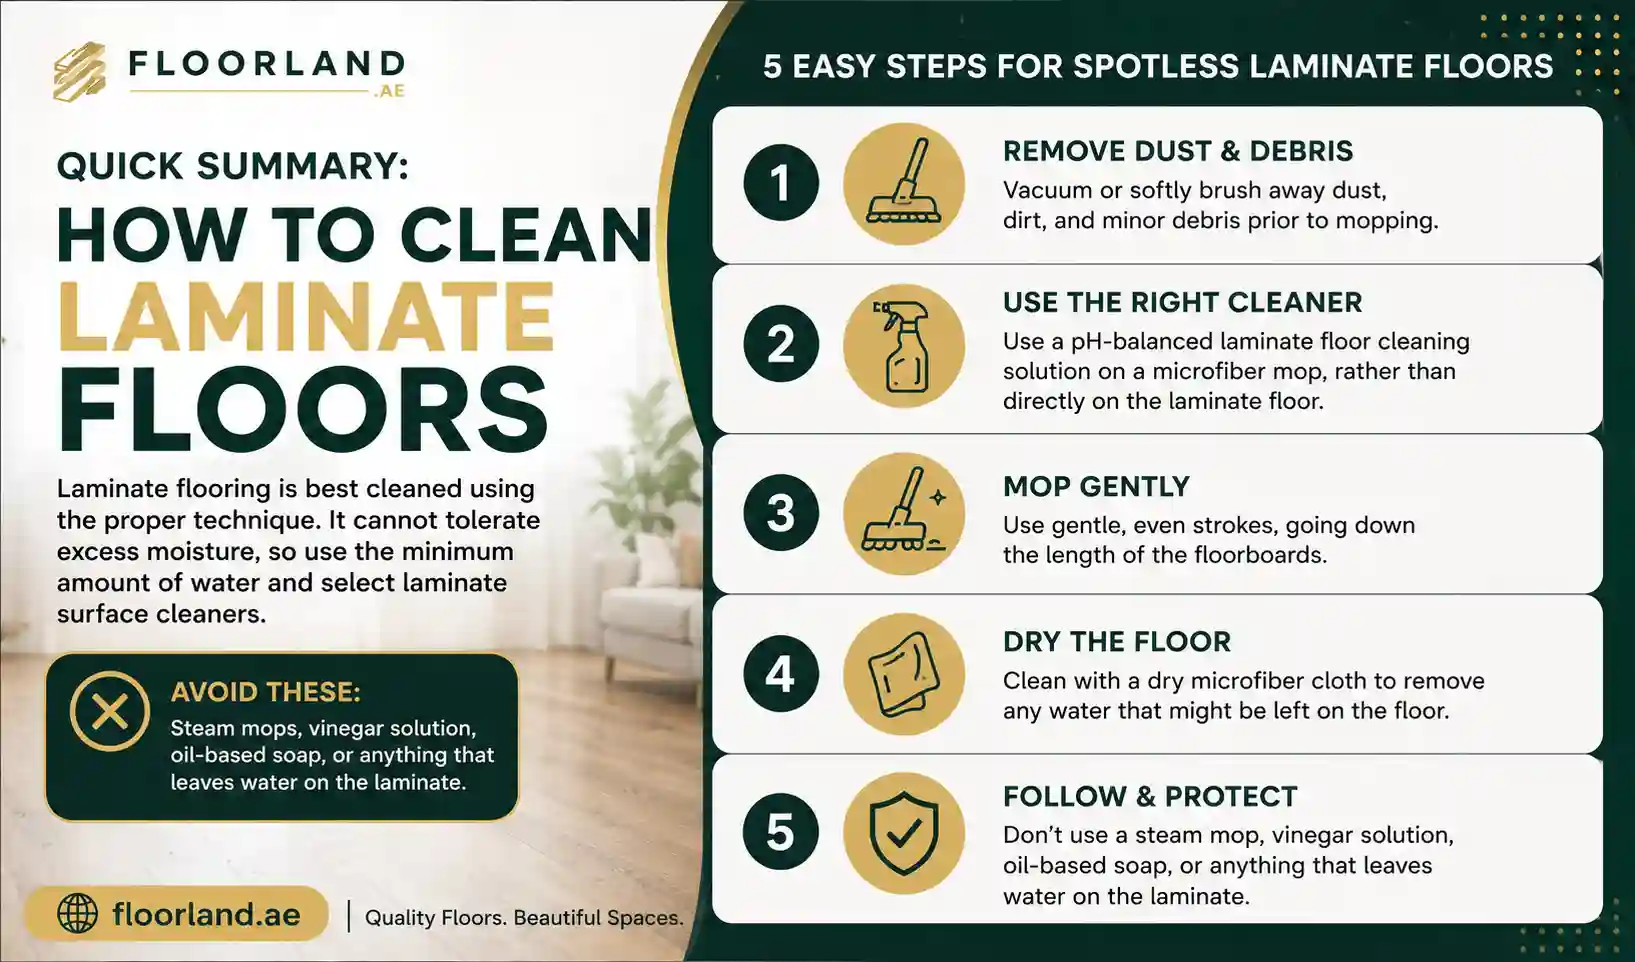
Laminate flooring is best cleaned using the proper technique. It cannot tolerate excess moisture, so only use the minimum amount of water and select laminate surface cleaners. To perform the routine cleaning safely, follow these easy steps:
- Vacuum or softly brush away dust, dirt, and minor debris prior to mopping.
- Use a pH-balanced laminate floor cleaning solution on a microfiber mop, rather than directly on the laminate floor.
- Use gentle, even strokes, going down the length of the floorboards.
- Clean with a dry microfiber cloth to remove any water that might be left on the floor.
- Don’t use a steam mop, vinegar solution, oil-based soap, or anything that leaves water on the laminate.
Materials You Need Before Cleaning
Get a couple of basic tools. Gently remove grit with the right equipment and prevent water from getting into the seams. Grit is the name of the game, and dust control is as important as mopping laminate.
| Mistake | Why It Causes Damage | Safer Alternative |
|---|---|---|
| Steam mops | Forces hot vapour into seams; swells the core and lifts edges. | Damp microfiber mop, wrung nearly dry. |
| Steel wool | Scratches through the wear layer instantly. | Microfiber cloth or plastic scraper. |
| Excess water | Reaches the fibreboard core and causes swelling. | Barely-damp cloth; dry immediately. |
| Bleach | Discolours the printed design layer and dulls the finish. | Diluted vinegar or pH-neutral cleaner. |
| Ammonia | Breaks down the protective coating over time. | pH-neutral cleaner. |
| Abrasive powders | Grind fine scratches into the surface. | Baking soda paste used gently, if at all. |
| Harsh brushes | Wear and dull the finish. | Soft cloth, wiping in one direction. |
| Soaking stains | Prolonged moisture penetrates the joints. | Short dwell time with a damp cloth only. |
| Wax polish | Builds a cloudy film laminate can’t absorb. | Residue-free pH-neutral cleaner. |
| Oil soaps | Leave a dulling, streaky residue. | pH-neutral, residue-free formula. |
How To Clean Laminate Flooring Step by Step
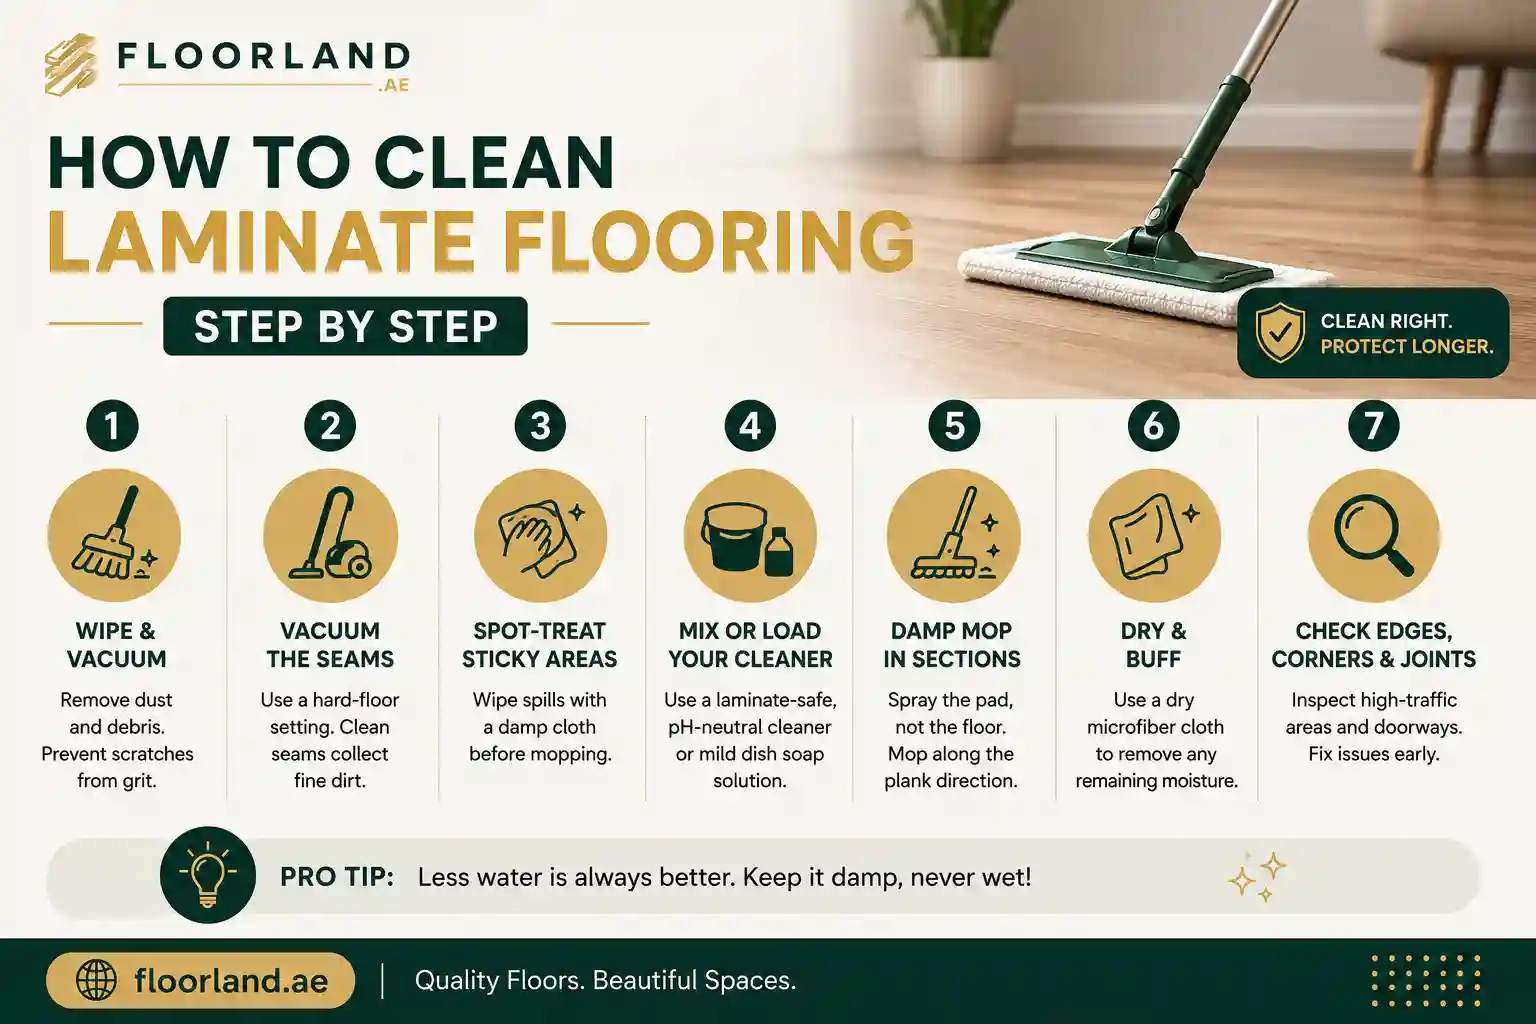
Cleaning laminate floors becomes very quick and easy when you know the right steps and techniques.
Step 1: Wipe and Vacuum the Floor
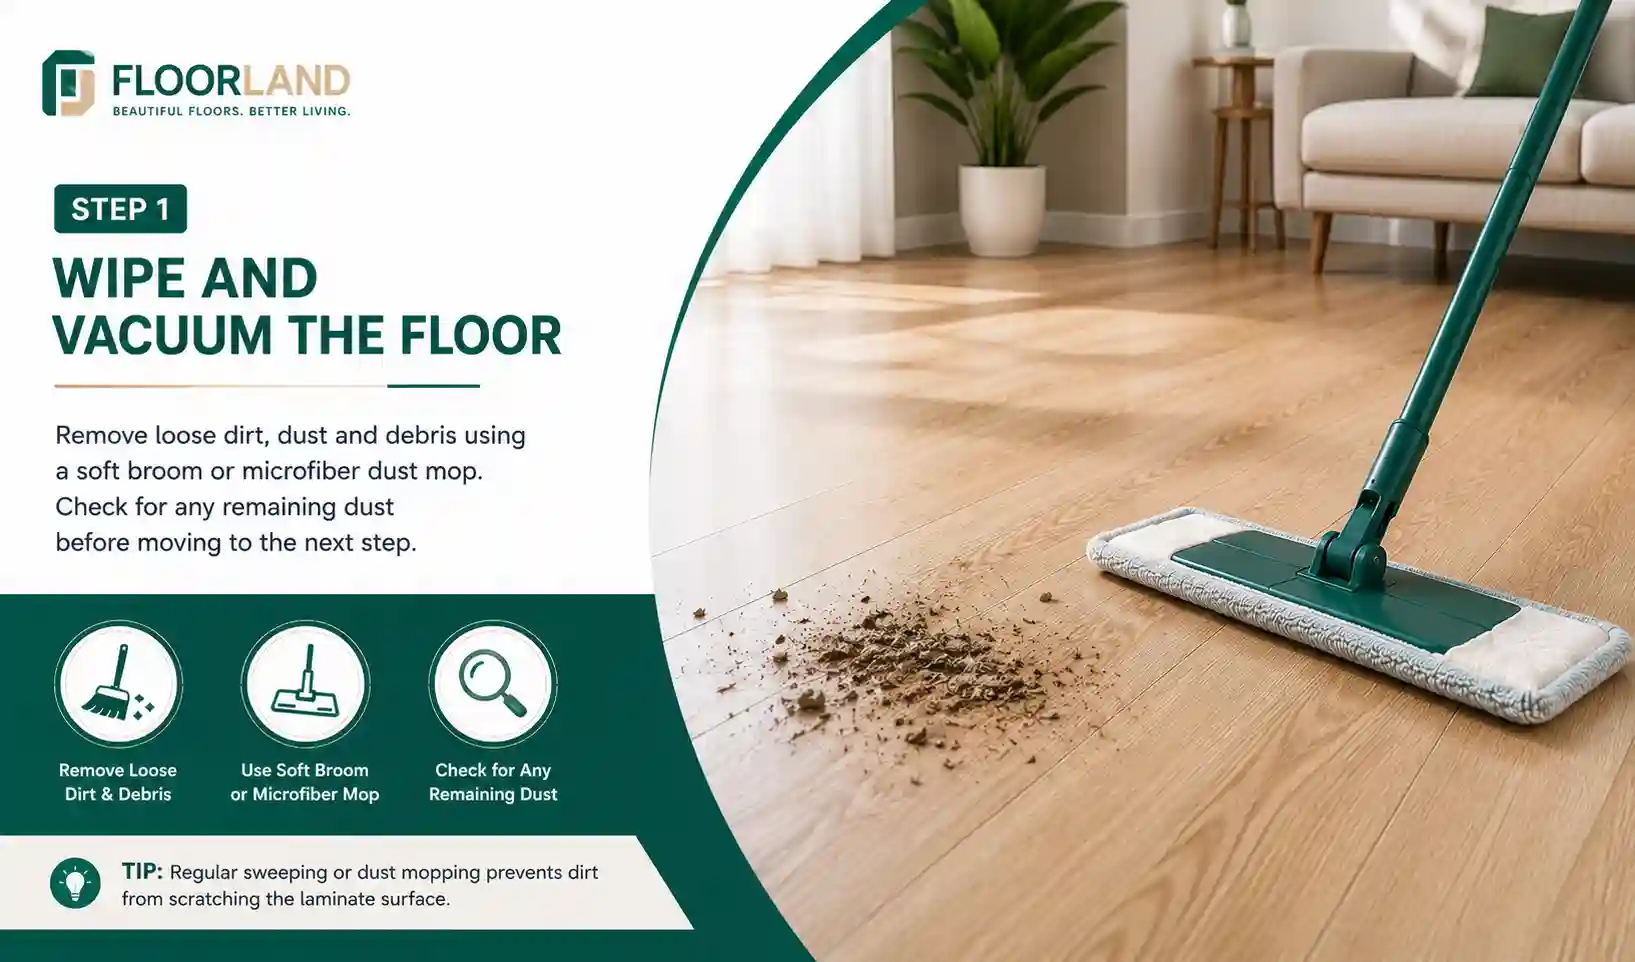
The first step should be to take out furniture, rugs, and other light items so that you can thoroughly clean the entire floor area. Use a soft broom or microfiber dust mop to sweep away loose dirt, pet hair, and dust. Small particles of sand and grit are like sandpaper under shoes and furniture and slowly work away at the protective wear.
Removing this dirt before mopping will minimize any damage to the surface and stop dirt from being spread around the carpet. Do check the floor for any dust before proceeding to the next step.
Step 2: Vacuum the Seams
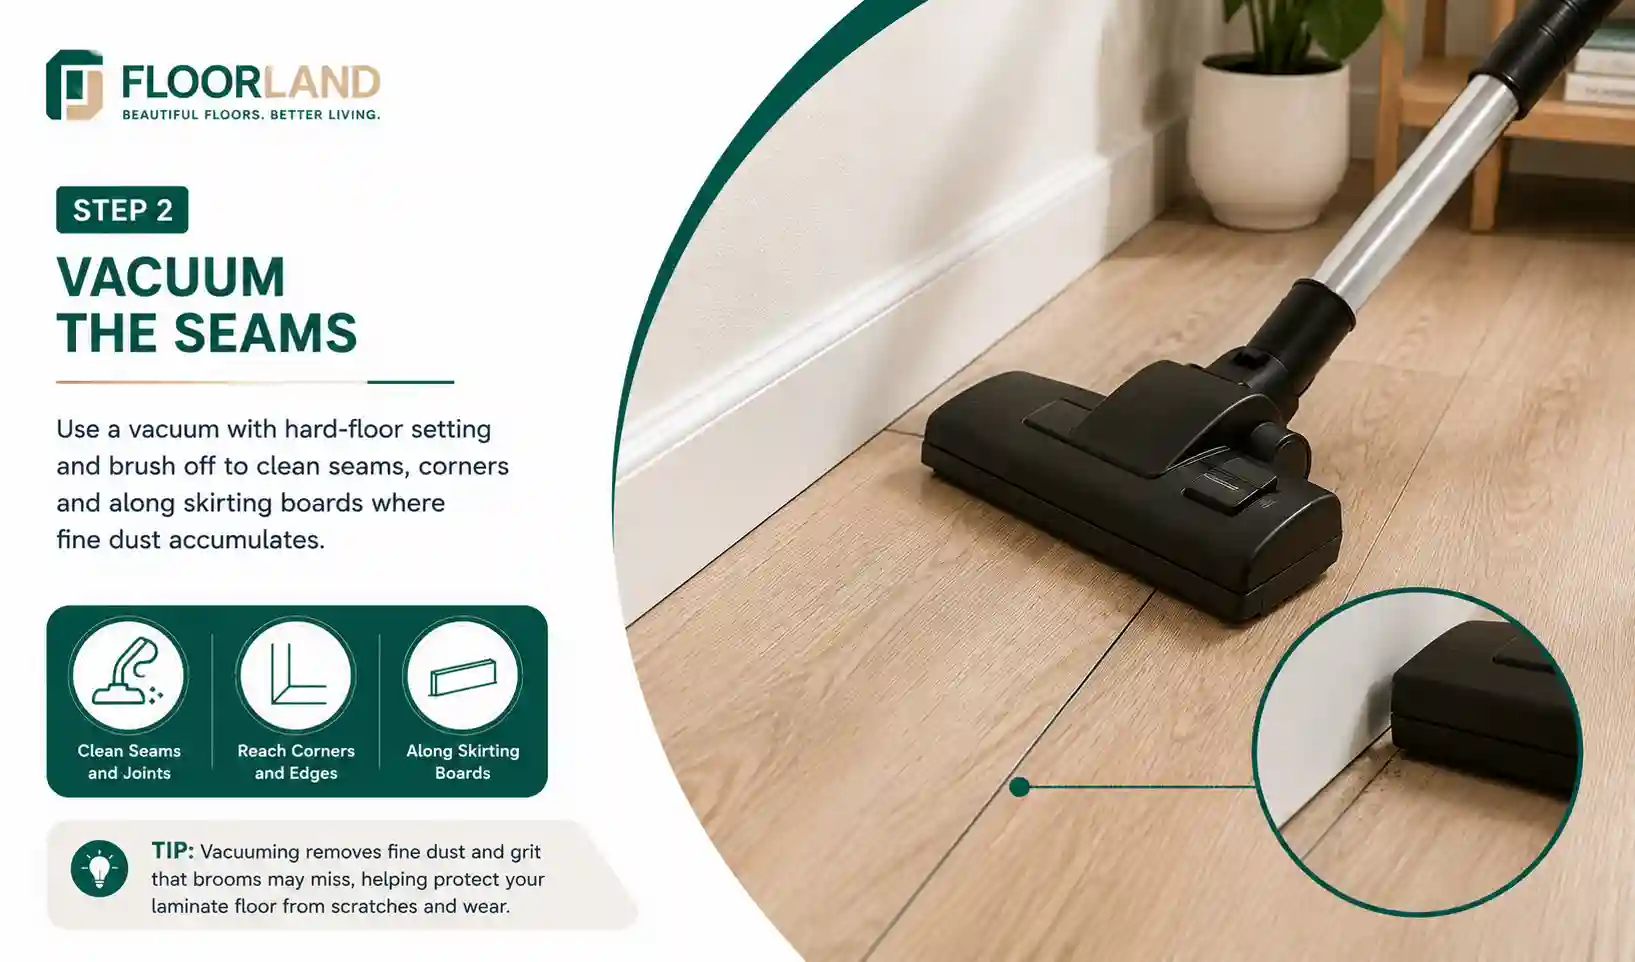
Sweep and vacuum the floor with the hard-floor setting and the rotating brush off. Be extra careful when cleaning plank joints, corners, and around skirting boards where fine dust can accumulate.
A vacuum will pick up particles in a faster way than a broom can catch any in tight spaces. Maintaining these areas in a clean condition keeps the amount of grit at a minimum, preventing wear and tear over time and in the joints. Sweeping alone will not pick up all the dust as vacuuming does, which will help enhance the look of laminate flooring.
Step 3: Spot-Treat Sticky Areas
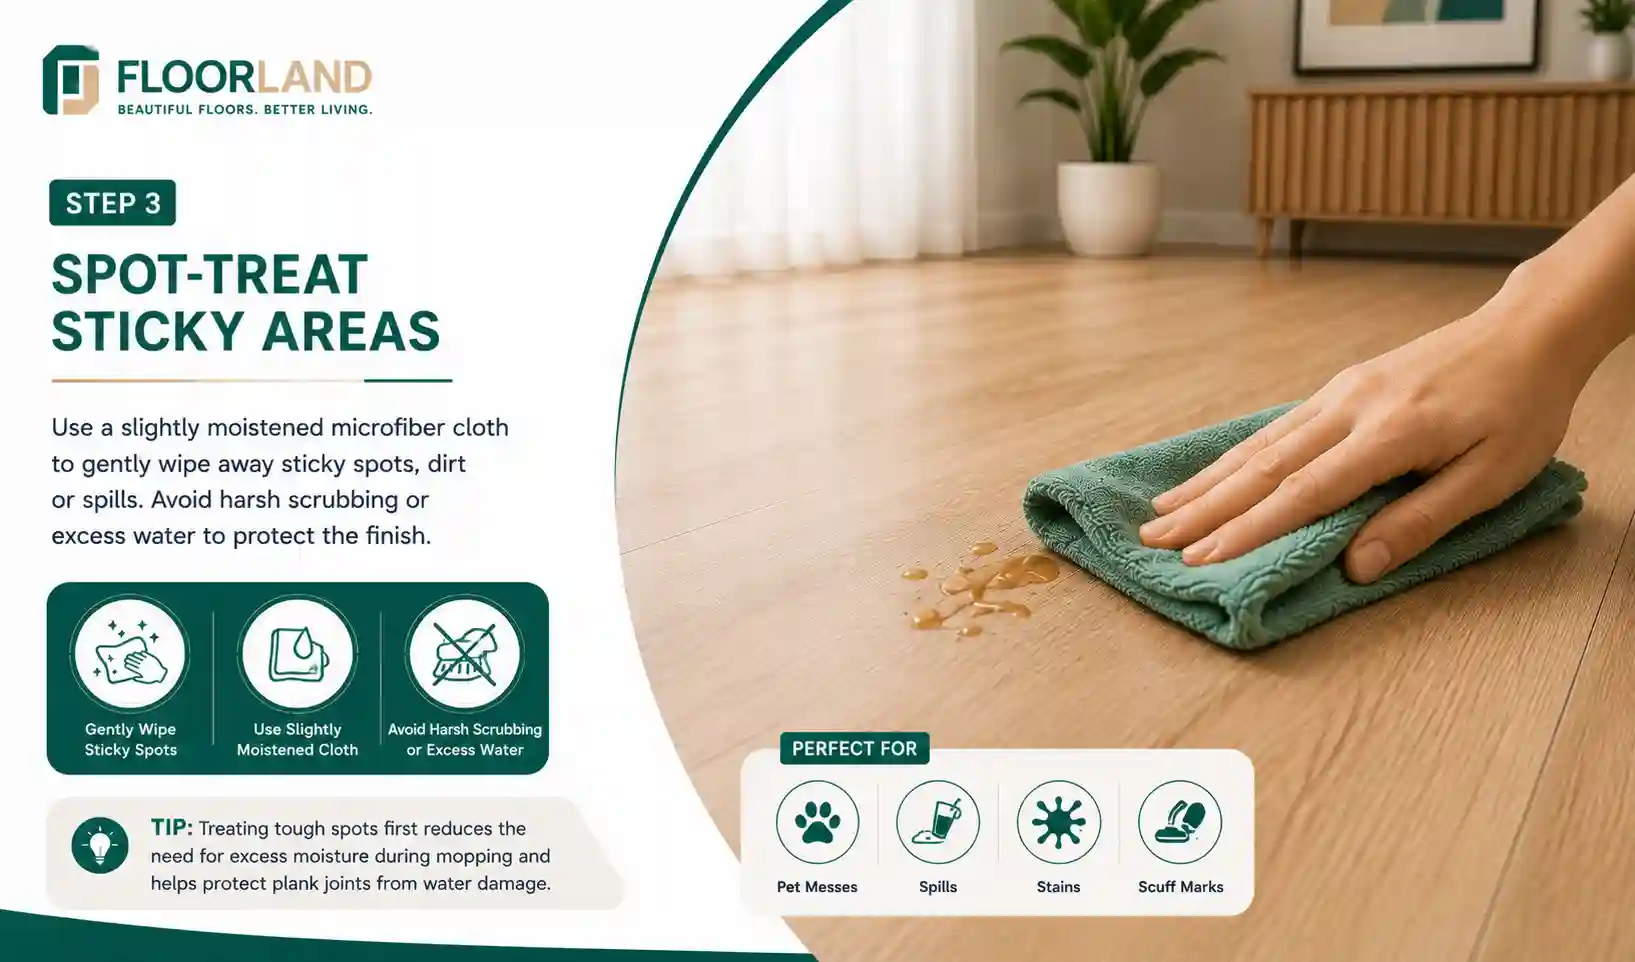
Mop up and clean up before mopping the whole floor. Use a slightly moistened microfiber cloth to gently rub away the dust or dirt. Don’t scrub the surface with abrasive pads or wet it so much that it can interfere with the protective finish. If you can get rid of the tough spots first, you’ll need less moisture on the main cleaning process. This decreases the risk of water getting to the plank joints, and the last mop is quicker and more effective.
Step 4: Mix or Load Your Cleaner
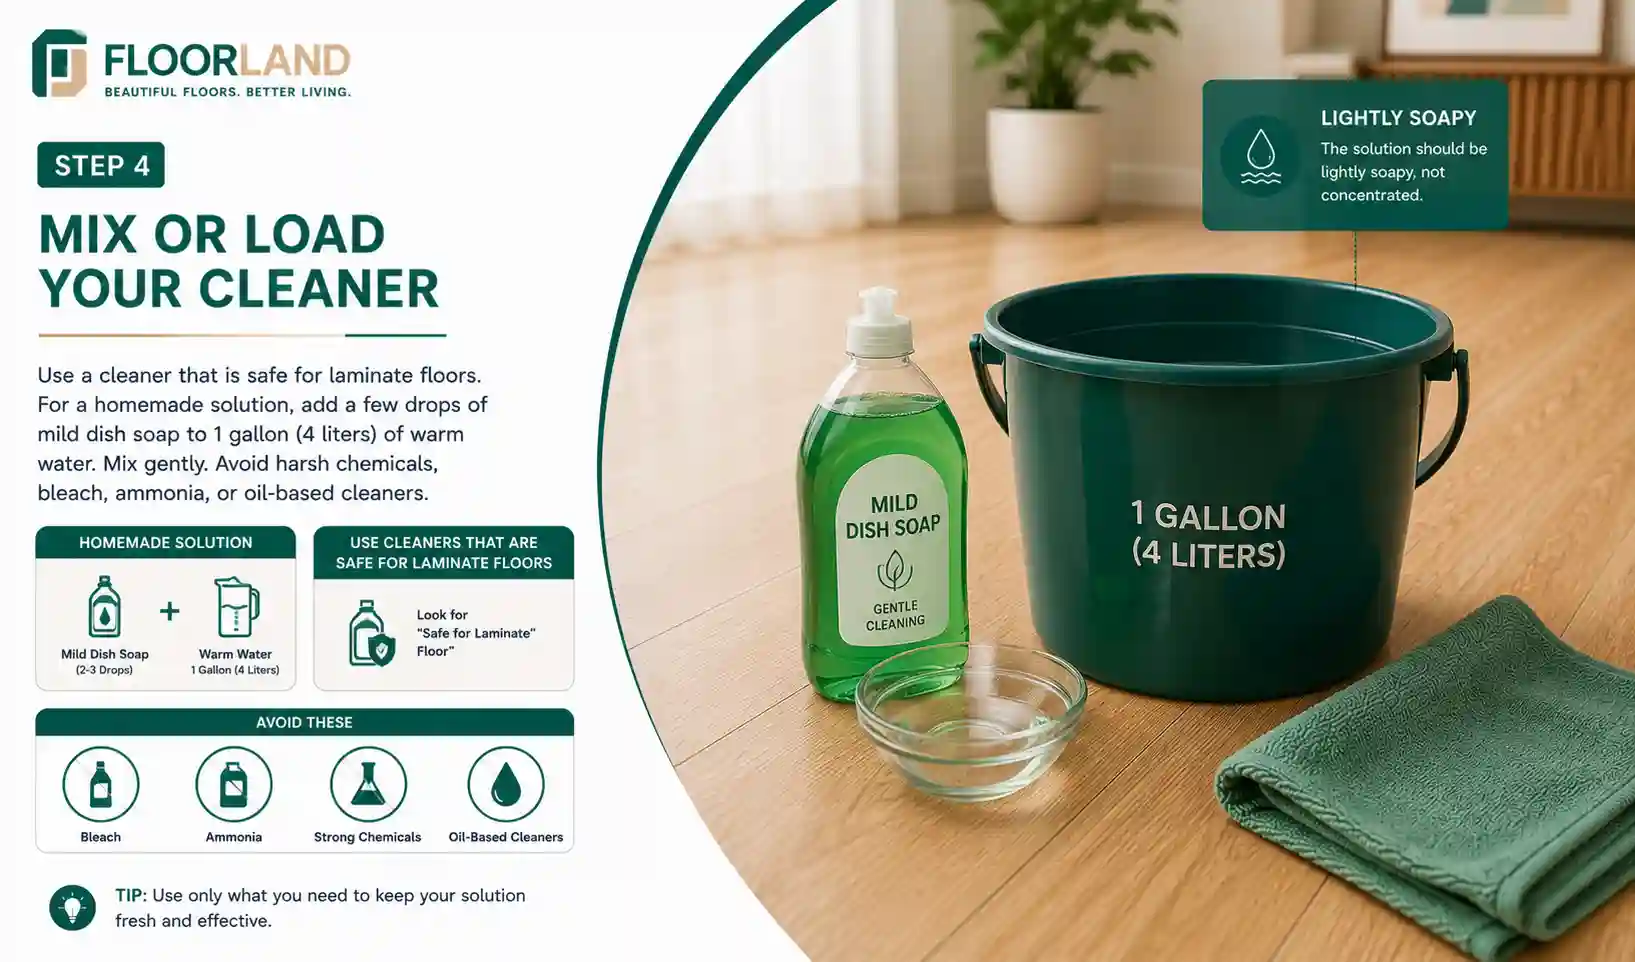
Use a cleaner that is specifically marked “safe for laminate floors”. For a home-made alternative, combine a couple drops of mild dish soap with one gallon (4 liters) of warm water. The solution should be lightly soapy and not concentrated. Strong chemicals, bleach, ammonia, or oil-based cleaners may leave a residue, dull the finish, or strip the protective coating. Only prepare enough solution for the required cleaning to maintain the solution’s freshness and effectiveness throughout the cleaning process.
Step 5: Damp Mop in Sections
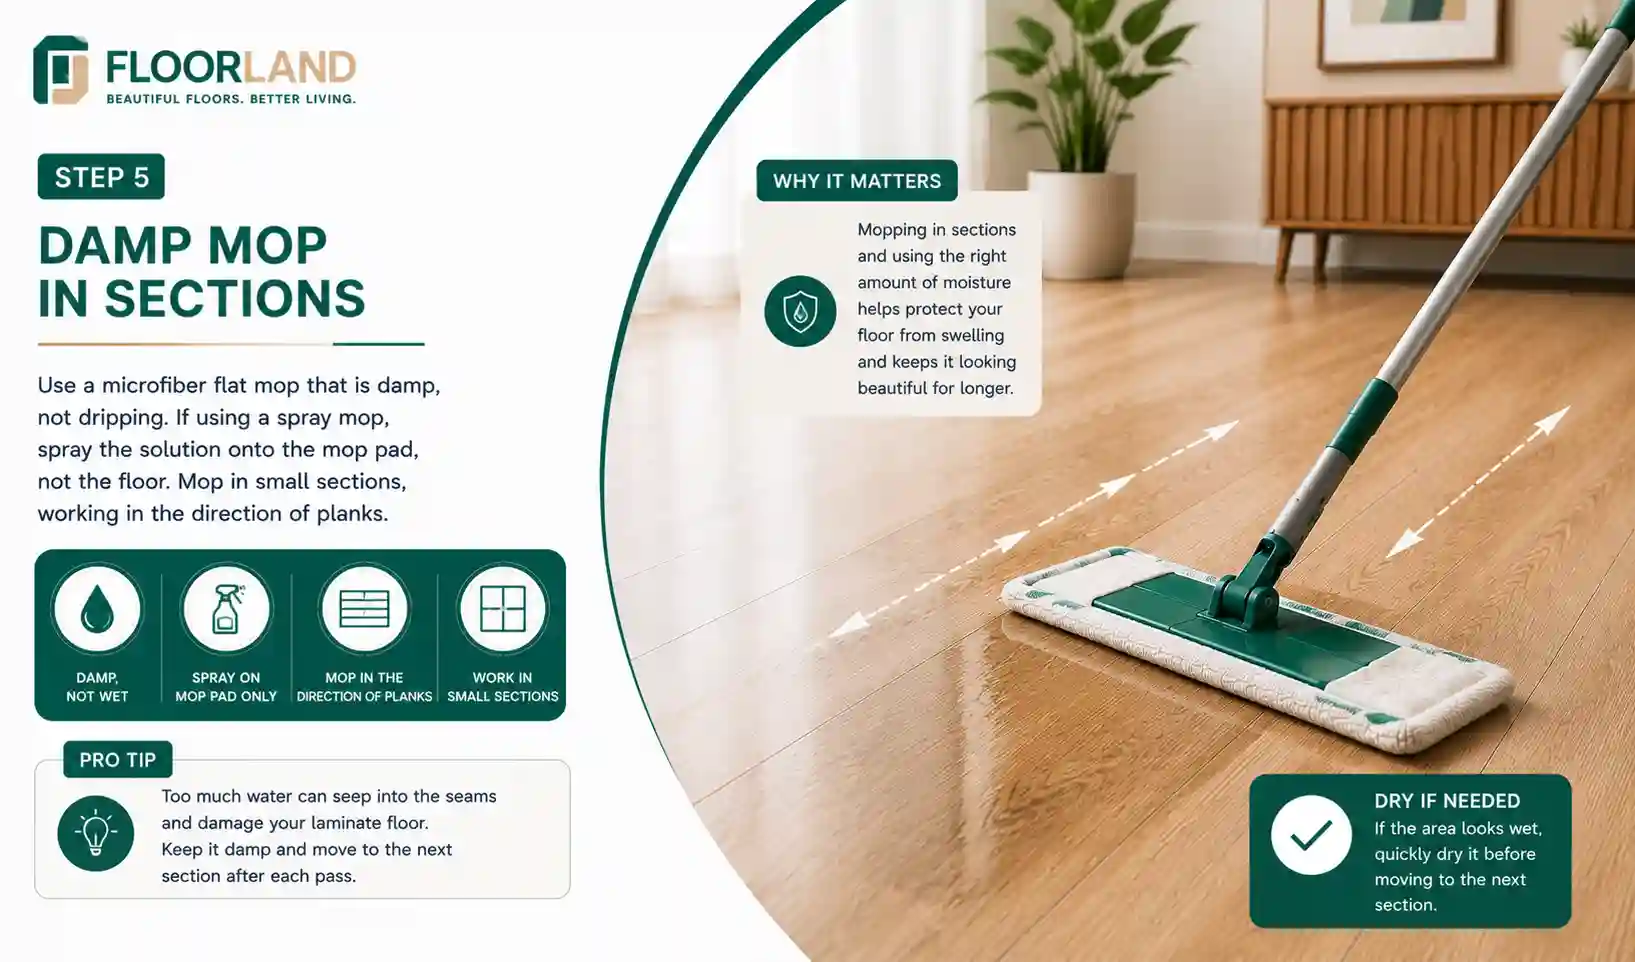
Use a microfiber flat mop and make sure it is somewhat damp, but not dripping with water. If using a spray mop, spray the cleaning solution onto the mop pad, not the floor. Mop in small sections, working in the direction of planks to create a more even finish. This method reduces the amount of moisture on the surface and helps to prevent moisture from penetrating seams. Dry the area if it is wet before you move on to the next area.
Step 6: Dry and Buff
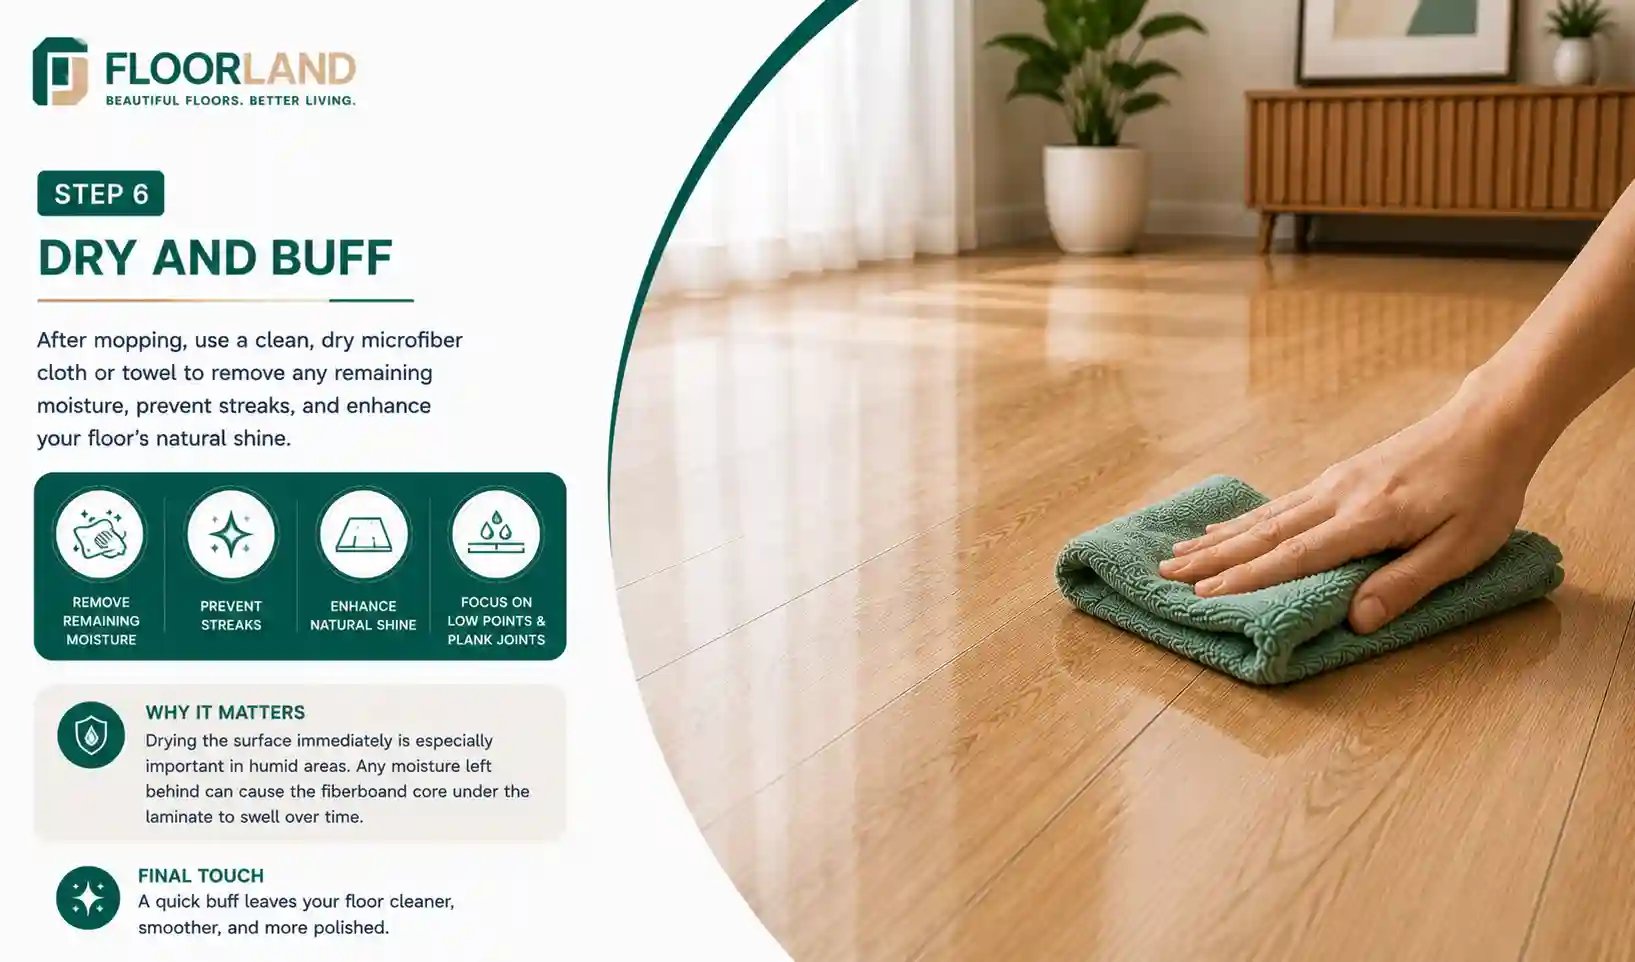
Once mopping is complete, go over the floor with a clean, dry microfiber cloth or towel. This will remove all the moisture, avoid streaks, and bring back the natural shine of the floor. Make sure to focus on low points and plank joints where water may accumulate.
It is particularly important to dry the surface immediately in humid areas, as any moisture on the surface can cause the fibreboard core under the laminate to swell over time. A quick buff of the floor also leaves the floor cleaner and more polished.
Step 7: Check the Edges, Corners, and Joints
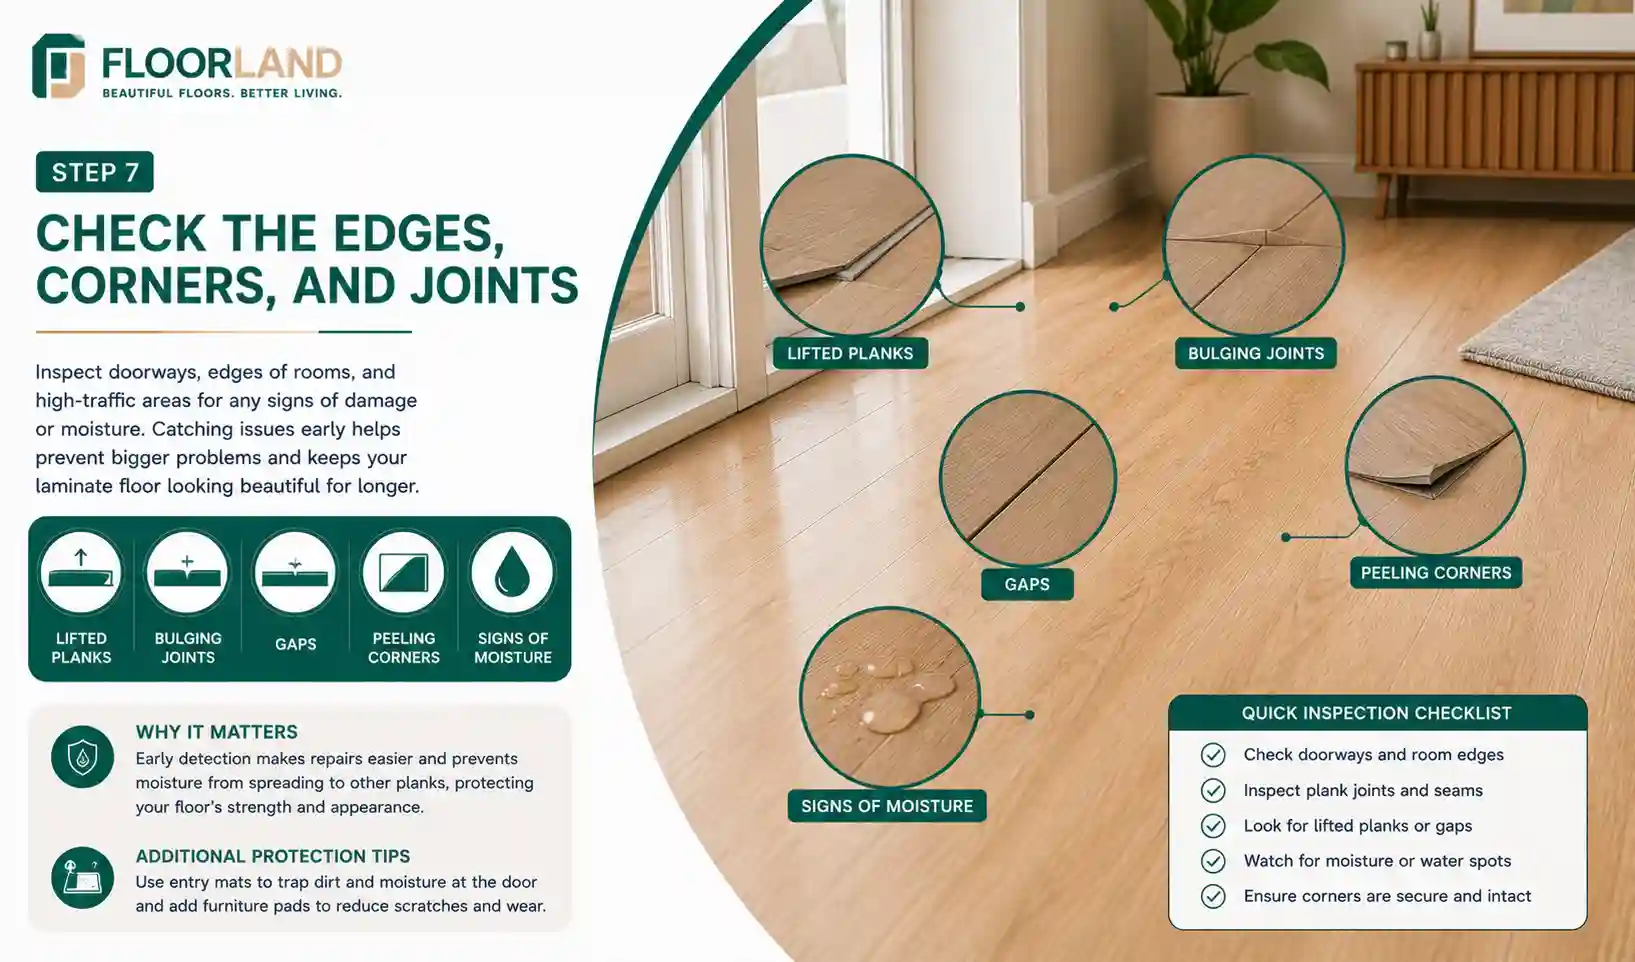
Finally, inspect doorways, edges of rooms, and common walking paths for damage or moisture. Check for areas that are lifted up, bulging joints and gaps, and peeling corners; these all may be signs of water intrusion into the flooring.
Early identification of these issues helps to make the repair easier and will limit damage to other planks. After cleaning, regular inspections can also give you the chance to discover additional protection you might need to keep your laminate floor lasting longer, such as entry mats and furniture pads.
How To Remove Different Types of Stains From Laminate Flooring
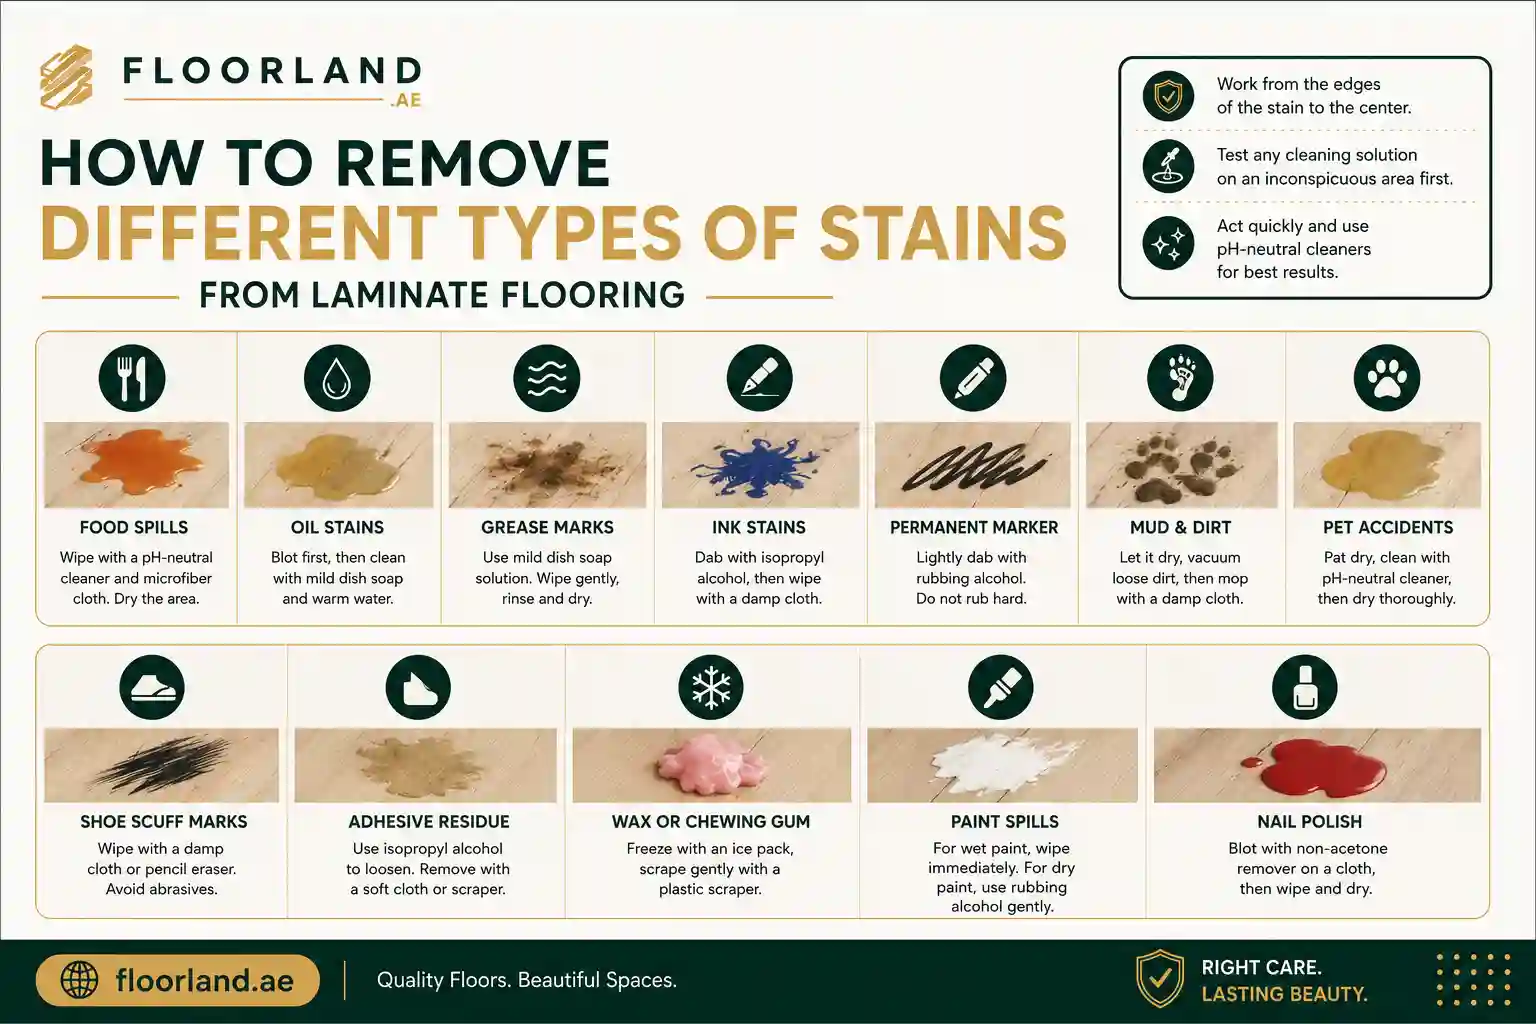
No matter how well a laminate floor is maintained, it can get stained from use. Fortunately, many common marks can be removed without damaging the protective wear layer. The secret is knowing what kind of stain is involved and the proper ways of cleaning stains on laminate flooring. Oftentimes, rubbing and harsh chemicals will cause more damage than the stain will.
The thickness of the wear layer of laminate flooring is usually in the range of 0.2 mm to 0.6 mm, depending on the grade of the product, according to industry testing. This protective layer protects from normal stains and scratches, but can fade with repeated exposure to strong solvents, abrasive pads, or excessive moisture.
When using any of the cleaning methods listed below, work from the edges of the stain to the center to avoid spreading the stain, and test any cleaning solution on an inconspicuous area first.
Food Spills
When it comes to cleaning up food stains, it is one of the easiest stains to clean when cleaned promptly. Laminate surfaces are non-porous, which reduces the likelihood of sticking when fresh spills occur. With a little pH-neutral laminate cleaner and a soft microfiber cloth, wipe up the spill. Dry the surface afterward to ensure that there is no moisture in the joints.
Don’t soak the area or let sugary liquids and sauces harden, as they are more difficult to remove and can leave a sticky residue.
Oil Stains
Cooking oil, lotions, and cosmetics can create a greasy surface that attracts dust unless cleaned properly. First, blot, then clean with a little mild dish soap and warm water. Clean off with a slightly moistened cloth and dry. Avoid using hot water or coarse scrubbing pads as they can ruin the laminate finish.
Grease Marks
Grease has a higher viscosity than regular oil and may require a bit more care.
Dampen with a mild dish soap solution and use a microfiber cloth. Gently rub to get rid of grease; wash off any soap residue with a slightly moist cloth and dry quickly. Failure to remove soap scum can create a dull surface and trap more dirt.
Ink Stains
Cleaning up pens quickly may be important, as the ink can bond to the wear layer quickly.
Take a clean cloth and put a small amount of isopropyl alcohol on it and rub it on the stain gently until it goes away. Wipe the area with a damp cloth after and then dry it. Never pour the alcohol straight on the laminate, as excess alcohol can seep through the seams.
Permanent Marker
If treated early, permanent marker stains can be treated with rubbing alcohol. Use a microfiber cloth to lightly dab the mark with isopropyl alcohol. Repeat as necessary, but do not rub with aggression.
Do not use acetone-based products unless specifically recommended by the flooring manufacturer.
Mud and Dirt
Later, when mud has dried out, it is easier to remove. Let the mud dry, suck up any loose bits with the vacuum cleaner, and mop up any remaining bits with a damp microfiber mop. Rushing to clean up wet mud will typically spread the mess over a larger area.
Pet Accidents
Other accidents and pet urine must be cleaned up promptly, as moisture can seep through plank joints if left too long.
Pat off the liquid right away, wipe with a pH-neutral laminate cleaner, and use a microfiber cloth to dry. Urine near seams can eventually make seams swell, smell, or stain permanently.
Shoe Scuff Marks
Rubber soles tend to get dark scuff marks, particularly on floors in hallways and entryways. Gently rubbing with a damp microfiber cloth or clean pencil eraser will take care of most scuffs. Don’t use abrasive pads or steel wool, as this can cause the protective wear layer to scratch.
Adhesive Residue
Tape, stickers, and labels can leave sticky residue on removal. Use a little isopropyl alcohol to loosen the adhesive and carefully remove with a soft cloth or plastic scraper.
Do not use metal tools, as the laminate surface can be permanently scratched.
Wax or Chewing Gum
It is easier to remove wax/gum if it is hard and brittle. Cover with an ice pack and allow it to freeze for a few minutes. Carefully use a plastic scraper to pull it up and get rid of it; this is done while cleaning around the area. Avoid heat or sharp blades because they may cause damage to the laminate finish.
Paint Spills
There are several methods for removing paint, depending on the type of paint and whether it has dried. If latex paint is wet, clean up right away with a damp cloth. If the paint is dry, apply a small amount of rubbing alcohol to soften it, then gently wipe it off. Do not use paint thinners or other strong solvents, which may remove the protective coating.
Nail Polish
When it comes to nail polish, it should be handled with care as some removers contain harsh chemicals. Use a non-acetone nail polish remover on a paper towel to blot the stain. Wipe the area down with microfiber cloth that is damp with water afterwards and dry thoroughly.
Test on an inconspicuous plank first and never pour acetone onto the floor.
Best Practice for Every Laminate Stain
No matter what kind of stain it is, there’s just one rule to remember: blot, don’t scrub. Light cleaning and gentle handling will keep the protective wear layer for the laminate; heavy pressure or repeated exposure to harsh chemicals will lead to loss of shine and life of laminate. With a few drops of the right cleaner, and the floor dried down right after cleaning, laminate flooring will last for many years.
What Cleaners Are Safe for Laminate?
The safest daily use is a pH-neutral cleaner or a laminate-specific cleaner. Neutral” indicates that the pH is close to 7, leaving no etching on the resin coating. Shortening the life of the wear layer is caused by both acidic and alkaline cleaners.
| Cleaner | Safe? | When to Use or Avoid |
|---|---|---|
| pH-neutral cleaner | Yes | Best default for routine cleaning. Gentle on the wear layer. |
| Laminate-specific cleaner | Yes | Formulated for this floor; follow the label dilution. |
| Dish soap (few drops/gallon) | Yes, sparingly | Fine for grease; rinse to avoid streaky residue. |
| Isopropyl alcohol | Spot use only | Good for ink, marker, and adhesive. Never mop with it. |
| Distilled white vinegar | Not recommended | Acidic; can dull seams over time. Most makers advise against it. |
| Commercial all-purpose sprays | Check the label | Avoid wax, oil, polish, or bleach in the ingredients. |
A Word on Vinegar
The pH of vinegar is about 2.4. If used on its own or frequently, it may cause loss of the protective coat and dulling of the finish at the seams. It is not recommended by most manufacturers. If at all used, dilute it extensively and use it only in exceptional circumstances and never as a standard cleaner. The safest default is a neutral cleaner.
Homemade Solutions That Work
Most light cleaning can be done with warm water and a few drops of dish soap per gallon.
A cloth with isopropyl alcohol will remove ink, marker, and sticky residue without water. Wring the cloth or pad to be damp only and buff dry.
Can You Mop Laminate Flooring?
Yes, but never with a wet mop! When you squeeze the pad, it shouldn’t drip and should be slightly wet. The floor should dry on its own in about 1-2 minutes.
1. Damp Mopping, Explained
Damp mopping involves applying just enough water to the mop to remove dirt, and then letting it dry before wiping. A microfiber flat mop is best because it will absorb water in the fibers instead of spraying it on the floor.
2. Why Excess Water Causes Swelling
Water is forced into the seams by puddles and soaked mops. The HDF core absorbs it, similar to a sponge. Edges then rise, fall, or divide. This process begins within 15 to 20 minutes of standing water near a joint, and can be irreversible.
3. How Much Moisture Is Acceptable
Squeeze pad until no more water drips out. It should be cool and moist, not wet.
If the liquid remains visible on the floor as you mop, then you are using too much water.
Seek streak-free drying in less than 2 minutes. Excess moisture will be indicated by longer drying times.
Cleaning Products and Methods to Avoid
Do not use steam, bleach, abrasives, wax, oil soap, ammonia or a rush of water. These cause moisture to penetrate the core or remove and dull the wearing layer. Damage is typically progressive over time, but suddenly becomes apparent
| Avoid | Why It Damages Laminate |
|---|---|
| Steam mops | Heat and pressure drive moisture and vapor into the seams, swelling the core. |
| Bleach | Strips and discolors the printed decorative layer. |
| Abrasive powders | Scratch the wear layer and leave a permanent haze. |
| Steel wool / scouring pads | Gouge the surface and dull the finish instantly. |
| Excessive vinegar | Acidic erosion weakens seams and dulls the shine. |
| Wax and polish | Build up a cloudy film that laminate is not designed to hold. |
| Oil soap | Leaves a greasy residue that traps dirt and dulls the surface. |
| Ammonia cleaners | Harsh alkalinity degrades the protective coat over time. |
| Flood mopping | Standing water seeps into joints and swells the HDF core. |
The indoor climate is also important. Maintain relative humidity between 35 and 65%, to reduce seasonal expansion and contraction. The joints are protected as much as by careful mopping.
Laminate Floor Maintenance Schedule
A simple routine prevents most damage. Dust control is the part people skip, yet grit causes the slow scratching that dulls a floor. Use this schedule as a baseline and adjust for pets, kids, and traffic.
| Task | Frequency |
|---|---|
| Dust or dry-mop high-traffic areas | Daily |
| Vacuum (beater bar off) | 2–3 times per week |
| Damp mop with neutral cleaner | Weekly, or as needed |
| Spot-clean spills | Immediately |
| Inspect felt pads under furniture | Every 3 months |
| Check seams and entry areas for swelling | Every 3–6 months |
| Refresh entry mats and rugs | Seasonally |
Indoor climate matters too. Keep relative humidity in the 35–65% range to limit seasonal expansion and contraction. Stable conditions protect the joints as much as careful mopping does.
Common Mistakes That Damage Laminate
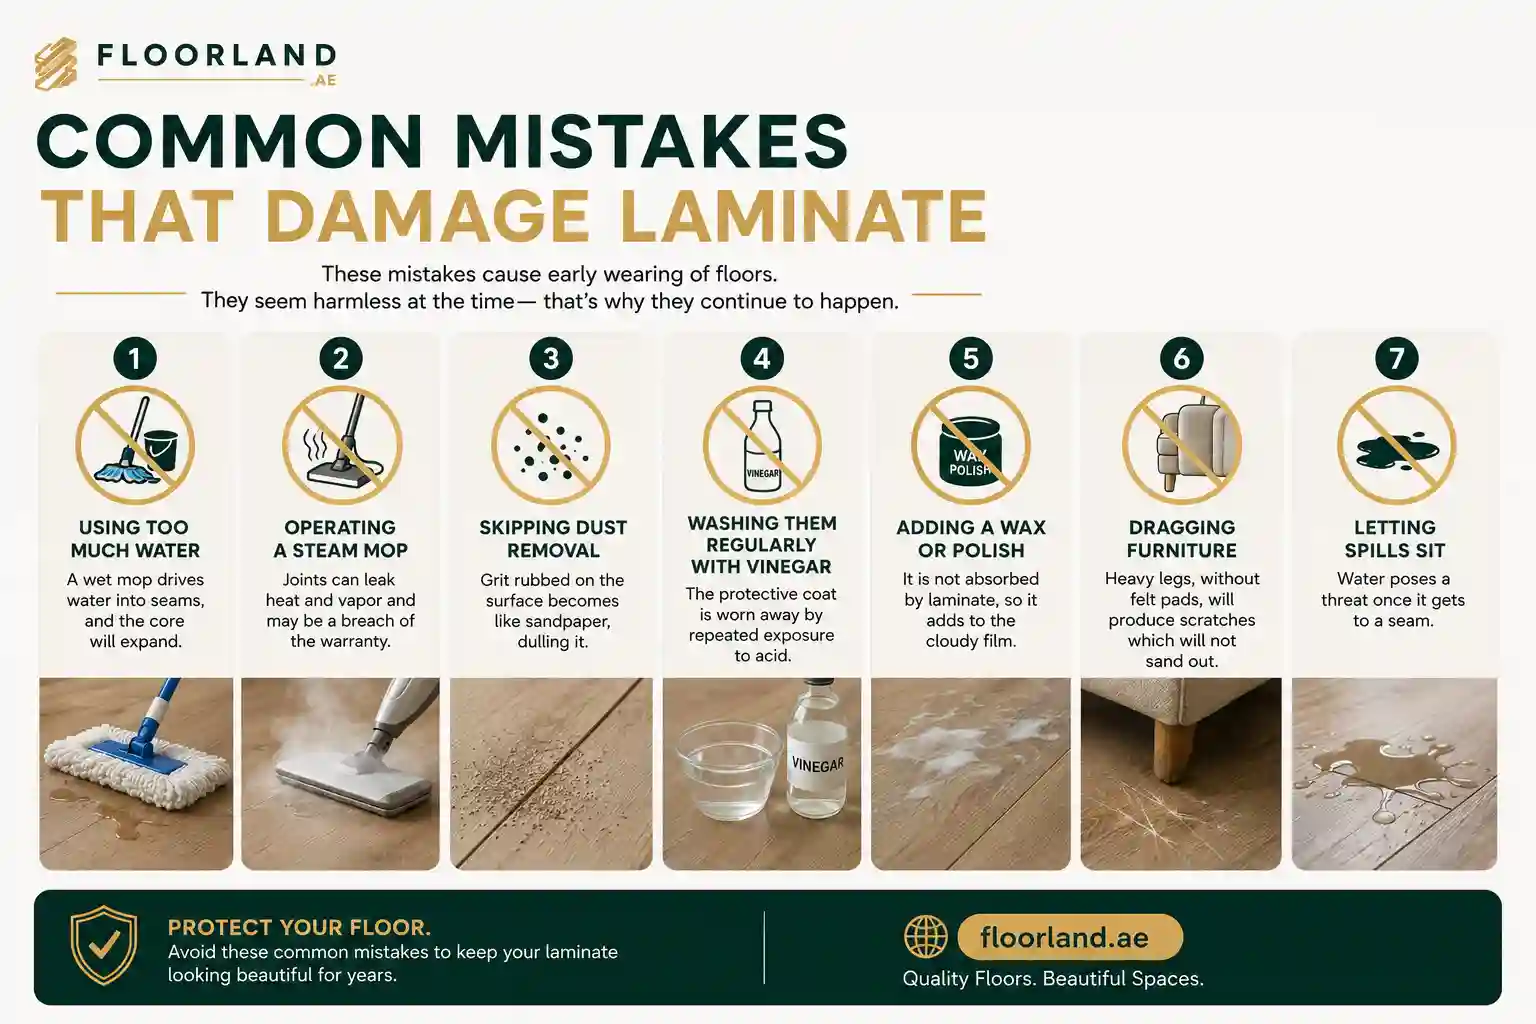
The following are some of the most frequently made mistakes that can harm laminate floors:
These are the mistakes that cause early wearing of floors. These all seem harmless at the time, and that is why they continue to happen.
- Using too much water. A wet mop drives water into seams, and the core will expand.
- Operating a steam mop. Joints can leak heat and vapor and may be a breach of the warranty.
- Skipping dust removal. Grit rubbed on the surface becomes like sandpaper, dulling it.
- Washing them regularly with vinegar. The protective coat is worn away by repeated exposure to acid.
- Adding a wax or polish. It is not absorbed by laminate, so it adds to the cloudy film.
- Dragging furniture. Heavy legs, without felt pads, will produce scratches which will not sand out.
- Letting spills sit. Water poses a threat once it gets to a seam.
Expert Tips to Extend Laminate Floor Life
A good laminate will last for 15 to 25 years. That is reduced to less than 10 years by neglect, primarily from the effects of gritting and watering. These habits push the floor toward the longer end of that range.
- Keep dirt out at the front door. Have a place mat at every entrance. The majority of grit is delivered on shoe soles, and by trapping it, the chances of micro-scratches being caused are reduced.
- Use microfiber pads (300-500 GSM). The higher the microfiber density, the more dirt it will pick up and the less water will get on the top.
- Spray the pad, NOT the floor! This restricts the amount of moisture that can ever come in contact with the seams.
- Fit felt pads on all furniture legs. Replace when worn out, approximately every six months if sitting.
- Place an area rug in pivot areas. Turning points, sinks, and kitchens experience the most wear.
- Keep humidity at 35–65%. Seasonally use a dehumidifier/humidifier to prevent gapping and cupping.
- Watch radiant-heat limits. When using underfloor heating, maintain the temperature of the surface within the limits set by the maker, usually about 27 °C (80 °F).
- Trim pet nails. Fine scratches are a common problem in active homes and many of the sharp claws are the most problematic.
When To Call a Professional
If water has gotten to the core, planks have swollen, or there are large sections of the deck that are up, call a pro. With DIY cleaning, one could take on surface dirt and stains. It’s less effective with structural water damage in the HDF core.
If you see any of the following, call in a flooring professional:
- Rising or bulging at seams from a leak or flood. Most damaged planks should be replaced, rather than cleaned.
- Sweeping cupping or peeling are signs of moisture or subfloor issues.
- A bad smell that doesn’t go away could be a sign of moisture or mold underneath the floor.
- Warranty questions, as manufacturers may specify certain products and methods to maintain the warranty.
Be aware of what one can do on their own. After water crosses the “wear layer” there is no better repair. The best bet is to replace the boards and locate the source of moisture.
Conclusion
The safest way to clean laminate flooring is simple: dust first, then damp mop with a wrung-out microfiber pad and a pH-neutral cleaner. Keep water off the seams, wipe spills the instant they happen, and let the floor air-dry in a minute or two.
Skip steam, bleach, wax, and heavy vinegar. Trap grit at the door, fit felt pads under furniture, and hold indoor humidity steady. Do that, and a well-made laminate floor stays sharp for two decades or more.
Frequently Asked Questions
Can you use vinegar on laminate flooring?
Has not been suggested. Vinegar is an acid that can cause the seams and finishes to become dull after a while. Most manufacturers recommend using a cleaner that has a neutral pH. When using vinegar, use it sparingly and dilute it thoroughly.
Can you use a steam mop on laminate floors?
No. Steam mops cause heat and moisture to enter the seams and cause the core to swell, potentially voiding the warranty. Instead, use a dampened microfiber mop.
Does laminate flooring get wet?
If you clean up quickly, it’s okay if there is a quick spill. It is the standing water that is the cause of the problem. When it’s left near a seam, it penetrates to the center and can start swelling permanently, usually within 20 minutes.
What is the best laminate mop?
A 300–500 GSM microfiber flat mop pad. It retains moisture in the fibers and dumps very little to the floor, just what laminate requires.
How often should you clean laminate flooring?
Clean in areas of activity daily, vacuum twice or three times weekly, and damp mop weekly or as necessary. Wipe up spills when they occur.
Can laminate flooring be polished?
Laminate will NOT accept waxing or polishing. The products leave a white haze that will not wash out. If it loses its shine, wipe it down with a clean microfiber cloth to remove any buildup and buff.
What causes dull laminate floors?
Usually residue and grit. Soap or polish film leaves a haze, while fine grit scratches the surface. Cleaning with a neutral product and buffing dry restores most of the shine.
Is the best way to clean laminate flooring really just water and microfiber?
For everyday dirt, close to it. A wrung-out microfiber pad with a little pH-neutral cleaner handles most cleaning. Save solvents for specific stains and keep water to a minimum.


