
How To Install And Finish Plywood Flooring?

Want a beautiful wood floor without breaking your renovation budget? Plywood flooring is a viable option, but only if it is properly installed and finished. This involves preparing the subfloor, choosing the appropriate plywood grade and thickness, securing panels firmly, sanding the surface, and applying a finish for durability. When installed properly, plywood flooring can withstand daily wear while still providing the warm, natural look of a wood floor.
Proper tools, installation techniques, and finishing methods are required to achieve professional results, whether you are renovating a room or undertaking a new project. This guide covers the installation and finishing of plywood flooring in detail, contains tips from the pros, common mistakes to avoid, and maintenance advice
Required Tools & Materials
| Item | Purpose |
|---|---|
| Tape measure, chalk line, carpenter's square, pencil | Room measurement and layout lines |
| Circular saw or track saw, fine-tooth blade (40T+), jigsaw | Straight cuts and cutouts around obstacles |
| Drill/driver, countersink bit, flooring screws (or ring-shank nails), construction adhesive, caulk gun | Securing sheets without squeaks |
| Moisture meter, 2m straightedge or spirit level, floor leveling compound, scraper, vacuum | Subfloor testing and preparation |
| 10mm spacers (wall gap), 2–3mm spacers or coins (sheet gaps) | Consistent expansion gaps |
| Wood filler matched to your plywood, flexible putty knife | Screw holes and minor gaps |
| Safety glasses, dust mask, knee pads, hearing protection | Cutting and sanding protection |
| 6-mil polyethylene sheet or specified moisture barrier, underlayment tape | Moisture protection over concrete |
For the finishing stage, you’ll also need a random orbital sander, sandpaper in 80/120/180/220 grits, a sanding pole or edge sander, tack cloths, and your chosen finish with applicators. We’ll cover those in detail later.
Subfloor Preparation
Subfloor preparation is necessary for fitting the plywood floors. Budget half a day for this stage.
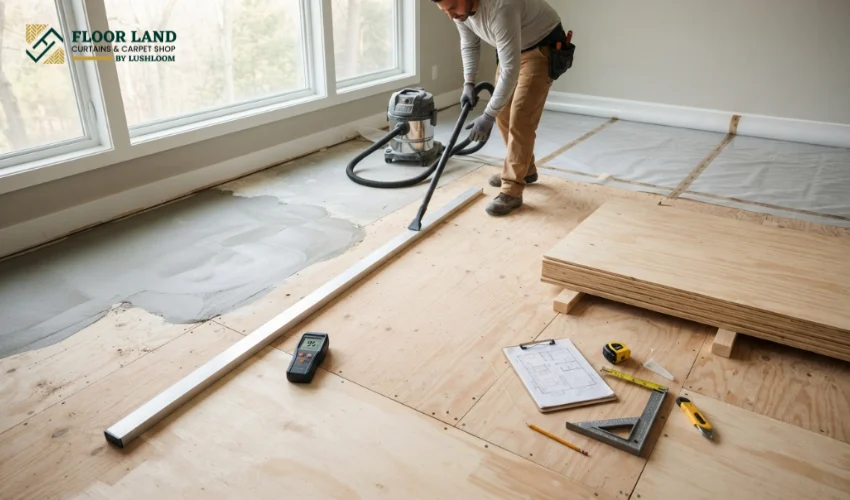
- Clean thoroughly: Scrape and vacuum all old flooring, staples, and adhesive residue so no hidden debris creates squeaks or high spots.
- Check level and flatness. With a 2 m straight edge (maximum deviation of 3 mm). Fill dips with leveling compound, grind high spots, or plane joists.
- Check for moisture: Wood subfloors should be below 12% moisture (within 2-4% of the plywood). Test concrete slabs for hidden dampness.
- Install a moisture barrier: On concrete, lay 6-mil polyethylene sheeting with 200mm overlapped and taped seams. Do not install a polyethylene barrier over a dry timber subfloor as it traps moisture in the joists.
- Acclimatize the plywood. Stack sheets flat with spacer sticks in the room for 48 to 72 hours at normal living temperature and humidity.
- Layout: Draw a sketch of the room on paper, including the direction of the joists, doorways, and direction of the panels before cutting.
How To Install Plywood Flooring?
Plywood installation is a sequence, and the order matters. Work through these ten steps in order, and resist the urge to jump ahead to the finish. A durable floor that’s fastened well needs almost no corrective work later, while a rushed installation guarantees problems that no finish can hide.
Step 1: Plan the Floor Layout
Good plywood installation starts before the first cut. If you’re installing over joists, the long edge (face grain) of each sheet must run across the joists, not parallel to them. This is how plywood achieves its rated stiffness. Panel ends must land on the center of a joist. If you’re overlaying an existing subfloor, position the new sheets so their joints fall at least 50mm (2″) away from the joints below, ideally offset by half a sheet. Stacked joints create weak lines.
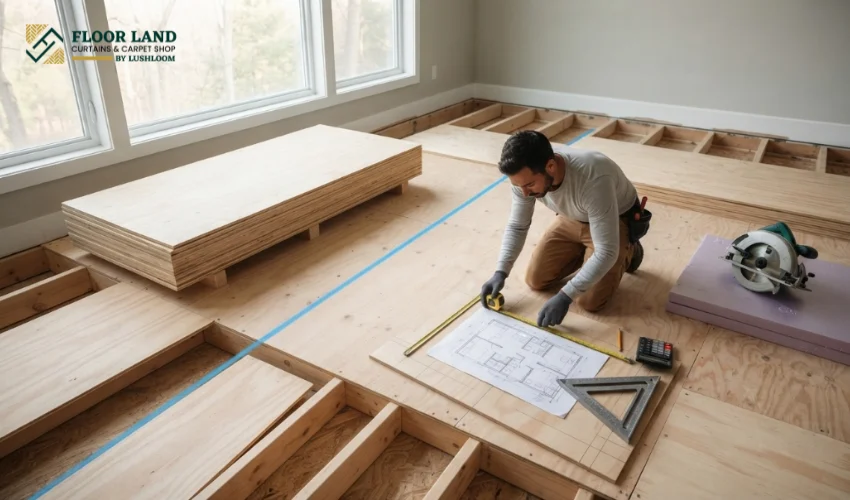
Start from the straightest, most visible wall, usually the wall opposite the main door, and check it for square against the adjacent wall using the 3-4-5 method. Rooms are rarely square; snap a chalk line one sheet-width from the wall and work from the line, not the wall.
Measure the room width and calculate how wide the final row will be. If it comes out under 300mm (12″), trim the first row narrower so both edge rows are a reasonable width. Narrow slivers at walls are weak and hard to fasten. If you’re ripping sheets into planks (200–300mm widths are typical), plan a random stagger and buy about 10% extra material for waste and defect culling.
Step 2: Acclimate the Plywood Sheets
If you followed the preparation section, your sheets have already been sitting in the room for 48–72 hours. Before proceeding, verify:
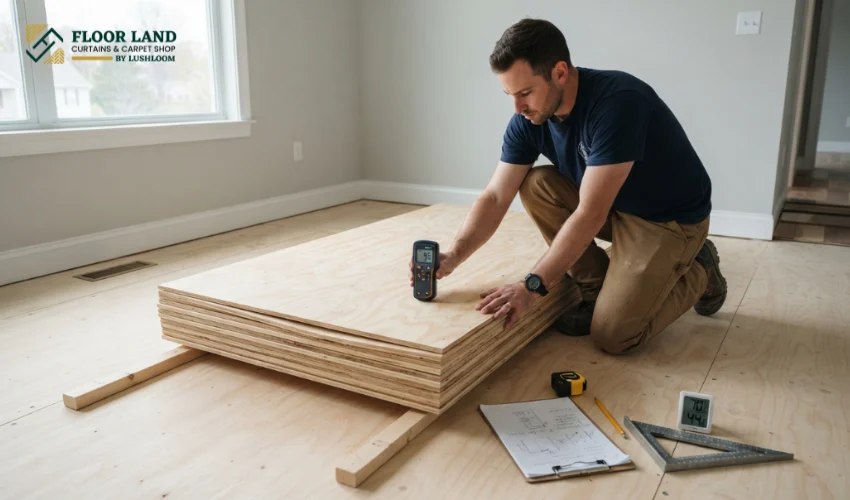
- Sheets are flat, not bowed. A slightly bowed sheet can be fastened flat; a badly cupped one should go back to the supplier.
- Moisture readings on the plywood are within 2–4% of the subfloor reading.
- The room is in normal living conditions. Never acclimate or install in a building without functioning climate control. Plywood equalized to a hot, humid construction site will shrink and gap once the AC comes on.
Acclimation isn’t optional. Fastening panels that haven’t reached equilibrium is the single most common cause of buckled seams and gapped joints appearing weeks after installation. The same moisture imbalance behind cupping and buckling in floors made of hardwood.
Step 3: Measure and Mark the Room
Measure the room’s length and width at multiple points; walls bow, and a room can vary by 20mm end to end. Snap your starting chalk line one full sheet-width (plus the 10mm wall expansion gap) from the starting wall.
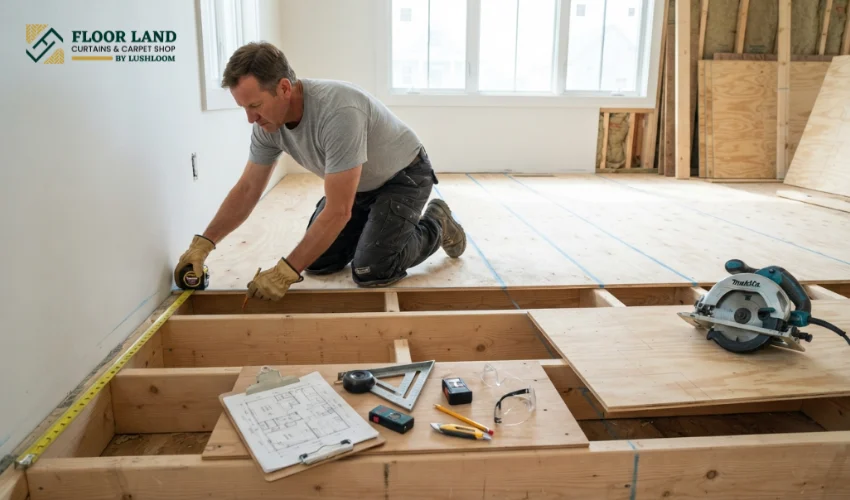
Mark joist centers on the walls before you cover them, then snap chalk lines across the sheets as you lay them so every fastener hits a joist. Guessing at joist locations is how floors end up with rows of screws holding nothing. Also mark all pipe penetrations, floor vents, and doorway transitions on your layout sketch and transfer measurements twice before cutting. Measure twice, cut once is a cliché because it’s cheap advice compared to a wasted sheet.
Step 4: Cut the Plywood
Use a circular saw with a sharp 40-tooth (or finer) blade. A track saw is even better for long, dead-straight rips. Cut with the good face down when using a circular saw; the blade’s teeth exit on the up-stroke, so splintering occurs on the upper face. (Reverse this on a table saw: good face up.)
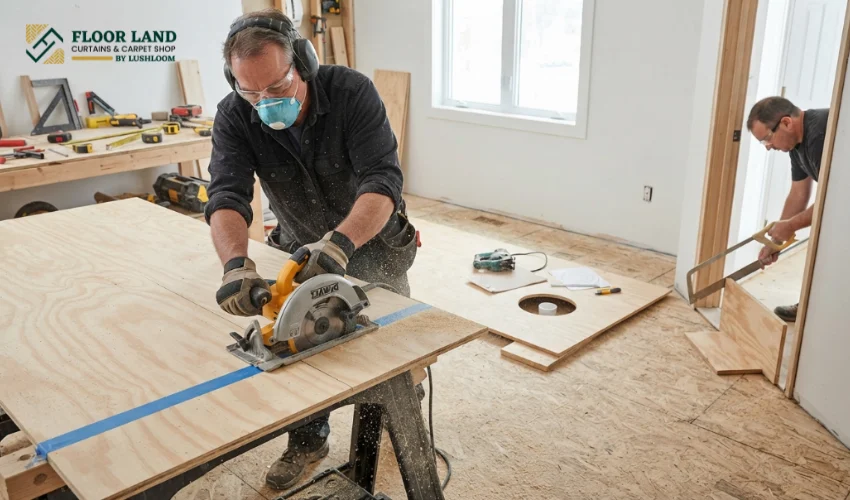
For a cleaner edge on show-grade sheets, run painter’s tape along the cut line and cut through it, or score the line with a utility knife first. Use a jigsaw for cutouts around pipes and door casings. For an irregular obstacle, make a paper template first and transfer it to the sheet.
Support the sheet on both sides of the cut so the offcut doesn’t tear away at the end of the pass. Cut door casings with a flush-cut saw resting on a plywood offcut so the new floor slides underneath; it looks far cleaner than scribing around trim. Wear eye protection and a dust mask on every cut.
Step 5: Dry Fit the Sheets
Lay out the entire first two rows, and ideally the whole floor without any adhesive or fasteners.
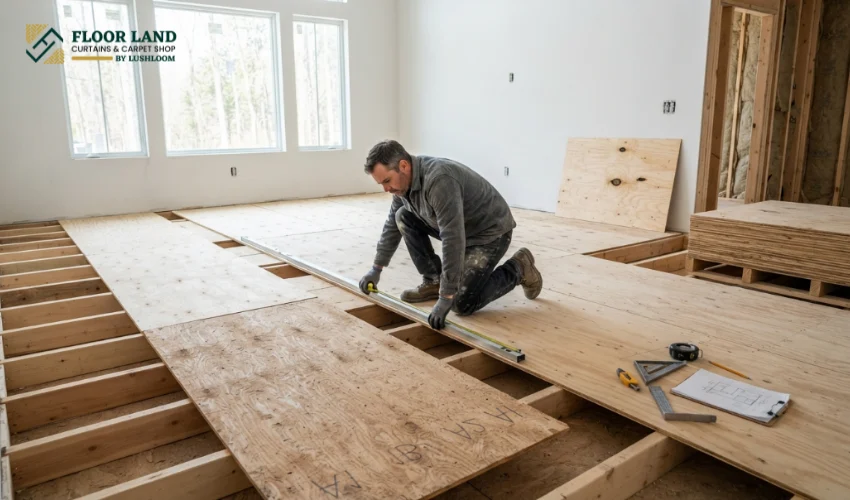
- Confirm the layout works at doorways and that no sliver rows have crept in.
- Check every joint lands where it should: on joist centers, offset from subfloor joints, staggered from the previous row.
- Number each sheet on its underside with the row and position (A1, A2, B1…) so the sequence is foolproof once the adhesive goes down.
- Flip any sheet with visible face defects, or reassign it to a closet or under-furniture zone.
Adhesive gives you 10–30 minutes of working time per sheet. Dry fitting means you spend that time fastening, not problem-solving.
Step 6: Leave Proper Expansion Gaps
Wood moves with humidity, and plywood, stable as it is, still needs room:
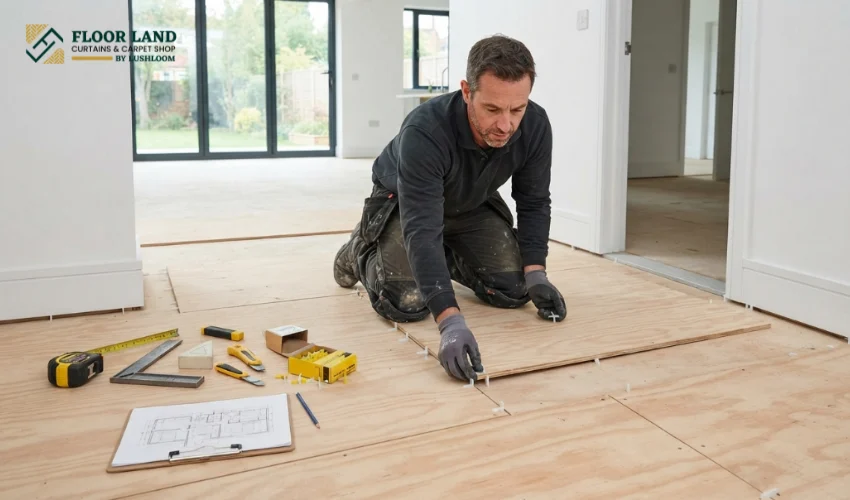
- 10mm (3/8″) gap at every wall and fixed vertical obstruction (columns, pipes, cabinets, door frames). Skirting boards or quarter-round trim will cover this gap later.
- 2–3mm gap between sheet edges and ends. A pair of 2mm spacers, or even two coins, held at each joint keeps this consistent. Tongue-and-groove panels set their own gap when properly seated; don’t hammer them dead-tight.
- In large rooms over 8m in any direction, or where the floor runs continuously between rooms, allow an additional expansion break at doorways, covered with a threshold strip.
Skip the gaps and here’s what happens: the first sustained humid spell, the sheets expand, press against each other and the walls, and the floor peaks at the joints. Every buckled plywood floor I’ve inspected has been fastened tightly to the walls.
Step 7: Secure the Plywood
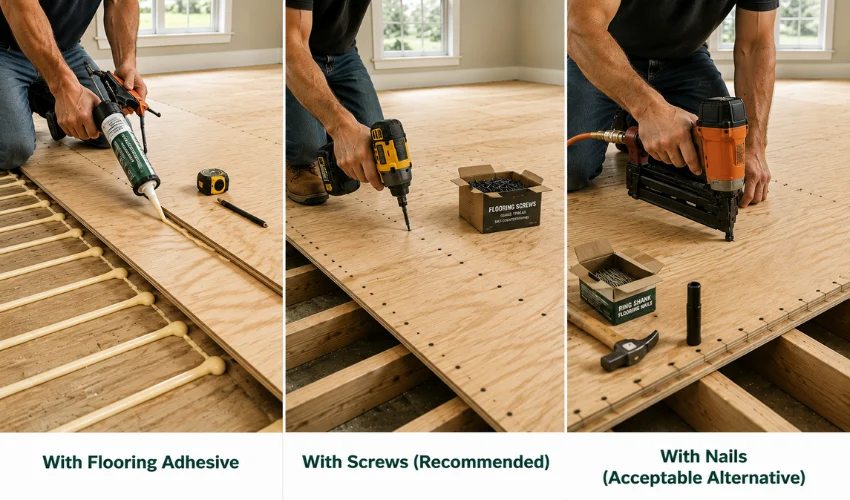
This step determines whether your floor is silent for twenty years or squeaks in six months. Use both adhesive and mechanical fasteners; the glue-and-screw method is what separates professional installations from DIY ones.
With Flooring adhesive:
Apply a continuous 6mm (1/4″) bead of subfloor construction adhesive (polyurethane-based adhesives outperform solvent types) along every joist, or in a 300mm serpentine/grid pattern when gluing to an existing subfloor or slab. Lay each sheet within the adhesive’s open time and fasten immediately. Adhesive that skins over before the sheet goes down bonds nothing.
Adhesive does two jobs: it eliminates the tiny sheet-to-structure movement that causes squeaks, and it stiffens the whole floor by making sheet and joist act as one unit.
With Screws (recommended):
Use proper flooring screws, coarse-thread, self-countersinking, typically 4.2 x 45mm for 18mm sheets over joists, or long enough to penetrate 25mm (1″) into the structure below.Every 150mm (6″) along sheet edges, every 200–300mm (8–12″) across the field. Keep fasteners 10mm in from edges to avoid splitting.
Drive heads 1mm below flush, countersunk, but not punched through the face veneer. Screws hold better than nails over time and can be backed out if a sheet ever needs replacing.
With Nails (acceptable alternative):
Use ring-shank or spiral flooring nails, 50mm (2″) for 18mm sheets. Never use smooth-shank nails, which work loose and squeak. Same spacing schedule as screws. Set heads just below the surface with a nail set.
Nailing is faster with a flooring nailer, which is why production crews use it, but for a finished plywood floor, screws plus adhesive is the better spec.
Step 8: Stagger the Joints
Lay sheets in a brick-bond pattern. Start the second row with a half sheet so end joints are offset by at least 600mm (2′). No four corners should ever meet at one point.
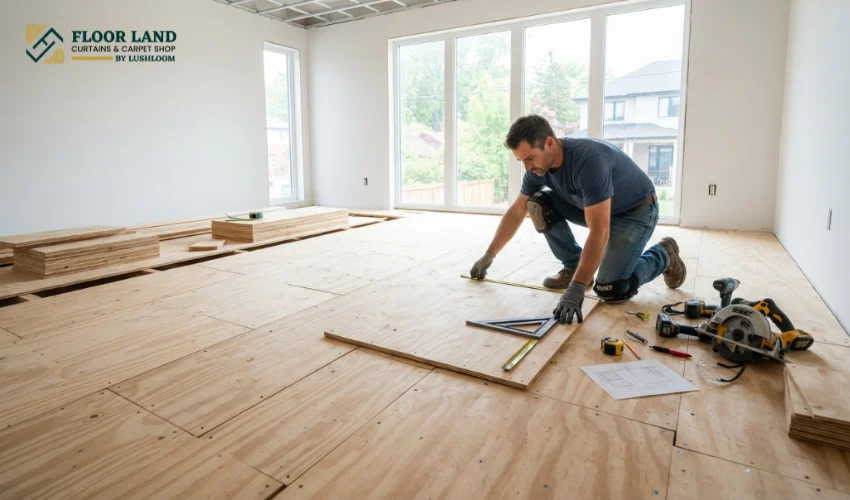
If you ripped sheets into planks, use the offcut from the end of one row to start the next. This produces a natural random stagger and minimizes waste. If you want a decorative layout rather than a brick bond, the same staggering logic underpins traditional parquet flooring patterns such as herringbone and chevron. Staggering isn’t cosmetic. Aligned joints concentrate movement and deflection along a single line, which telegraphs through finishes and cracks tile or grout above a subfloor. A staggered floor distributes load across the whole surface.
Step 9: Fill Screw Holes and Small Gaps
Once every sheet is fastened:
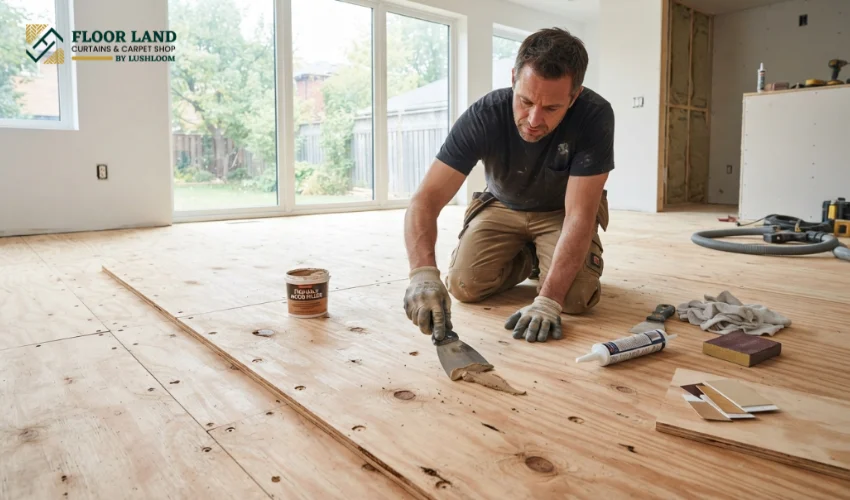
- Fill countersunk screw or nail heads with a wood filler matched to your plywood’s face color. On floors you plan to stain, use a stainable filler and test it on an offcut first; many fillers take stain darker or lighter than the surrounding veneer.
- Fill any joint gaps wider than 2 mm- 3 mm and any face voids or knot holes. For joints, a flexible filler or acrylic caulk handles slight movement better than rigid putty, which can crack out.
- On painted plywood floors, filling can be more generous since paint hides color mismatches.
- Apply filler slightly proud of the surface with a flexible putty knife; it shrinks as it dries and will be sanded flush in the finishing stage.
- Some installers deliberately leave fine gaps between the planks of cut plywood for a rustic board look. That’s a legitimate style choice; just seal those gaps well so they don’t collect debris.
Step 10: Inspect the Installed Floor
Walk every square meter of the floor before declaring installation complete. Walk slowly, shifting your weight. Mark any squeak or movement with tape and add a screw into the nearest joist. Run your hand across every joint. Sheet edges should be flush within 0.5mm. Any lip gets noted for sanding.
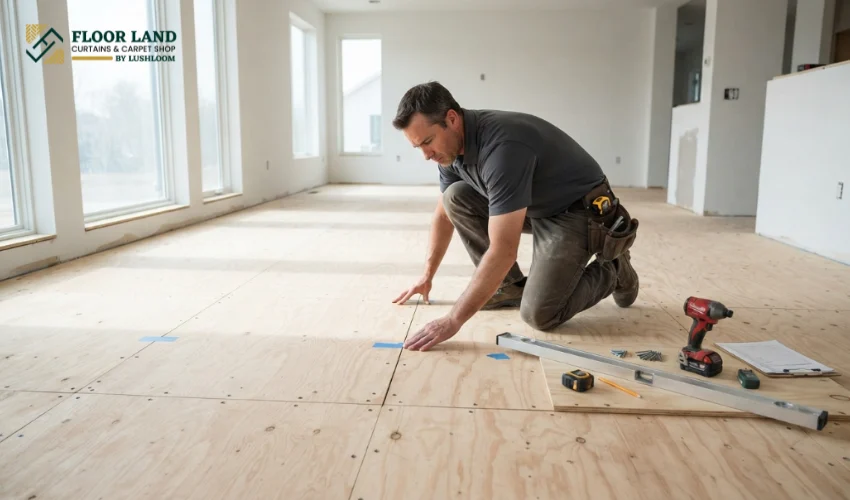
Check across the floor at a low angle in raking light for any raised fastener heads. Drive them down now. Re-check flatness. High joints can be sanded; a dip means a problem underneath that’s easier to fix now than ever again.
Confirm the expansion gap survived at every wall and that no filler or adhesive has bridged it.
Common Installation Mistakes & Quick Fix
Take a look at the common mistakes that people make while installing the plywood flooring.
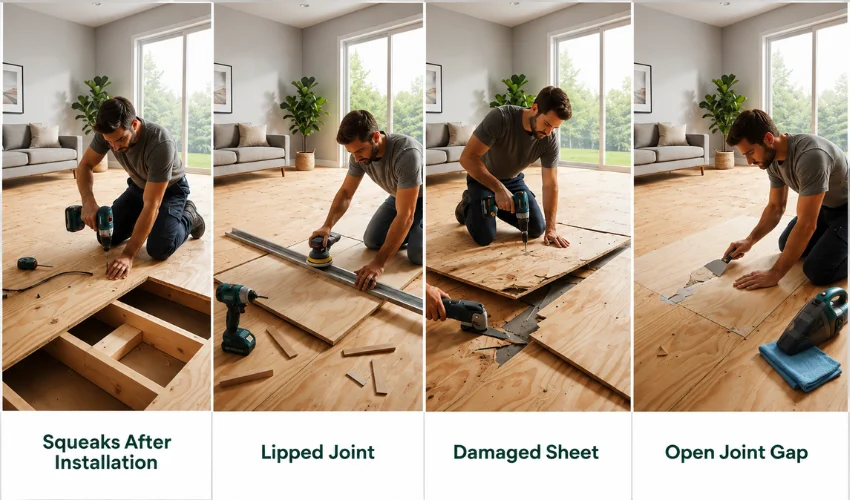
- Squeaks after installation: locate the joist nearest the squeak and drive additional screws through the sheet into it. Fit solid blocking between the joists beneath the joint and screw both sheet edges into it. Never toe-screw into a plywood edge as it splits along the plies instead of holding.
- A lipped joint (one sheet sits higher): if under 1mm, sand it flush during finishing. If more, back out the fasteners on the low side, shim or add adhesive, and refasten.
- A damaged or badly defective sheet: because you used screws, you can extract it. Cut the adhesive bond with a multi-tool blade, back out the screws, and drop in a replacement; this is exactly why screws beat nails for finished plywood floors.
- A gap that opened at a joint: filled with flexible filler after the floor has been through one full season of humidity swing, not before.
Only when the floor passes this inspection, silent, flush, flat, gapped correctly, is installation finished. Now, and only now, does finishing begin.
How to Finish The Plywood Floors
Bare plywood can’t survive daily foot traffic for long. With a thin 0.3–1.5mm veneer, unsealed wood easily absorbs spills and humidity, leading to stains, splintering, and edge delamination within months. Applying a proper finish protects the veneer from moisture and wear, locks down fibers, and achieves your desired look. For the best results, follow the process in order: sand, clean, repair, choose your finish, apply, cure, and protect.
Step 1: Check the Installed Flooring
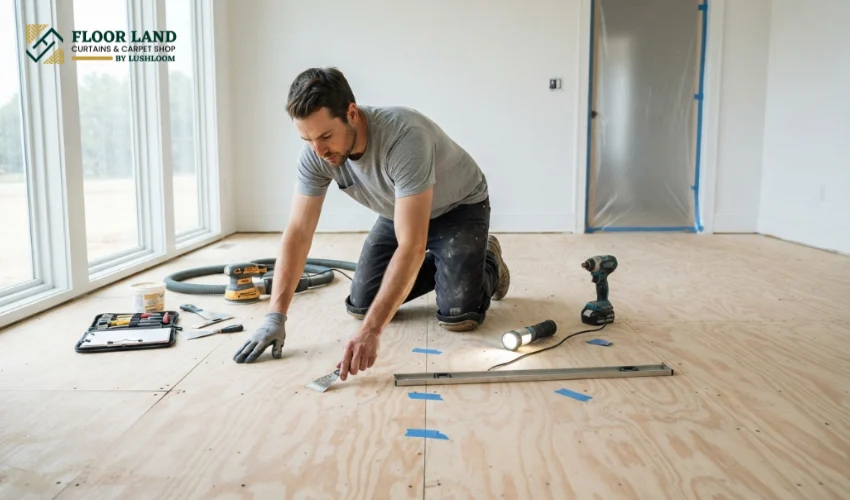
Before sanding, give the surface a quick final check. Make sure all filler has dried fully, which can take up to 24 hours. Check that every screw head sits safely below the surface to protect your sandpaper. Scrape away leftover glue so it doesn’t ruin your finish, mark any deep scratches with painter’s tape, and seal off the room completely.
Step 2: Sand the Surface
Sanding is where a plywood floor either becomes convincing or stays looking like sheet goods. One critical warning first: the face veneer is thin. You are smoothing a factory-sanded surface, not leveling rough lumber. A drum sander, the standard tool for solid hardwood, will cut through plywood veneer in seconds. Use a random orbital sander and light passes.
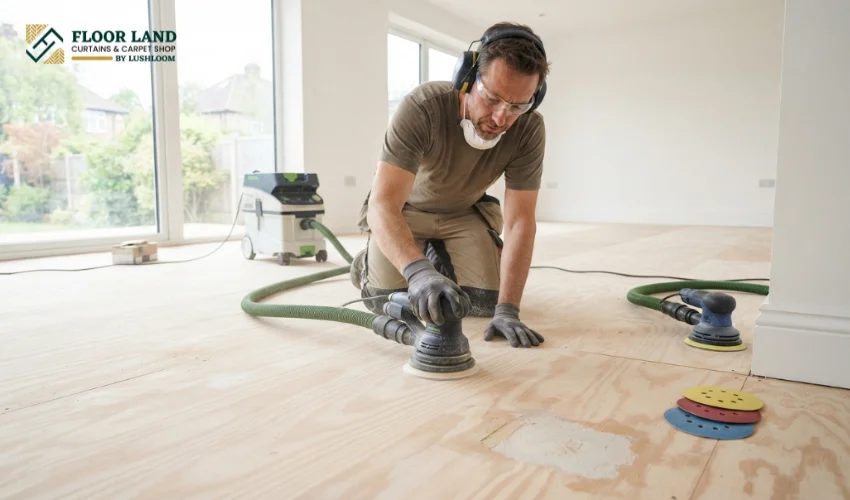
- 80 grit: only where needed: flush joints with slight lips, dried filler, rough patches, and adhesive residue. Skip 80 grit entirely on sheets that are already smooth.
- 120 grit: the whole floor, working in overlapping passes. This is the main smoothing pass and removes the scratch pattern from 80 grit.
- 180 grit: the whole floor again, for the final surface. Stop here for most finishes. Going finer than 220 can burnish the veneer and reduce stain and finish absorption.
Orbital sanders miss the outer 50–100mm near walls. Use a detail sander or block with the same grits, feathering edges smoothly into the main floor to prevent uneven staining.
Step 3: Clean All Dust
Finish failures are usually dust failures. Any particle left on the floor ends up embedded in the finish as a permanent bump.
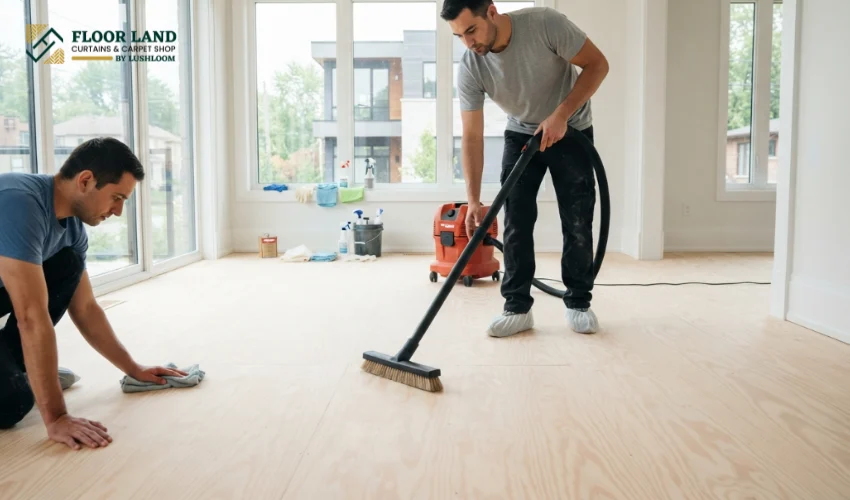
- Vacuum the entire floor with a brush head, slowly, twice, the second passes at 90° to the first.
- Vacuum everything above the floor too: window sills, skirting, door tops, light fixtures. Dust up there falls into a wet finish.
- Wipe the floor with a microfiber cloth barely dampened with water (for water-based finishes) or with a tack cloth or mineral-spirits-dampened cloth (for oil-based finishes). Never soak the floor; you just spent days keeping it dry.
- Wait for any dampness to flash off, then run a bare hand over the surface. If your palm picks up dust, clean again.
- From this point on, enter the room in clean socks or shoe covers only.
Step 4: Repair Minor Imperfections
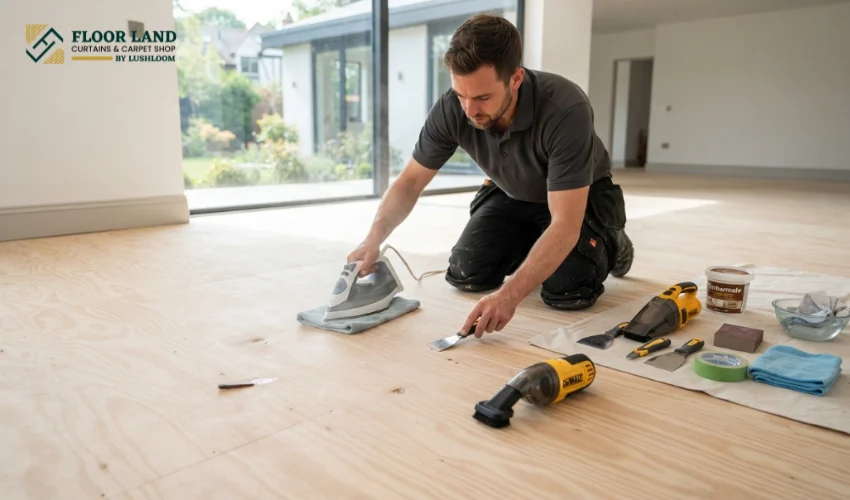
Before finishing, fix newly exposed flaws: steam out dents, refill sunken filler, patch chipped veneer, scrape flat any glue blotches, and seal hairline cracks. Finally, spot-vacuum over every repair.
Step 5: Choose the Right Finish
This decision determines the floor’s look, durability, and maintenance for years. Here’s how the realistic options compare:
| Finish | Durability | Appearance | Drying Time (per coat) | Maintenance |
|---|---|---|---|---|
| Water-based polyurethane | Very good | Clear, non-yellowing, low-sheen options | 2–4 hours; recoat same day | Low: damp mop; recoat every 5–7 years |
| Oil-based polyurethane | Excellent | Warm amber tone, deepens wood color | 8–24 hours; recoat next day | Low: but ambers over time; recoat every 5–10 years |
| Hardwax oil (e.g., natural oil/wax blends) | Good | Natural, matte, in-the-wood look | 8–24 hours | Moderate: periodic re-oiling, but spot-repairable without full re-sand |
| Floor paint (porch & floor enamel) | Good–very good | Solid color, hides plywood character entirely | 4–24 hours | Low: repaint high-wear areas as needed |
| Wood stain (+ topcoat) | N/A alone, must be topcoated | Any wood tone; plywood takes stain unevenly without conditioner | 4–24 hours before topcoat | Same as topcoat used |
| Clear penetrating sealer alone | Poor–fair | Very natural, minimal build | 1–4 hours | High: frequent reapplication |
Step 6: Apply the Finish
Applying finish to plywood floors is all about good technique and patience. Start by cutting in the perimeter with a brush, then immediately roll the main floor to maintain a wet edge and avoid lap lines. Always plan your route toward the exit door so you don’t paint yourself into a corner! The absolute golden rule is applying a thin coat. Two thin layers always perform far better than one heavy coat, which can wrinkle and trap solvents.
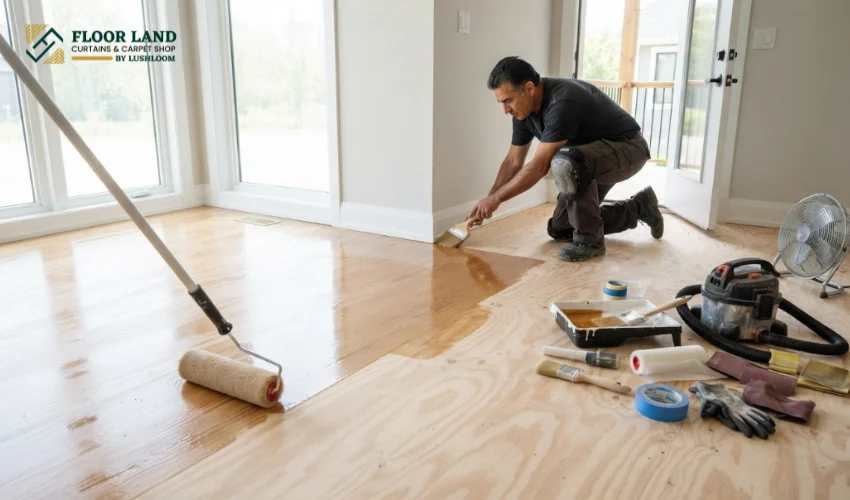
Keep the room between 18–25°C with indirect airflow. Let each coat dry completely, then lightly sand with 220-grit paper and clean up the dust before applying the next. Aim for at least three coats of clear polyurethane, adding a fourth for high-traffic areas. Lastly, don’t panic if coat one looks alarming and patchy; bare plywood drinks finish unevenly, but coat two will transform it.
Step 7: Allow Proper Curing Time
Dry and cured are different things. A finish is dry when you can touch it; it’s cured when the film has reached full hardness. Rushing this stage undoes days of careful work.
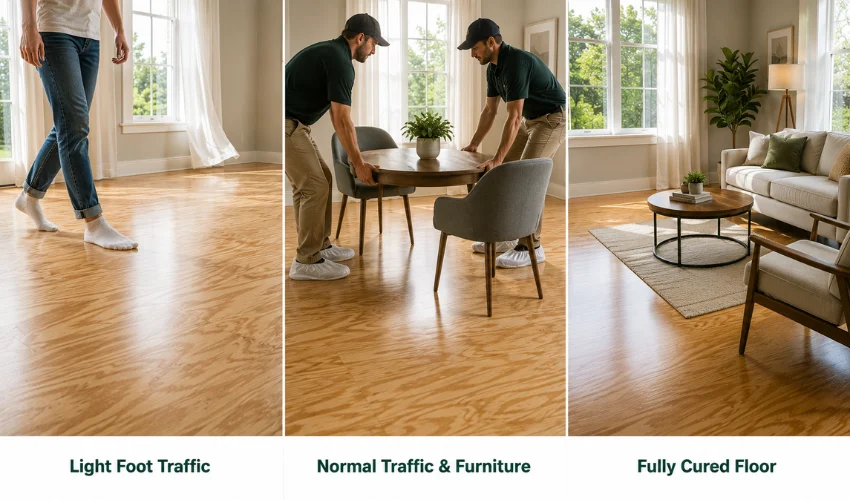
Typical guidance (always defer to your product’s label):
- Light foot traffic (socks only): water-based poly, 24 hours after the final coat; oil-based, 48 hours.
- Normal traffic and furniture (lifted into place, never dragged): 3–7 days.
- Full cure: water-based polyurethane, 7–14 days; oil-based polyurethane, up to 30 days; hardwax oils, typically 7–14 days; floor enamels, 7–30 days.
During curing, keep the room ventilated and at normal temperature, and keep water off the floor entirely.
Maintenance Tips
Take a look at the maintenance tips for the plywood finishing:

- Clean routinely: Sweep weekly and damp-mop monthly with a pH-neutral cleaner.
- Avoid damage: Skip steam mops, vinegar, ammonia, and wax.
- Wipe spills: Clean up liquids immediately to protect veneer seams.
- Control moisture: Maintain 35–55% humidity and use mats under plants and sinks.
- Use padding: Attach felt pads to furniture and place rugs in pivot zones.
- Prevent scratches: Keep pet nails trimmed and use mats under rolling chairs.
- Recoat early: Screen and topcoat every 3–5 years when traffic lanes lose sheen.
- Protect veneer: Avoid harsh wear. Plywood veneers can only handle one full re-sand.
For high-traffic areas where that limitation is a problem, see our comparison of the most durable flooring types.
Common Finishing Mistakes
| Mistake | Solution |
|---|---|
| Sanding through the face veneer | Use only an orbital sander and light passes; patch exposed core with filler and paint, or replace the sheet |
| Blotchy, uneven stain | Sand back to 120, recondition, restain with a gel stain; always test on offcuts first |
| Dust nibs and grit in the finish | Sand lightly with 220, tack clean, apply another thin coat |
| Lap marks and thick ridges | Let cure, sand level with fine grit, recoat thin with better climate control |
| Finish stays soft or tacky for days | Ventilate, warm the room slightly, and wait; solvent must escape. In bad cases, strip and redo in thin coats |
| Peeling or flaking finish | Sand back to sound material, clean with the finish maker's recommended prep, recoat |
| White rings or clouding | Often resolves as it cures; persistent clouding needs a light sanding and recoat |
| Picture-frame effect at walls | Re-sand edges to match the field grit before finishing |
Conclusion
A long-lasting plywood floor relies on discipline rather than complex carpentry. To prevent squeaks and buckling, never rush the essentials. These include moisture testing, sheet acclimation, expansion gaps, proper fastener spacing, and full finish curing. Treat the job as two distinct phases: installation and finishing.
First, prepare the subfloor, glue and screw staggered sheets, and inspect for a flush, silent floor. Next, sand through the grits, clean thoroughly, and build up thin coats of finish suited to the room. Finally, protect your investment with felt pads, mats, quick spill cleanups, and periodic recoats to make budget plywood rival high-end flooring.
Frequently Asked Questions
Can you use plywood as a finished floor?
Yes. Use a sanded, A- or B-face plywood at least 12mm thick over a sound subfloor (18mm directly over joists), fasten it with adhesive plus screws, then sand it and apply at least three coats of a floor-rated finish such as polyurethane.
What is the best plywood thickness for flooring?
Use 18mm (3/4″) tongue and groove plywood directly over joists at 400mm centers, and 12mm (1/2″) when installing a finished plywood floor over an existing solid subfloor. Thin 5–6mm plywood is only suitable as underlayment beneath vinyl or similar coverings.
What is the best finish for a plywood floor?
Water-based polyurethane is the best all-round plywood floor finish: it’s durable, dries in hours, stays clear without yellowing, and has low odor. Oil-based polyurethane gives a slightly tougher, warmer-toned film; hardwax oil gives a natural look with easy spot repairs.
How many coats of polyurethane does a plywood floor need?
Apply a minimum of three thin coats, and four in kitchens, hallways, and entries. Sand lightly with 220 grit between coats, but never after the final coat.
Do you need to sand plywood before finishing?
Yes. Even factory-sanded plywood needs a 120-grit then 180-grit pass with a random orbital sander to level filler, remove handling marks, and open the surface so finish bonds properly. Never use a drum sander; it cuts through the thin face veneer.
Should plywood flooring be glued or screwed down?
Both. A bead of subfloor construction adhesive on every joist plus flooring screws every 150mm along edges and 200–300mm across the field produces a stiff, squeak-free floor. Either method alone is a compromise.
How big should the expansion gap be for plywood flooring?
Leave 10mm (3/8″) at all walls and fixed obstructions, and 2–3mm between sheets. Skirting or quarter-round trim covers the wall gap. Without expansion gaps, humid weather will buckle the joints.


