
Should You Install Vinyl Flooring Over Tile? An Expert Guide for Homeowners
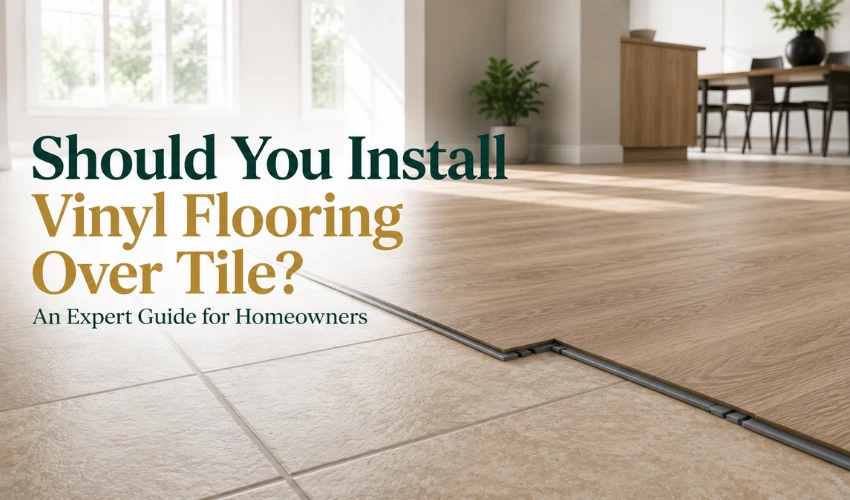
Yes, you can install vinyl flooring directly over tile, saving you the time, cost, and mess of tile demolition. However, long-term performance depends heavily on proper surface preparation. Before installing luxury vinyl over ceramic, porcelain, or natural stone, your existing floor must be firmly bonded with no loose tiles, reasonably flat with filled grout lines, and entirely free of active subfloor moisture problems.
When properly prepared, a luxury vinyl overlay can perform reliably for over 15 years. This comprehensive guide by Floor Land covers everything you need to know, including compatible vinyl types, simple surface prep steps, a full installation walkthrough, real cost comparisons, and the specific situations where removing the old tile first is the only right answer.
Which Types of Vinyl Flooring Can Be Installed Over Tile?
Not all vinyl floors handle a tile base equally well. Thickness, core rigidity, and installation method all matter. Here is how the main options compare when the base is existing tile:
| Vinyl Type | Works Over Tile? | Min. Thickness | Notes for Tile Overlay |
|---|---|---|---|
| Rigid-core click-lock LVP/LVT (SPC) | Excellent | 5 mm+ | Best choice. Stone-polymer core bridges grout lines and resists telegraphing. Floats freely, no adhesive bond needed. |
| Rigid-core WPC (wood-polymer) | Excellent | 5.5 mm+ | Softer and warmer underfoot than SPC. Slightly less dent-resistant; still bridges grout lines well. |
| Flexible click-lock LVP | Good with prep | 4 mm+ | Needs a flatter surface than a rigid core. Skim-coat wide grout lines first. |
| Glue-down LVP/LVT | Possible, more prep | 2.5 mm+ | Tile must be skim-coated or primed for adhesion. Glaze resists glue; extra labor often cancels the savings of not removing tile. |
| Sheet vinyl | Possible, most prep | 2 mm+ | Thin material shows every grout line unless the whole floor is skim-coated smooth. Best left to professionals. |
| Peel-and-stick tiles/planks | Not recommended | — | Adhesive rarely bonds well to glazed tile and fails at grout lines. Fine as a short-term rental fix only. |
Our recommendation: for 9 out of 10 tile-overlay projects, a rigid-core (SPC) click-lock plank of 5 mm or more with a pre-attached underlayment pad is the right product. It installs as a floating floor, tolerates minor grout-line texture, feels solid underfoot, and can be lifted later without damaging the tile beneath.
When Installing Vinyl Over Tile Is a Good Idea
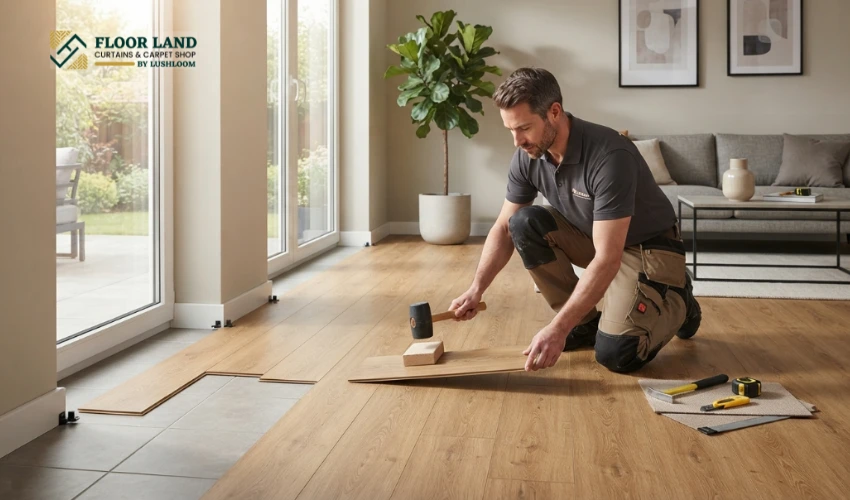
Installing vinyl flooring directly over existing tile is suitable when the underlying substrate is structurally sound despite aesthetic degradation or discoloration. This method eliminates dust, heavy debris, and noise generated by demolition, making it compliant with strict building regulations and suitable for occupied spaces.
An overlay installation typically requires one day for a standard room, whereas tile removal adds one to three days for teardown and site remediation. Furthermore, floating vinyl floors can be uninstalled without compromising the underlying tile, offering a reversible solution for tenant agreements or future property modifications.
Bypassing tile removal, disposal logistics, and slab preparation reduces overall project costs by one-third or more. The overlay also modifies the structural and thermal characteristics of the floor. Adding a vinyl layer over ceramic tile minimizes sound reverberation, reduces thermal conductivity to increase surface temperature, and provides mechanical cushioning to reduce underfoot hardness.
When You Should NOT Install Vinyl Over Tile
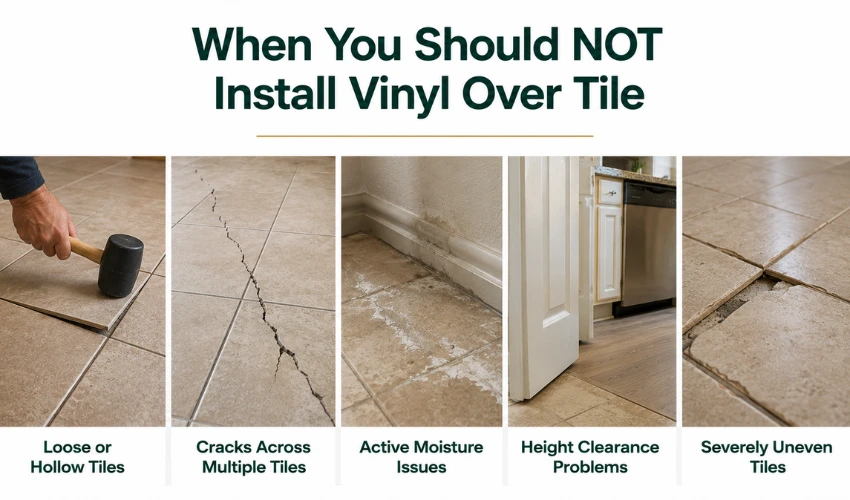
There are situations where overlaying is a mistake, no matter how tempting the savings look. Remove the tile first or fix the underlying problem if any of these apply:
- Large areas of loose or hollow tile. Tap-test the floor. A few isolated hollow tiles can be re-fixed or filled; if 20–30% of the floor sounds hollow, the tile bed is failing, and anything installed on top will move with it.
- Cracks that run through multiple tiles in a line. This usually signals slab movement or settlement. Covering it hides the symptom, not the cause, and the crack can eventually telegraph through rigid vinyl.
- Active moisture problems. Leaking pipes under the slab, rising damp, efflorescence (white mineral deposits), or a bathroom with failed waterproofing. Vinyl traps moisture against the tile and makes the problem worse and invisible.
- Height-critical rooms. If adding 3/16 to 5/16 in (5–8 mm) means doors cannot be trimmed, appliances no longer fit under countertops, or you create a trip hazard at a threshold, removal is the better path.
- Severely uneven tile. Heavy lippage (tile edges sitting at different heights), deep missing sections, or a floor that was never laid flat. If leveling compounds would cost more than removal, remove.
Warning: Never install vinyl over a floor with an unresolved leak. We have removed overlays where trapped moisture destroyed the vinyl, blackened the adhesive, and led to mold.
How to Prepare Tile Before Installing Vinyl
Here are some steps that will help you prepare the vinyl tiles before installation:
1. Fix Loose and Damaged Tiles
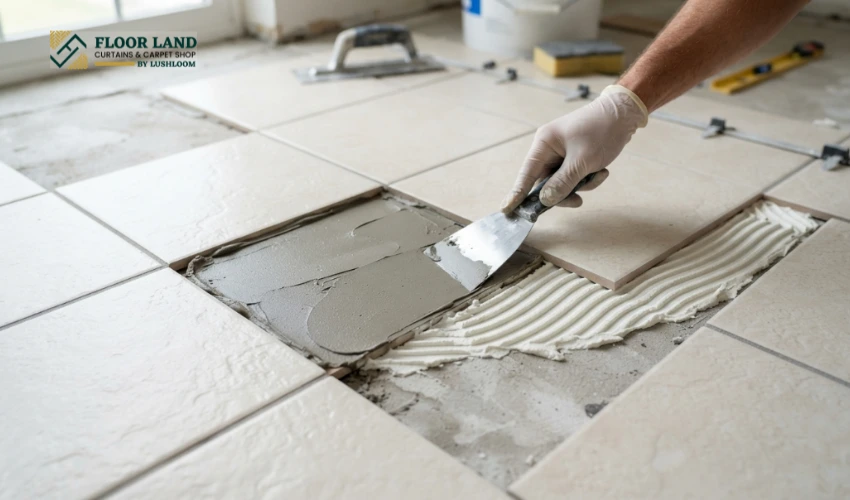
Re-bond loose tiles with tile adhesive, or remove them and fill the void with a cement-based patching compound flush with the surrounding surface. Do not leave empty pockets. A floating floor will flex and click over them.
2. Deal with Grout Lines
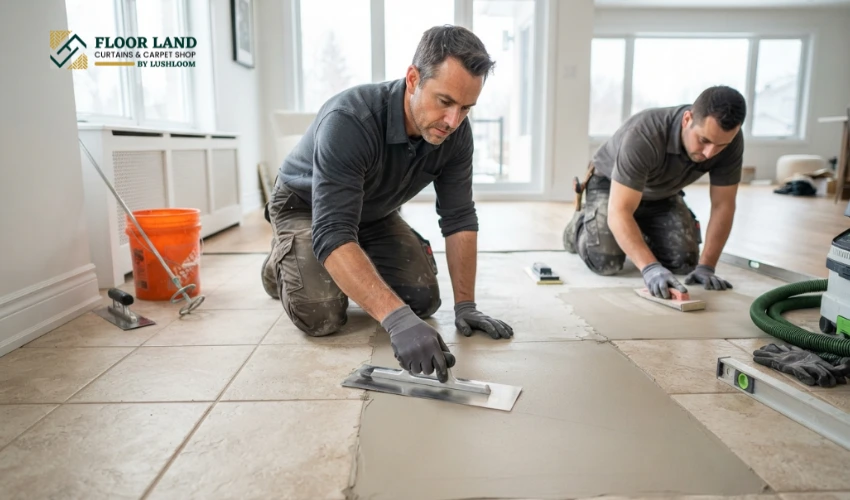
Cleaning floor tile grout is a crucial step that DIYers skip most often, and the one that causes “ghost lines” to appear in the new floor months later. Standard 1/16 to 1/8 in (2–3 mm) grout joints under a 3/16 in (5 mm) rigid plank are fine. Wide rustic joints, or joints where grout has worn low, need a skim coat: trowel a thin layer of floor-patching or self-leveling compound across the joints, let it cure, then sand down any ridges.
3. Level Dips and Humps
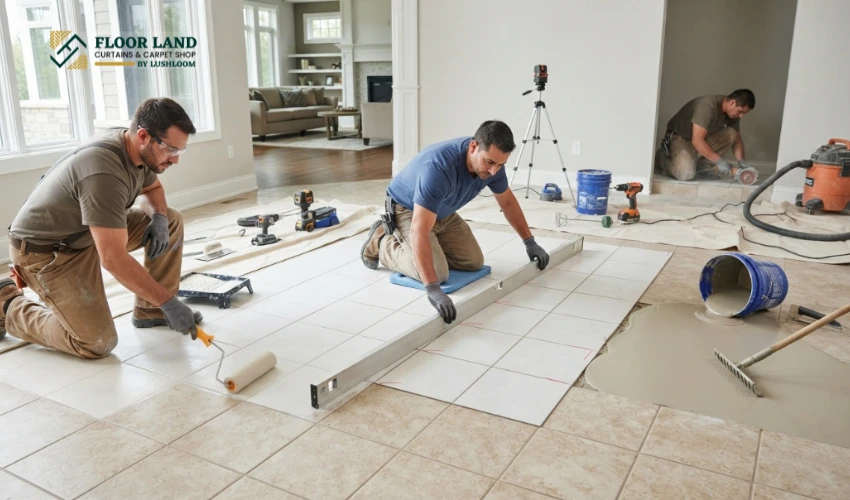
Mark low spots found with your straightedge, prime the tile with a suitable primer (essential: leveling compound will not bond to glazed tile without it), and pour self-leveling compound to bring dips within tolerance (3/16 in over 10 ft). High spots on tile are harder; grind them with a diamond pad or, if severe, remove and re-lay that section.
4. Clean Thoroughly
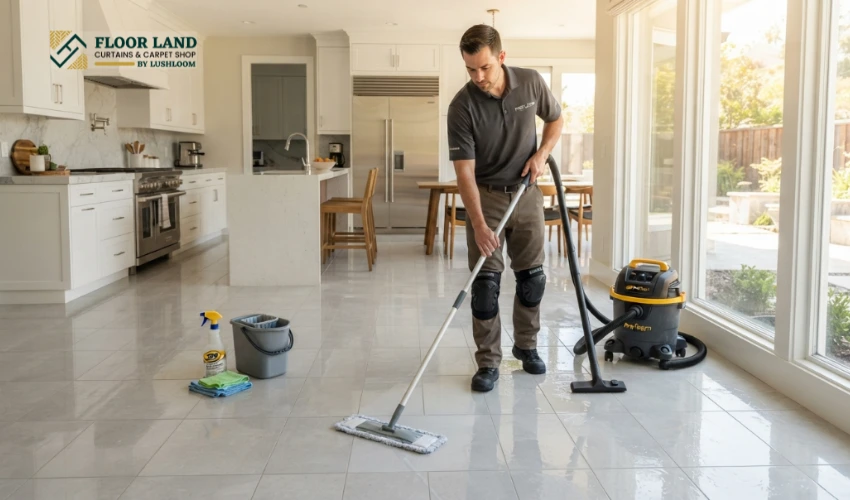
Degrease with a suitable cleaner; kitchens, in particular, carry an invisible oil film. Rinse with clean water and let the floor dry completely. Any dust left behind ends up as grit crunching under a floating floor.
5. Manage the Height Change
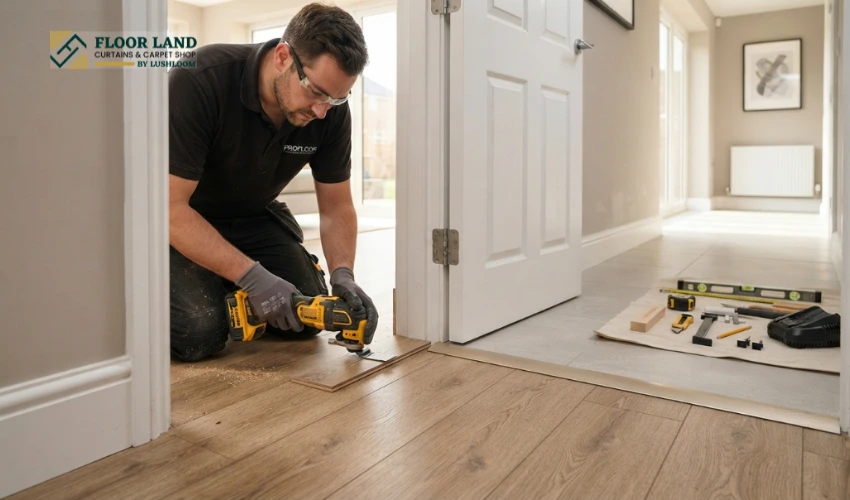
Undercut door architraves with a hand saw or oscillating tool using an offcut of the new plank as a height guide, so the vinyl slides underneath for a clean finish. Check that doors still swing; most can be trimmed a few millimeters if not. Plan transition strips where the new floor meets rooms you are not covering.
Tools and Materials You Will Need
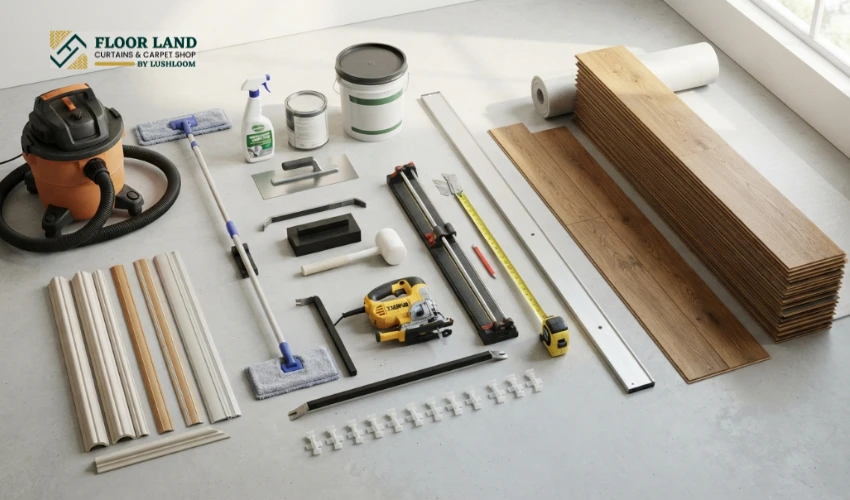
Here are some tools and materials required for installing the vinyl floors:
- Rigid-core vinyl planks (add 8–10% extra for cuts and waste)
- Underlayment (only if your planks do not have an attached pad and the manufacturer requires it; max thickness per spec is usually 1/16 in over tile)
- Tape measure, pencil, and a 6 to 10 ft straightedge or long spirit level
- Utility knife and/or a vinyl plank cutter (or jigsaw for detailed cuts)
- Rubber mallet, tapping block, and pull bar for locking planks
- 1/4 to 3/8 in (8–10 mm) expansion spacers
- Floor patching / self-leveling compound and primer (if prep requires)
- Degreasing cleaner, mop, and vacuum
- Transition strips and quarter-round or shoe molding as needed
Step-by-Step: Installing Click-Lock Vinyl Over Tile
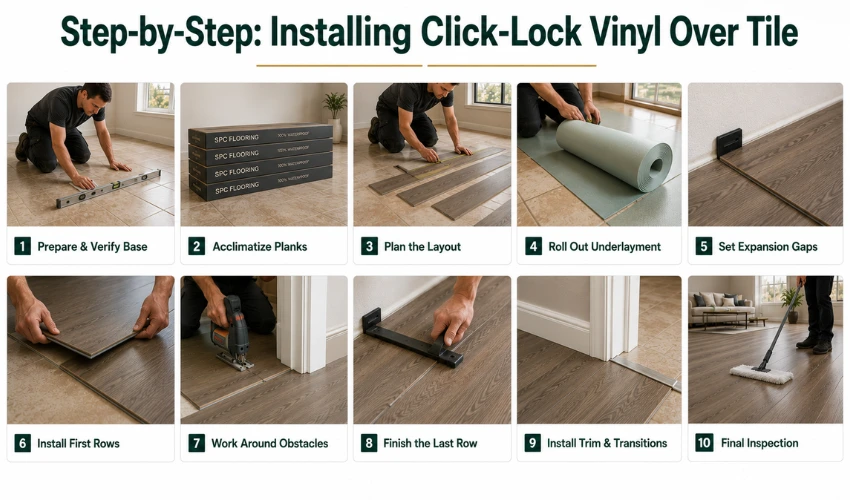
This walkthrough covers a floating rigid-core installation. The method is recommended for tile overlays. Always follow your specific product’s instructions where they differ.
- Prepare and verify the base. Confirm the tile passes every check in the assessment table above and complete all preparation.
- Acclimatize the planks. Stack boxes flat in the room for 48 hours at normal living temperature.
- Plan the layout. Measure the room and plan so the last row is at least 2 inches (50 mm) wide, and plank end joints are staggered by 8 to 12 inches (20–30 cm). Start along the longest, straightest wall, typically laying planks parallel to the main light source or longest line of sight.
- Roll out underlayment. Only if required by the manufacturer. Many rigid planks have attached pads, and adding another layer voids the warranty and makes joints flex.
- Set expansion gaps. Place 1/4 to 3/8 in (8–10 mm) spacers against the wall. The gap allows the floor to expand and contract with temperature changes. This is critical in rooms that receive direct sunlight through large windows.
- Lay the first rows. Click each plank into the previous one at an angle, then fold down, tapping gently with the block to close the seams. Cut the last plank in each row and use the offcut to start the next row if it is long enough.
- Work around obstacles. Trace and cut around door frames, pipes, and corners. Slide planks under the undercut architraves for a seamless look.
- Finish the last row. Use the pull bar for the final row against the wall. Remove all spacers.
- Trim and transitions. Reinstall skirting or fit scotia beading to cover the expansion gap, fixed to the wall, never through the floor. Fit transition strips at doorways and where floor heights change.
- Final check. Vacuum, damp-mop, and walk the whole floor listening for movement or hollow spots. Addressing anything now, while lifting a few planks is still easy.
Glue-Down Over Tile: What Changes
Glue-down vinyl gives the lowest floor height and the most solid feel, but tile makes it harder: glazed surfaces resist adhesive. The tile must be abraded or primed, and most manufacturers require a full skim coat of leveling. By the time you have paid for that prep, the cost advantage over removing the tile shrinks considerably. Choose glue-down over tile only when height is critical, and have it done professionally.
Common Mistakes to Avoid While Installing the Vinyl Floors Over Tiles
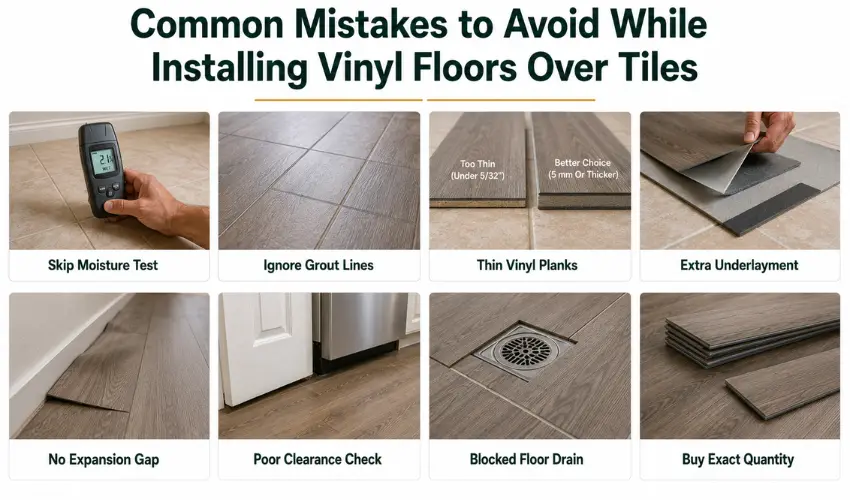
Check the mistakes listed below for installing the vinyl floors over the tiles:
- Skipping the moisture test. The single most expensive mistake. Trapped moisture has no escape route under vinyl.
- Ignoring grout lines because “the plank feels rigid.” Telegraphing is slow; lines appear after months of foot traffic compressing the plank into the joints.
- Choosing planks that are too thin. Planks under 5/32 in (4 mm) thick over tile invite telegraphing issues. A 3/16 in (5 mm) or thicker rigid core is the safe zone.
- Doubling up underlayment. Adding a foam layer under planks with attached pads creates a bouncy floor, fails click joints, and voids the warranty.
- No expansion gap, or beading nailed through the floor. A floating floor that cannot move will buckle. In hot climates with big day-night temperature swings, this happens fast.
- Not checking door and appliance clearance until after installation. Discovering the dishwasher no longer slides out is a bad day.
- Installing over a floor drain or blocking access panels. Common in bathrooms and kitchens. Never cover floor drains, water shut-offs, or inspection hatches.
- Buying exactly the measured amount. Always add 8–10% for cuts, mistakes, and future repairs from the same batch (dye lots vary).
How Vinyl Over Tile Performs: Moisture, Durability, Comfort, Longevity
Vinyl floors, whether tiles, planks, or sheet, behave very differently in moisture, durability, comfort, and longevity:
1. Moisture
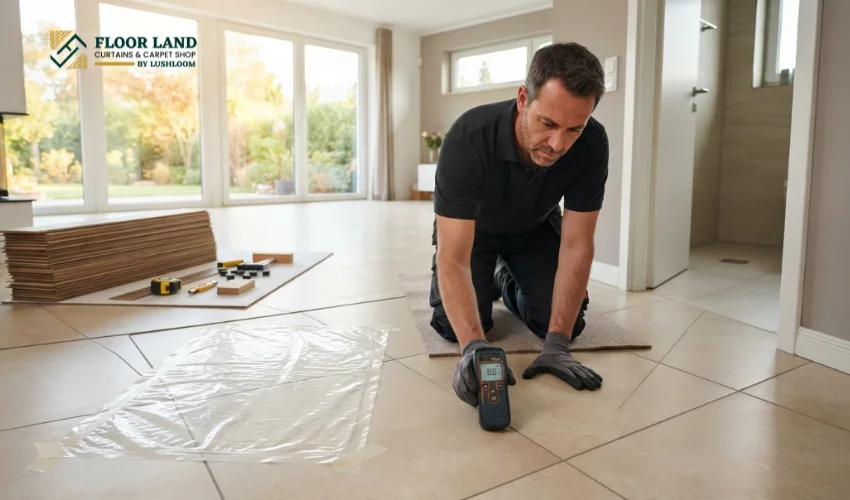
Quality SPC vinyl is fully waterproof from above; spills, mopping, and humidity do not harm it. The risk is moisture from below. Tile on a dry concrete slab is a low-risk base; tile over a leak is a disaster waiting. This is why the moisture test is non-negotiable. In bathrooms, we generally advise against covering the wet-area tile itself; the waterproofing system falls to the drain, and floor drain must stay functional.
2. Durability

A hard, stable base actually helps vinyl last. Tile bonded to concrete gives rigid planks continuous support, so click joints experience less stress than on a slightly flexible wood subfloor. Expect a quality 12 mil to 20 mil wear layer to handle residential traffic for 10 to 20 years. Choose a 20 mil (0.5 mm) or higher wear layer for entryways, kitchens, and homes with pets.
3. Comfort and Sound

This is where overlays surprise people. Vinyl with an attached acoustic pad noticeably softens footfall, cuts the echo that hard tile creates in AC-cooled rooms, and feels warmer to bare feet.
4. Longevity

A properly prepared overlay lasts as long as the same vinyl on any other approved subfloor: 15–25 years for quality rigid core. Failures almost always trace back to preparation, moisture, hollow tiles, or grout telegraphing, not to the overlay concept itself.
Maintenance After Installation
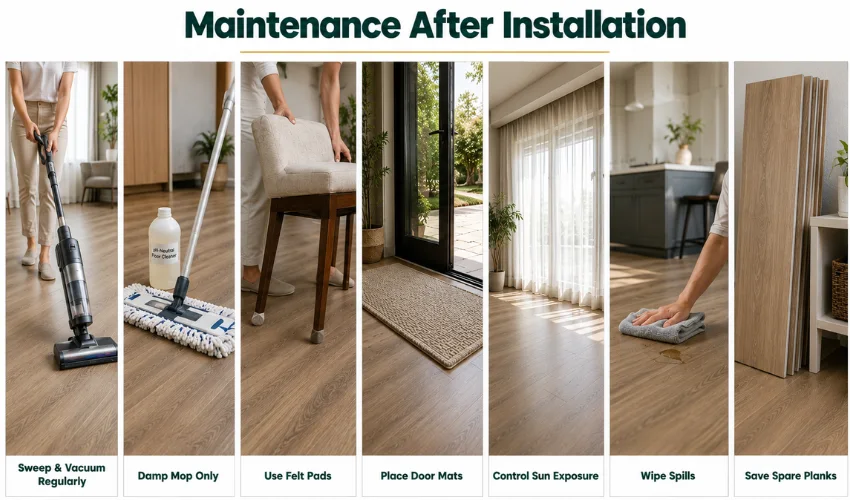
To improve the performance and lifespan, you must know how to clean vinyl plank flooring. Take a look at some maintenance tips below:
- Sweep or vacuum (hard-floor setting, no beater bar) regularly to remove grit.
- Damp-mop with a pH-neutral floor cleaner. Avoid steam mops, wax, polish, and abrasive powders; all can damage the wear layer or void warranties.
- Use felt pads under furniture legs and lift, don’t drag, heavy items.
- Place walk-off mats at exterior doors; avoid rubber-backed mats, which can stain vinyl.
- Use curtains or blinds on rooms with intense direct sun to limit heat build-up and fading over the years.
- Wipe up spills when convenient. Waterproof means no panic, but standing liquid can still creep to the edges and under the skirting.
- Keep a few spare planks from your original batch for future repairs; a damaged click-lock plank can be swapped without redoing the floor.
Final Thoughts
For most homeowners with sound tile floors, yes, install over the tile. You keep an exceptionally stable base, skip the cost and chaos of demolition, gain a warmer and quieter floor, and preserve the option to reverse it all later.
The exceptions are just as clear. Remove the tile, or fix the underlying issue first, when the floor is widely loose or hollow, cracked in patterns that suggest slab movement, affected by moisture, or when a few extra millimeters of height genuinely will not fit your doors and appliances.
Whichever route you take, the formula for success never changes: honest assessment, thorough preparation, a rigid-core product of 5 mm or more, and installation that respects expansion gaps and the manufacturer’s instructions.
Frequently Asked Questions
Can you put vinyl flooring directly over ceramic or porcelain tile?
Yes. Most vinyl manufacturers approve installation over ceramic and porcelain tile as long as the tile is firmly bonded, flat (typically within 3/16 inch over 10 feet / 5 mm over 3 m), clean, and dry. Rigid-core click-lock vinyl of 3/16 in (5 mm) or thicker is the most reliable option for this application.
Will grout lines show through vinyl plank flooring?
They can, over time, if the joints are wide or deep and the plank is thin. Standard 2–3 mm grout joints under a 5 mm+ rigid plank rarely telegraph. Joints wider than about 5–6 mm or deeper than 2–3 mm should be filled with a skim coat of leveling compound before installation.
Do I need underlayment when installing vinyl over tile?
Only if the manufacturer requires it. Most quality rigid-core planks come with an attached pad, and adding a second underlayment layer voids the warranty and destabilizes click joints. If your planks do not have a pad, use only the thin, dense underlayment specified by the manufacturer.
How much height does vinyl over tile add?
Typically 3/16 to 5/16 in (5–8 mm) for rigid-core planks with attached pads, plus any leveling compound used. Check clearance under doors, built-in appliances (like dishwashers), and cabinetry before buying, and plan transition strips where floor levels change.
Can you install vinyl over marble or natural stone floors?
Yes, the same rules apply: the stone must be well bonded, flat, and dry. One caution, covering quality marble rarely adds value. If the stone is in good condition, restoration and polishing is sometimes the better investment; if it is damaged or dated, a vinyl overlay works well.
Is it better to remove tile before installing vinyl?
Only when the tile fails the assessment: widespread looseness, structural cracking, moisture problems, or a height budget of zero. If the tile is sound, overlaying delivers the same finished result for 30–50% less cost and a fraction of the disruption.
Can I install vinyl over tile in a bathroom?
In dry zones of a bathroom, yes, with waterproof rigid vinyl. We advise against covering wet-area floors with floor drains: the drainage falls, and the waterproofing system needs to keep working, and trapping water under vinyl around a drain invites problems.
Does vinyl over tile feel hollow or sound different?
A properly prepared overlay with a quality attached pad feels solid and is quieter than the original tile. Hollow feel and clicking sounds are symptoms of skipped prep. Usually unfilled grout lines, dips outside tolerance, or doubled-up underlayment.
How long does vinyl flooring over tile last?
The same as vinyl on any approved subfloor: roughly 15–25 years for a quality rigid core with a 0.5 mm wear layer, given normal residential use and basic maintenance. The tile base, being rigid and stable, is a positive for longevity.
Can vinyl over tile be removed later?
Yes, this is one of its best features. A floating click-lock floor lifts out plank by plank, leaving the original tile untouched. Glue-down vinyl is removable too, but adhesive residue on the tile takes real effort to clean off.


